Recently in Photography

  Page 54 of 385 in Photography  

A Thousand Stories in One Photo

IMG_4453.jpg

Thousands of people gathered on a beautiful May morning in Santa Rosa to celebrate the graduation of friends and loved ones.

My job was to capture images that would tell the story of the day. My iPhone X was one of the many tools that I used that day. And this panorama of the crowd before the ceremony tells a thousand stories in image.

To create this 30-second video, I first captured the panorama with the iPhone. I then opened the image in Photos for macOS and created a slideshow with just the one shot. I chose the Ken Burns theme, slowed down the timing a bit, then exported the panorama as a movie.

You can also see a still photo version of it on Flickr. You might want to zoom in a bit to appreciate the individual behaviors of the audience.

Before the Graduation

Panoramas of crowds are seldom perfect because people are moving during exposure. But I think they are incredibly interesting despite their imperfections. And they tell a story that would be difficult to convey as a regular photo.

You can share your thoughts at the TDS Facebook page, where I'll post this story for discussion.

This is The Digital Story Podcast #689, May 28, 2019. Today's theme is "Gettin' Ready for Summer." I'm Derrick Story.

Opening Monologue

The fast approaching Summer season means more for photographers than just swapping our wardrobe in the closet. Our gear changes as well. And some of the items that I suggest might surprise you, even more than Uncle Bob's flamboyant Hawaiian shirt. So break out the sunblock and don your shades - it's time to get ready for long days and warm nights.

Gettin' Ready for Summer

What does Summer mean for me? Longer days, impossible mid-day lighting, more bike rides, travel, hiking, and outdoor events. Here are five items that you should get ready for this most active of all seasons.

IMG_1731-1525.jpg

  • Polarizers and ND Filters - Not only do we have to tone down reflections and deepen our blue skies, but there are times when I want to shoot at a wider aperture in bright lighting. These filters are a must-pack this time of year.
  • Fill Flash - I bet this one surprised you. But whether it's a backyard birthday party, graduation ceremony, or afternoon wedding reception, you're going to want a fill flash for those outdoor portraits. See my To Fill Flash or Not; That is the Question for more details. Also, my current favorite nimble fill flash is the Metz mecablitz 26 AF-2 Flash $129 for Sony, Nikon, Canon, Fuji, Olympus, Panasonic, Leica, and Pentax.
  • Collapsable Diffusers and Reflectors - I had to use a diffuser the other day for a 1pm portrait assignment outside, and there's now way I could have pulled it off as quickly or beautifully without it. It's our best option to tame the sun when there's no shade to be found.
  • A Pocketable All-Weather Camera - I have the new Olympus Tough TG-6 camera on order for this travel season. There's now way I'm packing my PEN-F in my board shorts. A quality, tough camera is ready when you are, regardless of the environment.
  • Shades, Hat, Sunblock, and Water - You have to protect yourself and be comfortable if want those creative juices to flow. Find yourself a water bottle that works with your kit and keep it filled. Make sure sunblock is in your bag at all times. And keep that head protected. Take care of your body and the wonderful images will follow.

If you have additional tips, please share them on our Facebook page where I'll post the podcast announcement.

Show Off Your Gallery on Your Smartphone

Most of us spend more time on our smartphones than we do on our computers. So it only makes sense to have your Portfoliobox gallery just a tap away.

iPhone users can accomplish this by visiting their Portfoliobox site in the Safari browser. Then tap on the Share icon at the bottom of the interface. Choose "Add to Home Screen" in the options presented. Now your gallery will have its own "tap and launch" position on your iPhone's home screen.

Android users have essentially the same process. Launch Google Chrome browser app. (Just tap on the Google Chrome icon on your home screen or app drawer.) Go to the website you want to save. Enter the website in the search/text bar and press "Enter." Tap on the Menu button. Tap "Add to Home Screen.

Portfoliobox sites are designed to look great on your smartphones. Take a look, and I think you'll like what you see.

Present your best self online and on your phone with a Portfoliobox site. To create your own Portfoliobox site, click on the tile or use this link to get started. If you upgrade to a Pro site, you'll save 20 percent off the $83 annual price.

160 Camera-friendly Canadian airport cuts holes in perimeter fence for aviation photographers

You can read the entire article here.

Québec City Jean Lesage International Airport, often shortened to Jean Lesage International Airport, has made camera holes in a range of locations around its perimeter fence to allow photographers an unhindered view of planes taking off, landing and moving along its runways and taxi areas.

The airport has propelled itself to the number one spot for aviation photographers with the project. Metal frames surround the holes to prevent wire scratching lenses and accompanying signs to clarify the area is reserved for photographers.

The airport got together with local plane-spotting group YQB Aviation to identify the best angles for photographers and then created a total of 10 sites all around the airport that provide views of exactly what photographers want to shoot, seen in the image below.

Do You Have a Film Camera that Needs a Good Home?

Over the last year, I've received donations from TDS members who have film cameras that need a good home. What I do is inspect the items, repair and clean as I can, then list them in TheFilmCameraShop where I can find a good home for them. If you're interested in donating, please use the Contact Form on TheNimblePhotographer site. And thanks for you consideration!

Updates and Such

Inner Circle Members: A big thanks to those who support our podcast and our efforts!

B&H and Amazon tiles on www.thedigitalstory. If you click on them first, you're helping to support this podcast. And speaking of supporting this show, and big thanks to our Patreon Inner Circle members:

And finally, be sure to visit our friends at Red River Paper for all of your inkjet supply needs.

See you next week!

More Ways to Participate

Want to share photos and talk with other members in our virtual camera club? Check out our Flickr Public Group. And from those images, I choose the TDS Member Photo of the Day.

Podcast Sponsors

Red River Paper - Keep up with the world of inkjet printing, and win free paper, by liking Red River Paper on Facebook.

Portfoliobox - Your PortfolioBox site is the best way to show off your best images.

The Nimbleosity Report

Do you want to keep up with the best content from The Digital Story and The Nimble Photographer? Sign up for The Nimbleosity Report, and receive highlights twice-a-month in a single page newsletter. Be a part of our community!

Want to Comment on this Post?

You can share your thoughts at the TDS Facebook page, where I'll post this story for discussion.
It's graduation season, and I've covered a ton of ceremonies as part of my work with Santa Rosa Junior College. Lighting conditions were all over the map, and I had to prepare for anything. So I kept a flash mounted on the camera, just in case.

1024-Cont-Ed-D-Story.jpg Fill flash used in strong backlighting. Photo by Derrick Story.

One of the times that I turn the flash on is when I'm in a strong backlighting situation. I could just expose for the face without a flash, but then the entire background blows out. And for many of these images, the location is important as well. If you graduate from SRJC, you probably want to see the setting as well as the subject. Fill flash is a quick solution to that challenge. You can balance both elements in a single frame. (Plus it allows you to take advantage of rim lighting for the hair.)

On the edges of the day, flash also makes the colors more vibrant. That pop of light really highlights the detail as well.

IMGP8325-Cont-Ed-Flash.jpg Colorful caps and happy grads with fill flash.

NoFlash-Cont-Ed-D-Story.jpg Existing light only, no flash for this version. Photos by Derrick Story.

Sometimes, I will shoot a quick portrait both ways - with and without flash - then choose my favorite later in post. I would love to tell you that I always choose one version over the other. But that just isn't the case. It could go either way.

The one thing that I do know is that some shots are saved by fill flash. And those are the times that I'm really happy to have that option.

Many photographers don't consider fill at all. I think, like many tools for the working pro or serious amateur, that supplemental lighting is an option to consider when covering events. And my advice is to learn and be ready to tap that technique if needed. It just takes one wonderful image to make the effort worthwhile.

You can share your thoughts at the TDS Facebook page, where I'll post this story for discussion.

Anyone who has owned an Olympus Tough camera knows what a technological marvel they are. But the latest TG-6 refines the feature set even further.

ToughTG-6-Red_Water.jpg

In addition to what's inside the camera (I'll get back to that in a minute), there's plenty going on outside the device as well. The TG-6 has actually become a system camera with a useful set of accessories.

TG-6_accessory_shadow.jpg

With all of these new goodies to work with, however, you might miss some of the less obvious gems under the hood. Here are five of my favorite features on the Olympus Tough TG-6 camera.

Focus Stacking Mode - Focus stacking mode captures multiple shots while automatically shifting the focus from the foreground to the background. Only the areas in focus are extracted and merged, resulting in a full pixel photo with a deep depth of focus. This is particularly effective for macro shooting when shots have a shallow depth of field and a narrow range of focus. Between 3 and 10 shots can be set on the Tough TG-6, so users can fine tune settings for different subjects and precision in their finished image.

Pro Capture Mode - Never miss a shot. Pro Capture Mode shoots sequentially at 10 frames-per-second (fps) for 0.5 seconds before the shutter button is pressed fully, making it perfect for capturing shots where timing may be difficult, such as an insect in flight or a drop of liquid splashing.

Microscope Mode - With Microscope Mode, users can capture high-quality, detailed images of tiny subjects that are difficult to see with the naked eye, such as the antennae and feet of insects, the veins of a leaf on a tree, snowflakes, etc. A maximum shooting magnification of 7X is possible when the optical zoom is set to the telephoto end and the subject is 1 cm away from the front of the lens, delivering magnified shots similar to using a microscope.

TG-6_RED_Top-web.jpg

Field Sensor System - The Olympus Tough TG-6 is equipped with a Field Sensor System, using tracking information obtained from various sensors in the camera to record data, including the GPS, manometer, temperature sensor, and compass. Data can then be synced to photos and videos and viewed in the free Olympus Image Track (OI.Track) smartphone app. Simply press the INFO button, even when the camera is off, to display data.

TruePic VIII Image Processor - Found in the award-winning Olympus OM-D E-M1X professional camera, this processing pipeline is featured on this model as well, reducing noise levels and improving resolution in low contrast areas. RAW data can be recorded and then edited in post-production using the Olympus Workspace image editing software (or your favorite image processor).

TG-6_RED_Top-back.jpg

You can preorder the Olympus Tough TG-6 camera now for $449. It will ship in June, just in time for your next summer adventure.

You can share your thoughts at the TDS Facebook page, where I'll post this story for discussion.

I can honestly say that I've never seen anything like the Travel Tripod by Peak Design.

e7d56990a8748ba190a5d95f7c6a7957_original.jpg

It doesn't have any protruding parts, it's slim, it's strong, and you have both aluminum and carbon fiber options. It's Arca Swiss compatible and has an innovative head with a single ring for adjustment. Even though it extends to 60 inches, it weighs as little as 2.81 pounds (carbon fiber model). And it accommodates DSLRs, mirrorless, and smartphones.

c6f65974095ab637b1a22a1acc34b79f_original.jpg

Their Kickstarter campaign is off to a roaring start, not surprisingly. You might want to go over there and take a look at all the details. This is most likely the next tripod that I will be packing for nimble photography.

You can share your thoughts at the TDS Facebook page, where I'll post this story for discussion.

This is The Digital Story Podcast #688, May 21, 2019. Today's theme is "5 Things that We Can Learn from Warhol's Photography." I'm Derrick Story.

Opening Monologue

Last week I spent an afternoon with Andy Warhol at SF MOMA. As I looked at his paintings and photographs, I was intrigued at how his work could help my own photography. After studying my images from the day, and thinking about his, I came up with these 5 tips to infuse more creativity into our work. I hope you enjoy the show.

5 Things that We Can Learn from Warhol's Photography

1024-MOMA-Warhol-XF10-web.jpg "Ethel Scull 36 Times" by Andy Warhol. SF MOMA.

My five tips for increasing creativity based on Andy Warhol's images.

  • Art is What You Can Get Away With - This Warhol saying applies wonderfully to photography. Don't limit your work. And especially now in the digital age when experimentation is so easy.
  • The Photograph Doesn't Need to Be the End Product - Some of my favorite Warhol paintings started out as Polaroid prints, but ended up as beautiful mixed-media images.
  • Repetition Can Be Interesting - At first a wall of Campbell's soup cans seems to be a single image repeated many times. But the slight variation pulls the viewer in for a closer look. In his work, "Ethel Scull 36 Times," Warhol created a vibrant, energetic series based on multiple poses of the same subject.
  • Be Bold with Color - The images themselves are interesting for sure. But when bold color is added to the frames, they become vibrant works of art.
  • Take an Instagram Approach to Your Portraits - Looking at a wall of tightly cropped, square portraits reminded me of some of my most popular Instagram images that had great presence and were easy to digest visually.

If you want to see the show for yourself, it's playing at SF MOMA. I'd be curious as to what your takeaways would be.

All about image quality, size and resolution

You can read the entire article here.

All images that are larger than 1920 pixels, in width or height, before upload will be resized to 1920 pixels during upload. To avoid quality loss, we recommend that you upload images that are 1920 pixels or smaller. Note that images that are smaller than 1920 pixels, will not be resized.

Dpi (dots per inch) only matters when it comes to printing or scanning. Monitors don't have dots but pixels, so dpi value has no effect on the quality of an image viewed on a screen or uploaded online.

Before uploading your images to your Portfoliobox site, make sure their color profile is sRGB. If you are using Photoshop go to File > Save for Web. This will make sure that the images will be optimized for web browsers.

Present your best self online with a Portfoliobox site. To create your own Portfoliobox site, click on the tile or use this link to get started. If you upgrade to a Pro site, you'll save 20 percent off the $83 annual price.

2019 Buying Guide: Best instant cameras

You can read the entire article here.

What is it we love so much about instant cameras? Is it the nostalgia-factor? Or the sensation of being able to hold/share a physical print? Maybe it's the excitement that comes from watching an image slowly appear before your eyes. Surely for some, the lo-fi image quality is refreshing in an increasingly high-resolution, digital world.

Favorite: The Fujifilm Instax Mini 70 strikes the perfect balance of price to features to make it our top overall pick - plus it makes use of the most affordable instant format. Available in six colors, the Mini 70 is among the most compact and lightweight instant cameras on the market, and also among the prettiest (in our opinion). The CR2 batteries it uses can be a little annoying to find, but battery life overall is great. And unlike rechargeable instants, the Mini 70 should still have some juice in it even if left on a shelf for several months.

But most importantly, it's really easy to use. Users simply select their shooting mode - normal, macro, selfie, landscape, self timer or high key - and the camera does the rest. And unlike some of its competitors, focus is motor-driven (three positions) and set by the camera when your mode is selected. Exposure is fully automatic, though there is a +2/3rd EV option (that's the high key mode). Overall, the Mini 70 does a good job balancing flash with ambient light thanks to a variable shutter.

TDS Workshops Update

Humboldt Redwoods Workshop Update

Our grand finale of the season will be on Sept. 18-20 in one of the most beautiful areas on the planet. Our headquarters will be in Fortuna, CA - an easy drive from the Eureka Airport only 25 minutes away.

We're located on the Eel River, and situated perfectly to explore the Redwoods just south of us. This will be an excellent event to cool off, slow down, and get some great images. Plus, you'll be able to spend some quality time with your fellow virtual camera club members.

We still have a couple openings on the reserve list. You can secure your seat by visiting www.thenimblephotographer.com, and place a fully refundable deposit for the event.

Updates and Such

Inner Circle Members: A big thanks to those who support our podcast and our efforts!

B&H and Amazon tiles on www.thedigitalstory. If you click on them first, you're helping to support this podcast. And speaking of supporting this show, and big thanks to our Patreon Inner Circle members:

And finally, be sure to visit our friends at Red River Paper for all of your inkjet supply needs.

See you next week!

More Ways to Participate

Want to share photos and talk with other members in our virtual camera club? Check out our Flickr Public Group. And from those images, I choose the TDS Member Photo of the Day.

Podcast Sponsors

Red River Paper - Keep up with the world of inkjet printing, and win free paper, by liking Red River Paper on Facebook.

Portfoliobox - Your PortfolioBox site is the best way to show off your best images.

The Nimbleosity Report

Do you want to keep up with the best content from The Digital Story and The Nimble Photographer? Sign up for The Nimbleosity Report, and receive highlights twice-a-month in a single page newsletter. Be a part of our community!

Want to Comment on this Post?

You can share your thoughts at the TDS Facebook page, where I'll post this story for discussion.

I played hooky from work on Friday afternoon and headed down to The City to see the opening of Andy Warhol - From A to B and Back Again at SF MOMA. I had my iPhone X in one pocket and the Fujifilm XF10 in the other. On the way home, my brother-in-law asked, "Why both?"

SF MOMA Looking Up SF MOMA Skylight and Bridge - Fujifilm XF10. Photo by Derrick Story.

I probably gave him a longer answer than he was looking for, but if you were to boil it down to its bones, there would be these five reasons.

  • 24 MP vs 12 MP - The file size from the XF10 is 6000 x 4000 pixels compared to 4032 x 3024 of my iPhone X. That is more image information to play with in post.
  • APS-C Sensor vs 1/2.5"-type - I'm not one to get hung up on sensor size, but this is quite a difference, even with computational photography factored in.
  • Interchangeable Batteries - I keep an extra battery in my pocket, which allows me to shoot as much as I want, as long as I want, without concern about running out of juice. My phone needs to stay charged for other functions including calls, texts, navigation, and (of course) Starbucks purchases.
  • More Manageable Memory - SD cards have high capacity, excellent speed, and are very compact. I can swap out cards quickly. This allows me to experiment with crazy HD movies, wild burst modes, 4K capture, and other storage intense techniques without worry of filling up my phone or my iCloud account.
  • It's a Camera! - I like the form factor of a camera. It's more pleasurable to hold and operate during capture. Plus, the physical buttons, rotating dials, and leather wrist strap all inspire confidence while working. I've yet to find an iOS camera app that's as satisfying to use as my XF10.

IMG_3190.jpg

I bought the Fujifilm XF10 for $449, and have already earned my investment back (and that's not even factoring in the enjoyment aspect). The Ricoh GR III will cost you more, but you also get built-in image stabilization and a flash hot shoe with TTL contacts.

Both of these cameras provide a shooting experience that I don't experience with my iPhone (as much as I love it). Maybe I could have saved my brother-in-law all of this technical detail by responding, "Photographers like real cameras."

Because, to tell you the truth, that's the real bottom line.

You can share your thoughts at the TDS Facebook page, where I'll post this story for discussion.

Photographers who have archived Aperture libraries want to make sure they have access to that content as they move forward beyond macOS Mojave. Apple has announced that OS 10.14 is the last version that will support the venerable photo management app. Now is a great time to start working on your plan to ensure easy access those older pictures.

aperture-3pt6.png Aperture 3.6 running on a 2009 white MacBook

The Path of Least Resistance - Migrate to Photos

Whether you're a fan of macOS Photos or not, the easiest way to protect your Aperture content is to migrate those libraries to Photos. The original Aperture container remains intact, and a new Photos library is created from it. The only real downside is that you've doubled the amount of required space on your hard drive.

There are a couple ways to do this, but I recommend holding down the Option key while launching Photos. It will present a dialog box showing all available Aperture and Photos libraries. Click on the Aperture library that you want to migrate, then click on Choose Library.

Photos will spend a bit of time "preparing the library," then present all of the content in the Photos app. You now have each access to all of your shots, and most of your Aperture work is retained as well.

If you want simple, this is a great way to go.

Repurpose an Old Mac

If you don't want to double your storage requirement using the Photos option, then you could repurpose an old Mac that won't require upgrading beyond Mojave. I tested this option with a 2009 white MacBook that my boys once used.

The first order of business was to max out the RAM. The MacBook had a measly 2 GBs installed. I spent $20 and doubled it to 4 GBs. I would have put more in, but the MacBook can only handle that amount.

I then upgraded the software to Mac OS X 10.11.6 (El Capitan). That version can run macOS Photos and Aperture 3.6. It's not the speediest configuration in the world, but it does get the job done.

BTW: If you want to access older versions of the Mac operating system or apps such as Aperture, all you have to do is log into iCloud on any Mac, then browse the Purchases tab in the Mac App Store. I was able to download and install El Capitan and Aperture using this approach.

I then plugged my Drobo drive with archived Aperture libraries into the white MacBook. I could open libraries directly from the drive, but I think it's better to copy those containers on to the MacBook, then open them. Performance will be better if everything is on an internal hard drive. Remember, we're dealing with older technology here.

Speaking of which, if I wanted to spend another $75, I could upgrade the internal drive to a SSD. That would further improve the sluggish performance of the laptop. It's not that big of deal to me at the moment, so I'll save the money. But it's a nice option to have. (By now, you've probably figured out that the MacBook is easy to crack in to. Just remove 8 screws on the bottom of the laptop. Much easier than today's models.)

Note: A side benefit to this project is that the rejuvenated MacBook is also a handy print server. My Canon Pro-100 gets along great with it. So I can set up a handful of jobs and let it chug away while I work on other projects on other computers.

The Bottom Line

Either of these options should get the job done for you, preserving both your Aperture libraries and your sanity in the process.

My advice is to start on this project now. That way you can chip away at it as time permits. So when you do need to retrieve an image from 2012, you can do so reasonably with minimal hassle.

You may be wondering why I didn't present a third option: migrating your Aperture library to Lightroom or Capture One Pro. Quite simply, it's too much work with uneven results. I find these two approaches far more efficient... and sane.

For Old Time's Sake...

More Aperture Tips and Techniques

To learn more about portrait retouching in Aperture, take a look at Portrait Retouching with Aperture. You may want to check out my other Aperture titles, including Aperture 3.3 Essential Training (2012), Using iPhoto and Aperture Together, and the latest, Enhancing Product Photography with Aperture. Also, take a look at our Aperture 3 Learning Center. Tons of free content about how to get the most out of Aperture.

You can share your thoughts at the TDS Facebook page, where I'll post this story for discussion.

This is The Digital Story Podcast #687, May 14, 2019. Today's theme is "The Physiology of Active Photography." I'm Derrick Story.

Opening Monologue

Most of us agree that photography as a hobby feeds our creative soul. But it can also be good for the body. A regular diet of planned photo shoots can have a positive impact on our physical well being as well. In today's podcast I'll share with you five of the health benefits that I've enjoyed since embracing the photo exercise plan. I hope you enjoy the show.

The Physiology of Active Photography

active-photography-1024.jpg

A common pushback that I hear from fellow enthusiasts is that they don't have enough time to pursue their hobby. If you find yourself citing lack of time to engage in activities that are good for you and will provide you with more physical energy and clearer thinking, then you might want to hit the pause button for a minute and re-evaluate your choices.

On average, I work 10 hours a day Monday through Thursday, and 4 hours on Saturday. The only way that I can maintain that schedule and remain productive is by incorporating excise into my week.

Opportunities include early morning before work, lunch breaks, afternoon breaks, and weekends. If you don't take regular breaks, then that's an issue unto itself. To be honest; it's not healthy to skip breaks, especially at lunch time.

Mixing photography into these activities supercharges the health benefits. The chance of capturing a new image that you can share on social is motivating. Actually taking a great picture is exhilarating. And having raw material to work with on your computer feeds creativity.

My recommendation is that you venture out for a walk or a bike ride with your camera at least 3 times a week. According to my math, you have 21 opportunities a week to do this: 7 early mornings, 7 lunch breaks, and 7 afternoon breaks/after work.

And if you embrace this, here are some of the health benefits to look forward to.

  • Sleeping Heart Rate Dip - Research shows that a measurable dip in heart rate during sleep is excellent for your cardiovascular health. Plus, you'll tend to feel more rested in the morning. In my case, burning an extra 225 calories from activity drives my heart rate down 7 beats per minute. On nights when I exercise, my sleeping heart rate is about 52 bpm. When I don't, it tends to by close to 60 or over.
  • Better Regularity - By adding water to my photo walks and bike rides has improved my bathroom breaks. I don't need to articulate how much better this makes one feel. You know what I'm talking about.
  • Stronger Legs - When I was a photographer/writer in the healthcare business, a common mantra was that a healthy 60 starts at 40. Our core strength and sturdy legs mean a higher quality of life as we age. If you want to be mobile later, you have to be active now.
  • Emotional Resilience - I have days like everyone else when the world is intent on knocking me down a peg. Staying at my desk and stewing about it does not produce a better result. Taking a break and exercising does. It is the ultimate reset button.
  • We are More than our Job - Exercising plus photography demonstrates to ourselves and our world that we are more than our job. We are creative, clear thinking, healthy individuals. And that is far more appealing than exhausted, downtrodden, and depressed.

About how many pictures do I take on my photo exercises? Generally 2-3 per 30 minute session. Not a ton, but they sure add up over time. And many of those shots are personal favorites.

How to create a start page for your website that attracts attention

You can read the entire article here.

There are different rules when it comes to designing a good start page. Rule of Thirds and Golden Ratio, to name a couple. Rule of Thirds is the easiest to understand and the simplest to apply. Simply take a screenshot of your start page above the fold, use this easy to use tool to apply a 3 x 3 grid on the screenshot. Instantly you will see if you need to rework your start page or not. A final suggestion, if you are going to rework your start page, pay attention to the change of your bounce rate in Google Analytics, this will help you understand if your new design is working or not.

Present your best self online with a Portfoliobox site. To create your own Portfoliobox site, click on the tile or use this link to get started. If you upgrade to a Pro site, you'll save 20 percent off the $83 annual price.

MFT Sensor and 11"x14" Paper - Nearly Perfect Fit

I heard from Drew at Red River Paper, and he forwarded a comment that he thought I would be interested in: Full size images from Micro Four Thirds sensors are almost a perfect fit on 11" x 14" paper. I did a little testing, and sure enough if he wasn't correct about that.

I then ask Drew about their inventory of 11" x 14" paper, and he said that they have a wide variety of surfaces. You may want to check it out.

TDS Workshops Update

Humboldt Redwoods Workshop Update

Our grand finale of the season will be on Sept. 18-20 in one of the most beautiful areas on the planet. Our headquarters will be in Fortuna, CA - an easy drive from the Eureka Airport only 25 minutes away.

We're located on the Eel River, and situated perfectly to explore the Redwoods just south of us. This will be an excellent event to cool off, slow down, and get some great images. Plus, you'll be able to spend some quality time with your fellow virtual camera club members.

We still have a couple openings on the reserve list. You can secure your seat by visiting www.thenimblephotographer.com, and place a fully refundable deposit for the event.

Updates and Such

Inner Circle Members: A big thanks to those who support our podcast and our efforts!

B&H and Amazon tiles on www.thedigitalstory. If you click on them first, you're helping to support this podcast. And speaking of supporting this show, and big thanks to our Patreon Inner Circle members:

And finally, be sure to visit our friends at Red River Paper for all of your inkjet supply needs.

See you next week!

More Ways to Participate

Want to share photos and talk with other members in our virtual camera club? Check out our Flickr Public Group. And from those images, I choose the TDS Member Photo of the Day.

Podcast Sponsors

Red River Paper - Keep up with the world of inkjet printing, and win free paper, by liking Red River Paper on Facebook.

Portfoliobox - Your PortfolioBox site is the best way to show off your best images.

The Nimbleosity Report

Do you want to keep up with the best content from The Digital Story and The Nimble Photographer? Sign up for The Nimbleosity Report, and receive highlights twice-a-month in a single page newsletter. Be a part of our community!

Want to Comment on this Post?

You can share your thoughts at the TDS Facebook page, where I'll post this story for discussion.

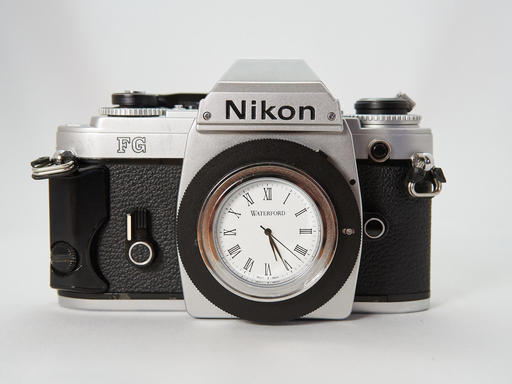
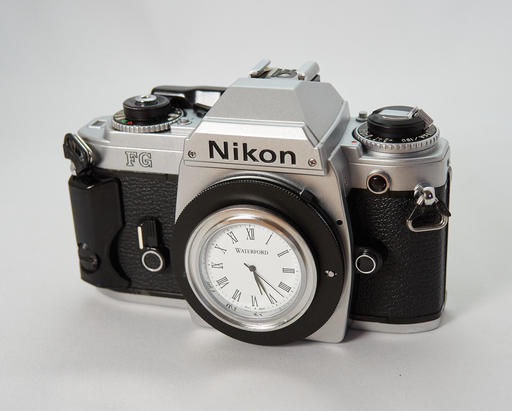
nikon-FA.jpg

The Nikon FA was introduced in 1983 and marketed as Nikon's most sophisticated techno-wonder. It was the first Nikon to incorporate multi-segmented metering. Twenty-five years later, Apple rolled out the iPhone X that utilizes computational photography with millions of lines of code executed with each tap of the shutter button. It is an incredible digital capture device.

When I work with analog, I also capture an iPhone image to use for my note taking. I thought you might be interested to see how things have evolved over the last 25 years. State of the art analog in the 1980s vs amazing 21st century tech.

Kitty Nikon FA Kitty looking out the window. Nikon FA, Nikkor 50mm f/1.8, Program mode, matrix metering, Fujicolor 200 film. Un-retouched. Photo by Derrick Story.

Kitty iPhone X Kitty looking out the window, iPhone X.

I like this shot of Sylvester looking out the screen door because it is a backlit scene. (You might not realize that looking at the iPhone image. More on that later.) The Nikon FA with its new-fangled metering system actually does a wonderful job of determining the exposure in program mode. Any shortcoming in dynamic range is due to the latitude of the film.

The iPhone, on the other hand, does a great job of balancing both the main subject and the brighter background. There is more shadow detail in the dark fur, and the highlights are much more recovered.

Now the question is, which shot is more pleasing to the eye? Well, that's an individual decision, isn't it?

Neon Sign Nikon FA Neon sign. Nikon FA, Nikkor 50mm f/1.8, Program mode, matrix metering, Fujicolor 200 film. Un-retouched. Photo by Derrick Story.

Neon Sign iPhone X Neon sign. iPhone X. Un-retouched.

When I look at the neon sign image, I'm amazed by the highlight recovery in the iPhone X version. The sky in the upper left corner and the reflection on the top of the umbrellas are perfectly exposed.

The analog Nikon shot definitely displays more contrast. And to be honest, is a more accurate representation of the actual lighting. The shadows are darker and the reflections are bright. That's more how things looked at that time of day.

And that's what I've noticed with film photography... I get a better sense for the lighting because it hasn't been clipped on both ends of the histogram. Do I love the wild dynamic range of computational photography? Of course! It's such a luxury.

But along the way I don't want to lose my ability to read the scene, and to understand what's happening with the lighting. Film photography helps me stay sharp that way.

My bottom line is that I like both sets of images. And I feel lucky to have the option to choose which way to go for any given subject. And I might add, that I think the Nikon with a consumer roll of color film held up quite well. Not bad for an old man.

You can share your thoughts at the TDS Facebook page, where I'll post this story for discussion.