Recently in Photography

  Page 343 of 386 in Photography  

dpc_116x180.jpg

The Digital Photography Companion is the culmination of two years work. To prepare this book, I spent hours working with photographers and aspiring photographers to find out exactly what they wanted. As a result, I settled on an 8.5" x 5.5" trim size that allows enough room for healthy-sized photographs, yet fits in the backpack, purse, camera bag, or jacket pocket.

The book is designed to help you make pictures that distinguish your work from others. By mastering the controls on your camera and learning a few basic techniques, you can create virtually any type of image you want. The book will be your companion for such an endeavor. And you can order it now, and receive it by early March.

I also wanted to create a companion site for the book, so we've launched the The Digital Photography Companion online. Here I will publish tips to augment the information in the book, and feature photos from TDS members who have used these techniques to create their own look. More on this once the Companion is published.

In the meantime, I will be adding content to the DPC page regularly. I hope you enjoy this new addition to The Digital Story and share it with your friends.

Event Calendar

Events! See the TDS Event Calendar for photography workshops, speaking engagements, and trade show appearances.


Technorati Tags: , ,

Remember the Pocket Tripod Too!

loris_diner.jpg

I constantly remind people to keep their compact cameras with them while on the go. That way if a great shot presets itself, they can grab it. But when going out for an evening stroll, take the portable tripod too!

Compact tripods, such as my favorite, Gorillapod by Joby ($22), enables me to use sign posts, newspaper machines, and just about anything else I can find standing still on the street, and use it for making long exposures. In the case of this image of Lori's Diner on Mason Street in San Francisco, I use the Gorillapod and a parking meter to make a 1/4 of a second exposure.

This technique will improve your street shooting at night, enabling you to capture sharp shots at low ISO settings (I used ISO 80 for this image on a Canon G9, and there is virtually no noise at all.) Then all you have to do is set your Drive mode to "self-timer," and the magical world of lights at night become your personal photo studio.

Photo by Derrick Story using a Canon G9 and Gorillapod.

Event Calendar

Events! See the TDS Event Calendar for photography workshops, speaking engagements, and trade show appearances.


Technorati Tags: , , , , ,

Raw is Still the Favorite Topic

book_passage_jan08_web.jpg

During Sunday night's panel discussion at Book Passage in Corte Madera, and then during the first day of the Aperture workshop at Macworld SF, Raw was still the most popular topic among attendees.

I imagine we're in for more Raw discussion at Wednesday's Apple Store event (in San Francisco) that features Mikkel Aaland, Harold Davis, Rick Smolan, and myself. (directions and details here.) The talk starts at 4:30 pm.

The crux of what many want to know is why they should shoot Raw, what are its advantages, and how best to process the files? I'm happy about the interest because I think Raw provides some nice options for photographers, including:

  • Ability to recover highlights and shadows better than with Jpegs.
  • Option to change white balance with no quality penalty.
  • More data to work with overall for high quality conversions.

I hope to keep the conversation going on Wednesday night at the Apple store.

Photo by Colleen Wheeler take with Canon 5D with a 50mm f-1.8 lens.

Event Calendar

Events! See the TDS Event Calendar for photography workshops, speaking engagements, and trade show appearances.


Technorati Tags: , , ,

sharpen_mask.jpg

One of the problems with sharpening in Adobe Camera Raw and Lightroom could be that you're not controlling what gets sharpened and what doesn't. For example, you may want to sharpen the buildings in a scene, but not the sky above them. Sharpening sky is a waste of time that only increases image noise. Same for portraits, you want to sharpen the eyelashes but not the skin pores.

You may have more control than you realize if you use this simple technique in either Adobe Camera Raw or Lightroom. Display your photo at 100 percent (this technique won't work unless you're working at full view). Go to the Sharpen menu. Hold down the Option or Alt key (Mac or Windows) and click on the Masking slider. You be treated with an instant edges mask that shows you exactly what will be sharpened. The white areas will be affected and the black areas will be left untouched. Move the slider to the right until you have a mask that works for your photo.

Now all you have to do is set the Radius (usually 1.0 or less), then slide the Amount until you have the sharpening you want.

This provides you excellent control and will improve your sharpening greatly.

Technorati Tags: , , , , ,

PS_elements6.jpg

We think that Photoshop Elements 6 is one of the best values in Mac software (along with iLife 08). Adobe just announced Elements 6 for the Mac at a preorder price of $89.99 US and upgrade from $69.99 US. For those dollars you get a Universal Binary version of Photoshop that features many of Adobe's latest technologies such as Photomerge GroupShot, Faces, Web Galleries and improved tools for B&W and scrapbooking. Plus, you can even correct lens distortion.

Here's what Adobe has to say:

"New features based on proprietary Photomerge technology let users easily combine the best facial expressions and body language from a series of shots to create a single, perfect group shot. The new Quick Selection Tool reduces a once time-consuming select-and-adjust task to a single click. Photographers – beginner to expert – can choose from one of three edit modes, each geared toward a different experience level. A new Guided Edit mode helps walk users through the steps of improving a photo. Photoshop Elements 6 software streamlines editing with clean, uncluttered screens that draw focus to the photos, with new tabs providing simple access to the many capabilities of the program. Additional enhancements include an improved conversion tool that dramatically converts color images into elegant, nuanced black-and-whites."

Technorati Tags: , , , ,

How to Shoot at Aquariums

aquarium_lionfish.jpg

I was wandering around the The Florida Aquarium in Tampa last night for the Kodak-sponsored Closing Night Party at Imaging USA. Since it was a photography show, it's safe to assume that most of the attendees were shooters.

I was amazed at how many people did not know how to shoot exhibits at an aquarium. So I thought it might be time for a refresher. This technique applies to shooting through hotel windows and portholes on airplanes too.

  1. Turn off the flash. (all it's going to do is cause reflection in the glass).
  2. Increase your ISO (for aquarium and museum shooting) to 400 or above.
  3. Look for a subject that isn't moving too fast. You're not going to engage in action photography here unless you switch to movie mode (which is also fun!).
  4. Find a clean place in the glass, and put the nose of your camera right against it. This eliminates reflections from your surroundings.
  5. Shoot in Raw if you have it. You'll most likely have to do a little image cleanup when you get back to the computer.
  6. Don't worry about bad shots. You'll have some loss for this type of assignment. But the keepers will be outstanding!

All types of water shots are fun. I was lucky enough to see Howard Schatz this week and learn how he did those amazing dancer images underwater. Aquariums also provide great opportunity. Apply this technique, and you'll come home with a prized shot.

Photo of Lionfish by Derrick Story, captured with a Canon G9, ISO 400, f-2.8 at 1/6 of a second. Processed in Adobe Lightroom.

Technorati Tags: , , , , , ,

printerville_logo.jpg

Rick LePage had managed Macworld Magazine, covered the photography beat for other publications, had more printers than I have cameras, and is now putting his talent into a new web site called Printerville. Rick says this about the site:

"We love everything about printers, paper, ink and printing. We have been playing with them, writing about them, and using them for more than two decades, so we like to think we know more than a little bit about them. Of course, the world of printers is a big one, and we’ve chosen to focus largely on photo printers for amateur and professional photographers."

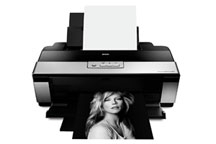
Rick launches the site with a news piece about the new Epson R1900. "The R1900 uses a reformulated inkset, called UltraChrome Hi-Gloss 2, consisting of eight individual inks: the gloss optimizer, matte and photo black, and cyan, magenta, yellow, red and orange. Epson claims that the orange ink, which replaces blue in the original Hi-Gloss inks, increases the printer’s overall gamut and provides improved flesh tones, while the new formulations of magenta and yellow inks improve the blues and greens, respectively, in most prints."

If you love printing too, or just want to keep up on everything in the world of output, be sure to spend some time over at Printerville. I think it's going to be a terrific resource for all of us.

Technorati Tags: , ,

20080106-0827-Tampa_web.jpg

Regardless if you're using Lightroom or just managing files on your own, a good file naming convention that you can apply to your pictures on import will help you stay organized. In his Imaging USA session, "Organizing: Asset Management in Lightroom," Seth Resnick provided this tip.

He created a preset in Lightroom to name his pictures logically when he brings them into the application:

DATE_custom-name_sequential-number.file-extension

So a file would look something like this for a shot he'd take today: 20080107_tampa_0001.cr2

I like his method, but use a variation on it. Instead of adding a sequential number after the custom name, I retain the original file suffix. I like keeping that original number the camera assigns in all of my file names. So my picture would look something like this on import:

20080106_0827_tampa.cr2

The 0827 is the original file suffix the camera assigned. Then, when I output the image for various purposes, such as for web publishing, I add this:

20080106_0827_tampa_web.jpg

Regardless of which method you embrace, now, at the start of 2008, is a good time to establish a useful file naming convention that you can use going forward.

About the photo... I captured this with a Canon G9 while walking down a stairwell in the hotel. I used a GorillaPod to steady the camera during the .8 exposure. I keep the ISO to 80 and converted the image to B&W in Lightroom.

Technorati Tags: , , , , ,

In Tampa for Imaging USA

tampa_night_reflection.jpg

Lots of interesting stuff going on today at Imaging USA. I'm going to sit in on a Seth Resnick talk, "Organizing: Asset Management in Lightroom." I haven't had a chance to listen to Seth since he's moved from his management system to Lightroom, so this should be fun to hear how one of the DAM masters leverages Adobe's latest photo software.

I'm also looking forward to Katrin Eismann's talk on "The Power of Camera Raw." Katrin has a new book out, The Creative Digital Darkroom that looks just great. I have a copy at home that I can't wait to dig in to.

And of course, the Expo opens today with lots of high profile exhibitors. I want to get my hands on the new Nikon D3. It looks terrific on paper.

I took this photo last night while walking home from dinner. There's plenty of water in Tampa, and it makes for good night shooting, especially when you get some interesting skies to boot. I used the Canon G9 resting on the railing of a bridge (yes, I held on to the strap). With the self-timer on, I manually set the exposure to 15 seconds at f-2.8 keeping the ISO to 80 to control the image noise. I then processed the picture in Adobe Lightroom.

Photo of Tampa Night Reflections by Derrick Story.

Technorati Tags: , , , , ,

wide_angle_lens.jpg

Here's a fun project if it's miserable outside and you want to play with your photography. Find an old pair of corrective glasses for farsighted eyes, and make a do-it-yourself fisheye lens.

You can read all about, complete with instructions, at Photojojo, (which is a great site anyway for a rainy day).

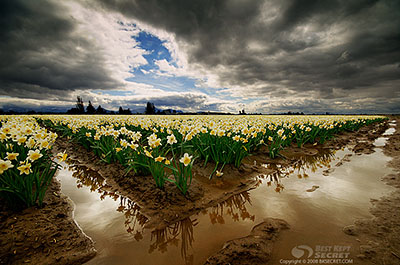
Oh, by the way, this shot was taken with a Nikon 10mm lens, not a DIY fisheye lens... don't expect these results with your hack ;)

Technorati Tags: , , ,