This week on The Digital Story Photography Podcast: Make Mine 300mm (field testing), Rode Mic for iPhone 5 Series and iPad mini (this podcast was recorded with it!), Out of Focus Backdrops (very clever...) - All of this and more on today's show with Derrick Story.
Story #1 - The Weekly Update: Lastolite 'Out of Focus' backgrounds bring beautiful bokeh to your home studio. Two reversible models, a seascape / autumn foliage and summer foliage / city lights. Measuring 1.5 x 1.2m (4' x 5') the backgrounds are big enough for almost full-length portraits of most adults, and weigh in at 3kg (6.6lb) each - $205 each. (source: DP Review).
In other news, Hoya EVO Antistatic Filter Series - Acting like a force field around the filter to repel dust, the hardened, antistatic layer is water-repellent, stain- and scratch-resistant, and cleans easily when smudges or fingerprints are introduced to the surface. (Source: Photography Blog).
And finally, Sigma dp2 Quattro: We post our first batch of real-world gallery images (including RAW conversions). (Source: Imaging-Resource)
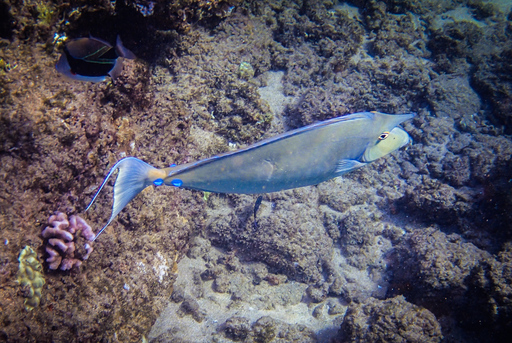
Butterfly with Passion Flower - Captured with the Olympus 75-300mm on an OM-D E-M10
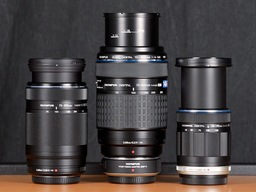
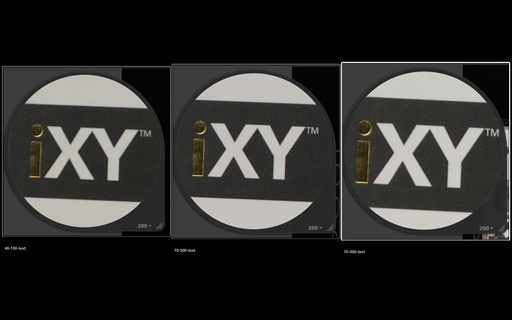
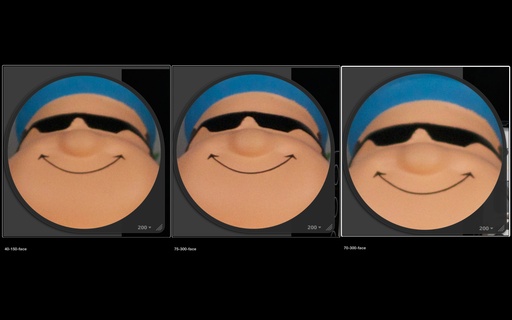
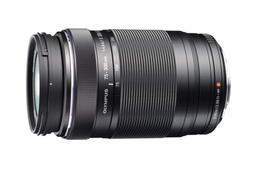
Story #2 - Make Mine 300mm - The lens I've always wanted for my Canon DSLRs was the Canon EF 70-300mm f/4-5.6L IS USM. But alas, it runs $1,600 and is a bit bulky. So I've rented it when I needed a super tele. But then I discovered the Olympus M.Zuiko Digital ED 75-300mm f/4.8-6.7 II for $499, as first discussed last week, and I finally have a 300mm at home. Here's the wrap-up on this lens after a week of testing.
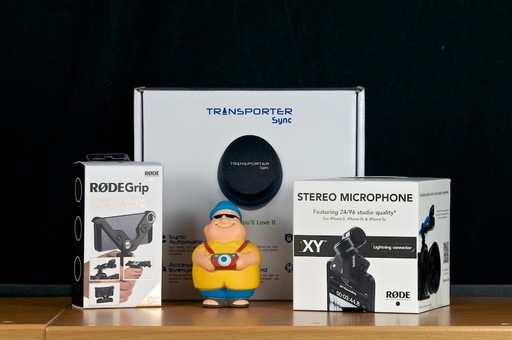
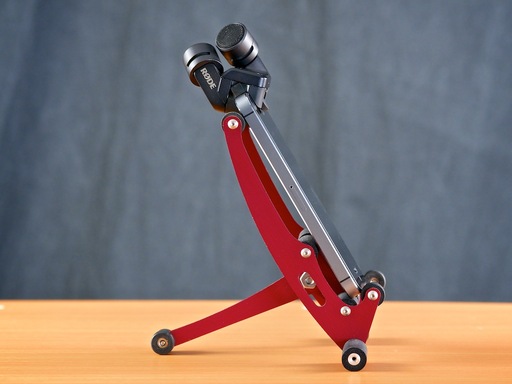 Rode iXY Mic on an iPhone 5S sitting on an Insanely Great FrameShift Mini-5 aircraft aluminum stand.
Story #3 - The Nimbleosity Report - The Rode iXY Stereo Microphone (Lightning Connector) for iPhone 5, 5S, 5C, and the iPad mini. I've been recording podcasts with the Dock Connector version of this mic for some time. But Rode has really upped their game with this latest version. In fact, this podcast was recorded with the new Rode iXY on my iPad mini. What do you think of the sound? Combined with the Rode Grip ($39), you have a versatile, high quality recording system always at your fingertips. The new Rode iXY Lightning deserves a top nimbleosity rating.
Story #4 - From the Screening Room - Basics of Using the Nik Collection with Tim Grey. This 10-minute movie is terrific for Lightroom users because Tim walks you through the steps for setting up the Nik plug-ins in the app. I'm pretty sure you'll learn something you previously did not know.
You can watch Tim in action by visiting the TDS Screening Room at lynda.com/thedigitalstory. While you're there, you can start your 7 day free trial to watch other design, photography, and computing titles, plus every other topic in the library (including my brand new "Photographing High School Senior Portraits."
Story #5 - A Free Photo Workshop, Week 2. I'm working on the 2015 TDS Photography Workshop Schedule. As many of you know, I like to introduce at least one new topic a season. And I'd like to hear from you, "What Theme Would You Love for Me to Teach in 2015?" Send your idea to derrick@thedigitalstory.com with the subject line: My Favorite Workshop Topic. My goal is to incorporate one of these suggestions into the 2015 season. If I do, that person gets free tuition to that workshop. I give an update on the suggestions that have come in.
Virtual Camera Club News
From SizzlPix: Now, for The Digital Story listeners and readers, this month only, SizzlPix will knock off 20% of the price for your SizzlPix, any quantity, any size up to 6 feet! Just put the initials TDS or "The Digital Story" in the comments space of their new, simplified online order form. SizzlPix.com.
Save on Ground Shipping for Red River Paper: Use coupon code ground50c to receive a 50 percent discount on UPS ground shipping for Red River Paper. No minimum purchase required.
Photo Assignment for July 2014 is "Smokin' Hot".
If you haven't done so already, please post a review for The Digital Story Podcast in iTunes.
BTW: If you're ordering through B&H or Amazon, please click on the respective ad tile under the Products header in the box half way down the 2nd column on thedigitalstory.com. That helps support the site.
Download the Show
In addition to subscribing in iTunes, you can also download the podcast file here (34 minutes). You can support this podcast by purchasing the TDS iPhone App for only $2.99 from the Apple App Store.
More Ways to Participate
Want to share photos and talk with other members in our virtual camera club? Check out our Flickr Public Group. And from those images, I choose the TDS Member Photo of the Day.
Podcast Sponsors
lynda.com - Learn lighting, portraiture, Photoshop skills, and more from expert-taught videos at lynda.com/thedigitalstory.
Red River Paper -- Keep up with the world of inkjet printing, and win free paper, by liking Red River Paper on Facebook.
SizzlPix! - High resolution output for your photography. You've never seen your imagery look so good. SizzlPix.com. SizzlPix! now is qualified for PayPal "Bill Me Later," No payments, No interest for up to 6 months, which means, have your SizzlPix! now, and pay nothing until January!
Want to Comment on this Post?
You can share your thoughts at the TDS Facebook page, where I'll post this story for discussion.