I was reading a story on PDN this morning titled Smart Phones for Smart Photographers that discussed how today's mobile devices have a variety of tools that are helpful for shooters -- including their built in cameras.
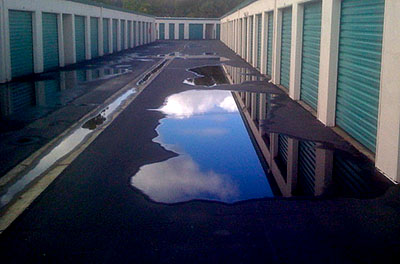
I had one of those "smart phone moments" this weekend while I was moving out of a storage unit (finally!) on Saturday morning. It had rained that evening, but the sky was beginning to clear. As I sat there in my VW van ready to take the first load to the house, I saw this interesting composition. I didn't have a "real" camera with me, so I pulled out my iPhone and composed this shot through the van windshield.
That night, tired from a day of moving, I pulled out my iPhone and took a peek at the images. I like the juxtaposition of sky in asphalt. It's a fun shot that I'm glad I have.
Ah, smart phones. You gotta love em! What's in your pocket? Let us know by posting a comment below.
-
Technorati Tags: candid, Derrick Story, digital photography, iPhone, Technology, The Digital Story