Recently in Photography

  Page 358 of 386 in Photography  

ipod_video_sm.jpg

Nearly every digital compact these days records movies. But... when's the last time you took advantage of that capability? Here's a little incentive.

You can record movies with your digicam, then move the best of them to your iPod to share with others. It's really simple. You'll need QuickTime Pro, which is a $29 download from Apple (Mac or Windows version). Open your digicam movie in QuickTime Pro, choose File > Export... In the Export popup menu, choose "Movie to iPod." Click Save.

Now all you have to do is drag the iPod movie to iTunes and sync your iPod. You now have home movies with you on the go.

Technorati Tags: ,

houdahgeo.png

You can add geocodes to your existing photos with a nifty new Mac application called HoudahGeo. What's interesting about HoudahGeo, is that if you have a GPS device, you can provide a track log file from the receiver and have the application add the data to your photos. What's really helpful though, is that you can add the geocoding yourself with a user-friendly interface that requires you only to point to a location on a provided map.

I tested HoudahGeo by having it add geodata to a handful of pictures I have, then I opened the images in iPhoto and looked at their EXIF data in the Get Info box. Sure enough, the latitude and longitude information was there in Get Info.

gps_info.jpg

You can download a trial version right now, and if you like it, can buy for $24.95.

Technorati Tags: ,


Sponsor Note...

Add Magic to Your Slideshows -- FotoMagico presentations are so amazing that your audience will be asking how you did it.

filmStripPhotoCd.gif

Like many digitally curious photographers in the early 1990s, I tried my hand at Kodak Photo CDs. I couldn't afford an expensive film scanner at the time, so I would have Kodak scan my negatives as part of the film finishing process. I would receive back from the lab the prints, negatives, and yes, a CD with high resolution scans of my images.

Now, 13 years later, I'm looking at that stack of CDs in my studio and thinking that I should import my pictures into an Aperture library. After all, who knows how long those discs will last?

The first thing I discovered is that Aperture can't import directly from a Kodak Photo CD. The encoding was proprietary, and Aperture can't read the file format. "Rats!" I thought. But then I remembered that iPhoto could once read those discs. I gave it a try, and sure enough, iPhoto imported the "16-base" versions of the images on the Kodak Photo CD. The resolution was a decent 3072 x 2048 with a file size around 7 MBs. Not bad, even by today's standards. There was no useful metadata to speak of, but I could fix that later in iPhoto or Aperture. I put the Photo CD images in a iPhoto custom album.

I then opened Aperture, selected File > Import > Images... and pointed to my iPhoto Library folder. Aperture (in its infinite wisdom) reads the custom albums you create in iPhoto, and it allows you to import pictures organized by album. I chose the iPhoto album that I had created for the Kodak Photo CD, renamed those awful Kodak file names with Custom Name with Counter, added some metadata, and clicked Import.

I've now safely relocated all of my Kodak Photo CDs into my Aperture Library for my 1990 images. That wasn't so bad after all...

Technorati Tags: , ,

cs3_path.jpg

CS3 users as well as Elements 4.01 for Mac and Elements 5.0 for Windows have a new Camera Raw plug-in available for download. The latest version supports the Panasonic FZ-8, which is a camera that I've favorably reviewed.

For more information about the Camera Raw 4.0 update, you can read about the Mac version or the Windows version on the Adobe site. Mac users can also read how to install the plug-in on their systems.

Technorati Tags: ,


CRE8 Conference, Orlando FL
Join Derrick Story for a Digital Photography Field Trip in Orlando Florida on May 11. And don't miss his sessions on Camera Raw and Photoshop Lightroom. CRE8 Conference - May 9-11, 2007

aperture_announce.jpg

I spotted this in my Software Update. Here's the scoop directly from Apple...

Aperture 1.5.3 addresses issues related to overall reliability and performance in a number of areas, including:

  • Generation of thumbnails for adjusted images
  • Entering and exiting Full Screen mode
  • Working with large sets of keywords in the Keywords HUD
  • Restoring from a vault

Among the specific issues that have been addressed:

  • Previews now update properly when images are sent to an external editor.
  • Leaf Aptus 22 and Aptus 75 images are now imported with the correct orientation.
  • When folders are imported as projects, the folder structure is now correctly preserved when identically named subfolders are included in the hierarchy.
  • Reconnecting referenced images that have been externally edited now works more reliably.
  • Setting the ColorSync profile in the Aperture Print dialog now correctly suppresses color management settings in the Mac OS X Print dialog.

Toshiba 200 GB Portable Drive

toshiba_drive.jpg

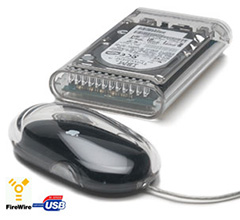
I have this theory that as my Aperture and Lightroom libraries grow in size, so will portable hard drives to house them. I've just moved up from 120 GB portables to 160 GB models to accommodate my burgeoning photo collections.

Now, Toshiba has provided me with a glimpse of the future with its just announced 200 GB USB 2.0 portable drive that includes back up software for Mac and Windows. The software works in concert with the drive providing one-button back up. This could be especially handy for those who aren't using Aperture or Lightroom and don't have built-in photo management back up solutions.

The Toshiba drive also features shock mounting for durability on the road, and includes a 4-foot USB cable. You can buy the drive directly from Toshiba for $210.

Personally, I prefer FireWire drives. They just seem to work slightly better with my Macs. But this Toshiba drive is alluring. And if you get one, please send me mail with feedback.

Technorati Tags: ,

brightness_contrast.jpg

For years, the first thing I told photographers about Photoshop was to avoid the Brightness/Contrast adjustment. Your images would fare much better using Levels or Curves. But Photoshop CS3 has changed that. Brightness/Contrast now behaves like an intelligent tool.

The new version actually compresses highlights and shadows instead of clipping them. This is a tremendous difference that you can test for yourself. If you have the beta version of CS3, open an picture, then go to Image > Adjustments > Brightness/Contrast...

Play around with the sliders and watch what happens to your photo. Now, click the Use Legacy box and make the same adjustments. The resulting image will look much worse than your first effort with the box unchecked - I guarantee it. The Use Legacy box enables the old algorithm that most of us avoided.

You can learn more about this improved tool by reading the latest dekeBytes that walks you through the process of using the new Brightness/Contrast. What will they think of next?

Technorati Tags: ,

ExpoDisc as an Incident Meter

expodisc_demo.jpg

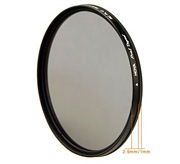
As good as our camera's built-in reflective meter is, some high-contrast situations can fool them. For many years, handheld incident meters were used by serious shooters to ensure proper exposure in difficult lighting. You can use your ExpoDisc to convert your camera's reflective meter to incident by following these easy steps.

  1. Set your camera to Aperture Priority mode and choose an f-stop, such as f-5.6.
  2. Put the ExpoDisc on your lens.
  3. Turn off autofocus mode.
  4. Point your camera in the direction of the light source illuminating your subject and click the shutter. The trick here is to meter the same light that is falling on your subject.
  5. Review the grayscale image created by the ExpoDisc in your camera's LCD monitor. Note the shutter speed recorded at exposure. That combination of shutter speed readout and the f-stop you set is the "incident" reading for that scene.
  6. Return your camera to autofocus mode, set the aperture/shutter speed combination you recorded (manual exposure mode is probably easiest for this) and shoot the scene.

The difference between a reflective meter reading and incident is that reflective measures the light bouncing off the subject, and incident records the light falling on the subject. Since your camera's meter is calibrated for 18 percent gray, as is the ExpoDisc, you can convert your reflective meter to incident by using this method. (You can read more about incident meter reading in this brief Luminous-Landscape tutorial.)

If you want to take advantage of this technique to the fullest, the ExpoDisc manual includes more information on how to meter for incident light under different lighting conditions (Section 2.d). One additional tip, for instance, is that, when shooting a backlit subject, you can reduce the exposure one full stop to preserve darker than normal tones in shadow areas.

As an added bonus, remember that you can set the custom white balance at the same time you take the incident meter reading, ensuring that you have both accurate color and exposure. Give it a try!

Photo of John Baker demoing ExpoDisc at Photoshop World, Boston by Derrick Story.

Technorati Tags: ,


CRE8
Conference, Orlando FL
Join Derrick Story for a Digital Photography Field Trip in Orlando Florida on May 11. And don't miss his sessions on Camera Raw and Photoshop Lightroom. CRE8 Conference - May 9-11, 2007

Don't Forget the Detail Shots

church_2746.jpg

When you're out shooting architecture and other objects in the wild, don't forget to capture the detail shots too. For example, this is a handsome church in Northern California. I like the overview image that gives me the sense of how it must of felt to enter this structure every Sunday in days gone by.

But there are many individual elements of interest also. For example, the hooks that hold the doors open while people flow in are beautifully designed and appealing in their own right. The texture of the wood worn away from years of rubbing against the metal is also interesting. I find the details just as fascinating as the overall structure.

church_2749.jpg

Make a mental note to capture as many of the details as possible when out shooting. Sometimes it's the small things that become the big shot of the day.

Technorati Tags: , ,

My Favorite Jay Maisel Quotes

jay_maisel.jpg

I sat in a darkened ballroom last night and listened and watched as Jay Maisel took us on a tour of light, gesture, and color during his session at Photoshop World. Jay has been creating unforgettable images for decades. He is a member of the Art Directors Club Hall of Fame, was the American Society of Media Photographers' Photographer of the Year, and has been honored with the International Center of Photography's Infinity Award. (Photos by Jay Maisel)

During the session, Jay showed us visual examples of how he captures light, color, and gesture to create powerful images. As we were looking at the pictures, he would add tidbits of wisdom, and I've included some of my favorite thoughts here.

On preparing for a shoot... "Try to go out empty and let your images fill you up."

When composing a picture... "Be aware of every square millimeter of your frame."

"If you can capture the element of surprise, you're way ahead of the game."

"I don't see light as something that falls, but as a positive force."

"As people, we love pattern. But interrupted pattern is more interesting."

"Never put lettering in your photos unless you want it read."

On air quality as it impacts composition... "I'm a New Yorker. I don't believe in air unless I can see it."

When finding the right angle for a shot... "Move your ass."

If you ever have the opportunity to attend a workshop by Jay Maisel or study his work, I highly recommend it. He shared a terrific closing anecdote with me after his talk last night. I thought I'd close with it here.

"A friend of mine brought a cardboard box to one of my presentations. I asked him, why the box? He said there will be two groups of people in the audience today. Half will leave before the presentation is over because they will have to go outside and take pictures. The other half will want to leave their cameras in this box."

Technorati Tags: ,