Recently in Photography

  Page 129 of 385 in Photography  

I Shoot Fewer Frames These Days

One of my most embarrassing experiences from the film days was when I was shooting product shots for a company with a 4"x5" monorail view camera. The setups were fairly elaborate, and I didn't want to take a chance on messing up the shot. So I bracketed wildly in both directions.

When I picked up the transparencies from the lab, there was a thick stack of pictures instead of what should have been a dozen. As I spread the frames on the lightbox, I did indeed get a properly exposed, good color balanced, sharp image of each set up. I also had dozens of over/under exposed films.

At that moment, I felt like I didn't really know what I was doing. And I vowed to get better.

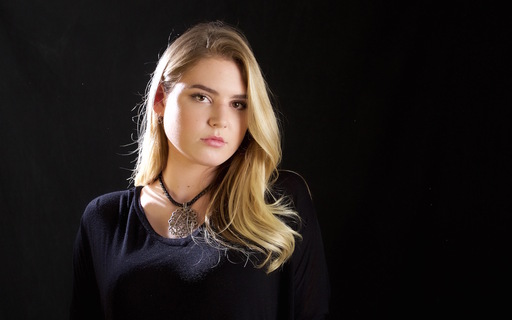
carrie-with-brick-wall-1024.jpg Carrie Dungan with Straw Hat and Brick Wall, Santa Rosa, CA. Olympus OM-D E-M5 Mark II with 40-150mm f/2.8 PRO lens. A reflector was used for fill light. Photo by Derrick Story.

Fast forward to 2015. In the digital age, I can shoot as many frames as I want, and it doesn't cost me, or the client, any money. But I still carry the weight of that experience from years ago with me.

My goal these days, is to shoot as many frames as needed to get the proper expression and composition, and trust that I can handle the technical details in camera. When some might shoot 500 frames, I capture 150.

For most model shoots, such as the image above with Carrie, the subjects are surprised at how fast the session goes. "Did you get enough?" they would ask.

I've noticed that this speed is a real benefit for commercial shoots too. Many of my portraits are scheduled for work hours onsite, when busy executives don't have much time to spare for photography. Once client remarked, "We used to have to go to a studio, spend 45 minutes there, then get back to the office. Now we're done in 10 minutes."

Working fast is a good thing in the business world. My days of excessive frames are well behind me. And the bonus is, I spend far less time in post production too.

Can you say, "Good night's sleep..."?

Want to Comment on this Post?

You can share your thoughts at the TDS Facebook page, where I'll post this story for discussion.
This week on The Digital Story Photography Podcast: "LED Studio Lighting, Rumors About the Podcast, T-Shirt Winners, Sigma 24-35mm f/2 Art Lens Review" - all of this and more on today's show with Derrick Story.

Weekly Update - "Apple releases Digital Camera RAW 6.05, adds RAW support for ten new cameras". Imaging-Resource reports: "Apple has released Digital Camera RAW 6.05, a substantial update bringing support for ten new cameras to OS X Yosemite and OS X El Capitan, which is currently available as a public beta. Notables include the Fujifilm X-T10, Nikon D810A, Olympus STYLUS TG-4 Tough, and the Panasonic LUMIX DMC-G7."

In other news... "Sigma 24-35mm f/2 'Art' Lens Review: How does the world's fastest full-frame zoom perform?" Imaging-Resource reports: "This new zoom is the world's first constant-aperture f/2.0 zoom lens for full-frame DSLRs, which basically means you get three sharp f/2.0 primes -- 24mm, 28mm and 35mm -- in a single lens. Sigma is, once again, offering a unique lens that the major manufacturers simply do not offer! So, the big question is: How does it stack up? Very, very well."
Lens construction: 18 elements in 13 groups, including 2 aspherical, 1 FLD and 7 SLD elements; 9 aperture blades; weighs 33 ounces; Sigma, Canon, and Nikon mounts. Still waiting for details about price and release date.

P7104524-Siobhan-Portrait-1024.jpg Portrait of Siobhan Anderson using LED studio lighting.

Story #1 - "LEDs Light Up My Studio" -

This has been an interesting journey for me. I never really liked professional studio lighting kits with the array of big modifiers. So I opted for more portable speedlites with smaller accessories. And they were fine. I then tried compact fluorescent lighting, and was happy to have a continuous source again. But I have to say, since I've switched to LED lighting, I've been the happiest ever in the studio.

Currently I'm using a pair of FotodioX Pro FlapJack LED Edge Lights that have variable power output and built-in diffusion. I could use AC power, but the lithium battery lasts so long, I don't have to. The color temperature ia a pleasing 5,500 K. And they are so easy to pick and move around during the shoot, I find myself being more creative. I talk more about LED lighting in today's first story.

Story #2 - T-Shirt Winners from the The Digital Story - Digital Photography Public Group Giveaway

Here's the scoop: Last week we had 123 members of our virtual camera club share photos with the TDS Public Group, most of them adding more than one image to the pool. Image quality and creativity were outstanding. I show people the gallery on my laptop and the first comment is usually something like: "Wow, they're really good!"

So without further ado, here are the names of those eligible to receive a free T-Shirt:

  • Joel_Favela
  • RHYockey
  • Jim Hansen
  • Garagewerks
  • callmeunity
  • Tim Gilbreath
  • mommapostal
  • Fran Polito
  • 440 volts
  • LightMovesPhotography

If you name was called, please send email to thenimblephotographer@gmail.com with the subject line T-Shirt and your name (in the subject line). And in the body of the note, your T-Shirt size, your email address, shipping address, and phone (for shipper only). Congrats... and thanks to everyone who posted images.

Story #3 - Rumor has it... that The Digital Story podcast is moving over to the growing TWiP network. I clarify the situation in today's third feature.

Story #4 - From the Screening Room -Street Photography: Posed Portraiture with Steve Simon. Steve is one of those guys who can win the trust of strangers. Here's how he does it.

You can watch Steve in action by visiting the TDS Screening Room at lynda.com. While you're there, you can start your 7 day free trial to watch all of Steve's movies, plus every other title in the library.

Virtual Camera Club News

Fall Color with Safari West: October 23-25, 2015 - Sonoma County has rolling hills covered in vineyards, beautiful trees, and gorgeous blue skies. What a prefect place to shoot Fall color and bolster your landscape library. But there's more. We include environmental portraiture with a professional model, and an exclusive African wildlife photo adventure at Safari West, led by a professional photographer, plus a few surprises. This is our longest running workshop of the season, and for good reason. Two full days plus pre-workshop reception, breakfast and lunch, excellent swag, professional model, private Safari West adventure with a pro photographer guide - all included for just $599.

Moving from Aperture to Photos or Lightroom - August 7-8 - Now that Aperture will no longer be developed, many photographers are contemplating their next move. In this software workshop, we'll explore the two leading contenders: Photos (part of the Yosemite Update) and Adobe Lightroom. By the time we conclude, you'll have a much clearer idea about your photo management future. Two full days plus breakfast and lunch - all included for just $495.

Show Off with SizzlPix

Do you want to blow away friends and family with your photography? Then hang a 5k Ultra High Definition SizzlPix on the wall at home. You won't believe the comments.

Give it a try. They'll send Digital Story listeners and readers a free mini-proof before production; just put "proof first, TDS" in the comment space on the SizzlPix order page.

Tip from Red River Paper

Article from Red River Paper: Frame Your Images for Maximum Impact!. A helpful article to help you choose the right frame for your prints.

Thanks to everyone who recently reviewed the TDS Podcast in iTunes!

BTW: If you're ordering through B&H or Amazon, please click on the respective ad tile under the Products header in the box half way down the 2nd column on thedigitalstory.com. That helps support the site.

Download the Show - MP3 Version

In addition to subscribing in iTunes, you can also download the podcast file here (35 minutes - MP3 version). You can support this podcast by purchasing the TDS iPhone App for only $2.99 from the Apple App Store.

More Ways to Participate

Want to share photos and talk with other members in our virtual camera club? Check out our Flickr Public Group. And from those images, I choose the TDS Member Photo of the Day.

Podcast Sponsors

lynda.com - Learn lighting, portraiture, Photoshop skills, and more from expert-taught videos at lynda.com/thedigitalstory.

Red River Paper -- Keep up with the world of inkjet printing, and win free paper, by liking Red River Paper on Facebook.

SizzlPix! - New 5k Ultra High Definition SizzlPix output for your photography. You've never seen your imagery look so good. SizzlPix.com.

Want to Comment on this Post?

You can share your thoughts at the TDS Facebook page, where I'll post this story for discussion.
Creative Reflection Technique

Editor's note: Leah Gerber contributed this post.

One of the advantages to being Derrick's assistant is that I get to shoot at photo workshops right alongside the participants. As a result, I've discovered some new techniques, one of which I want to share with you today.

bodie-by-leah-gerber.jpg Photo by Leah Gerber.

This image is from the Eastern Sierra workshop this past June. Day one of the event, we drove out to the old ghost town of Bodie. This place is a photographer's dream, set in an isolated, rural area with buildings and roads forgotten by time. It puts the imagination in high gear, to walk among the remains of an old western town.

We got there at 9 o'clock in the morning, and the sun kept climbing higher in the mostly-cloudless sky. At first I just shot everything I saw, because heck, I was in Bodie! Everything looked fantastic. Every direction I faced there was something to be photographed. I was surrounded by the wild west.

But once I got all that excitement out of my system, I began to curse the harsh midday lighting, the flat sky, and even the other tourists who seemed to be everywhere that I wanted to photograph. I started shooting through the windows, into the abandoned homes and buildings (the public could enter only a few structures). I liked the shots I was getting, but I wanted to be more creative.

I had been using my camera lens placed against the glass to peer into the buildings and take photos. As I started playing around with this technique, tilting the camera to one side or the other, I discovered a new effect.

Where the lens produced shade, I could see inside the home. But on the other side of the frame, the dust-coated windows reflected the ghost town behind me. When I pulled the lens very slightly away from the window, I got a blurred edge, which looked like the two worlds were just barely meeting.

Once I did this a few times, I became enamored with the style, and I ended up with a bunch of shots that I love. What I liked about it was the fact that the very conditions that originally made photography difficult - namely the flat, harsh lighting - were the ones that actually helped me get those strong reflections leading to photos that were quite interesting. In other words, the bad lighting forced me to shoot more creatively.

When I show these photos to others, several comment on the editing between two subjects. I have to correct them: "Actually... this isn't a compilation of images sewn together in Photoshop; this is one image." The only editing I'd done, was with coloring and tone.

The fun part about it is the lack of technology involved, the simplicity of it, and the ability to create art because of undesirable conditions. Had the sky been filled with clouds, or a beautiful sunset, I may not have gotten the images I did, the ones I love, the ones which suggest stories of another world in that old, forgotten place.

Want to Comment on this Post?

You can share your thoughts at the TDS Facebook page, where I'll post this story for discussion.
The Classic Canon 85mm f/1.8

canon-85mm-top.jpg

In 1992 I was shooting weddings as a freelancer trying to build a photography business. I owned two EOS Elan film bodies and a handful of glass. When Canon released the Canon EF 85mm f/1.8 USM for less than $400, I knew I had to have it.

It immediately became my primary portrait lens, low-light compliment to the 50mm f/1.8, and soft background wonder. Even though my Canon bodies have evolved over the years - shooting now with a 5D Mark II and 70D - this lens has remained in my camera case. I still reach for it when I need to capture that perfect portrait.

IMG_0698-leah-with-85mm.jpg Leah before a big commercial photo assignment. Canon 85mm f/1.8 set to f/2.8 on a Canon 5D Mark II. Photo by Derrick Story.

The lens basic specs are modest:

  • Lens construction: 9 elements in 7 groups
  • Diagonal angle of view: 28 degrees (at 30 feet)
  • Focus adjustment: Rear focusing system with USM
  • Closest focusing distance: 2.8 feet
  • Filter size: 58mm
  • Dimensions: 3 inches in diameter, 2.8 inches long
  • Weight: 15 ounces

It all hangs together like a timeless black suit that fits perfectly.

When I started shooting with Micro Four Thirds also, I sold many of my Canon lenses. The one optic that I doubt that I'll ever let go of is that original 85mm. Its quality and dependability has gained my trust over 20+ years of assignments.

This is what I love about great glass. Camera bodies my come and go, but a classic lens is for life.

Want to Comment on this Post?

You can share your thoughts at the TDS Facebook page, where I'll post this story for discussion.
Capturing Engaged Portraits

When I give portrait assignments to students, I usually ask them to capture three different types: Front-facing head and shoulders, environmental where the subject is part of a larger scene, and what I call the "engaged portrait," which is when the subject is doing something.

charlie-with-soap-bubbles-1024.jpg

I like the activity portraits a lot. My feeling is that we learn even more about the subject when they are focused on their work, a hobby, or in the case of this young boy, watching soap bubbles with his mom.

With engaged portraits, we often see expressions that reveal personality. The person is thinking about an activity and not as much about be photographed. The protective shield is lowered, and the viewer gets a peek at an aspect of the real person.

You have to have your camera available and ready to fire, because these opportunities are often spontaneous. For example, I prepared my OM-D in the morning and had it available as we started our 4th of July BBQ with family. I didn't take any pictures for the first few hours. But when Charlie and his mom started blowing soap bubbles, I grabbed the camera and captured an engaging series of images.

Don't get me wrong, I'm a big fan of group shots and other types of portraits during these events. But the engaged portraits are often the ones I share with others.

Want to Comment on this Post?

You can share your thoughts at the TDS Facebook page, where I'll post this story for discussion.
Flashpoint 7' AutoStand Review

autostand-with-light.jpg

When you're working alone and have to move your lights from one area to another, it can be a cumbersome task. The Flashpoint 7' AutoStand aims to make that job just a bit easier.

Its standout feature is the set of automatic legs that retract against the main body of the stand when you lift it up, then spread when you place the autostand in a new location. It only requires one hand.

I've been using this lighting accessory in my studio that has a shooting room upstairs and the classroom downstairs. Now when I move lighting from one location to the other, I can still hold my camera in one hand and simply lift up the stand with the other to transport it down the stairwell. It's great.

autostand-legs-open.jpg The three legs spread automatically when you set the stand on the floor.

autostand-legs-folded.jpg But when you lift up the stand with just a single hand, the legs retract against the body so you can easily transport it.

The autostand adjusts from 3 feet to 7 feet and folds down to 30 inches for storage or transport. This kit comes with a reversible 5/8' stud, with a ¼"-20 thread on one end, and 3/8" on the other, which can be mounted either vertically or horizontally as needed. The stand is made of aluminum alloy and weighs 2.8 pounds. It can bear a load of 15.5 pounds.

I like the over-sized tightening knobs and the general construction of the autostand. There is a bit of wobble when extended, due to the design of the legs to allow them to open and close automatically. This isn't an issue for lighting gear (the stand is plenty stable for my lights), but it's a design byproduct that you should be aware of.

The Flashpoint 7' AutoStand comes with a carry case for location work, and the entire kit sells for $59.95. Adorama also carries a variety of accessories to round out your rig.

The autostand is a handy addition to my studio. I always have it set up and ready to work.

Want to Comment on this Post?

You can share your thoughts at the TDS Facebook page, where I'll post this story for discussion.
air-with-zoom.jpg

It's like Micro Four Thirds lenses were designed for this moment.

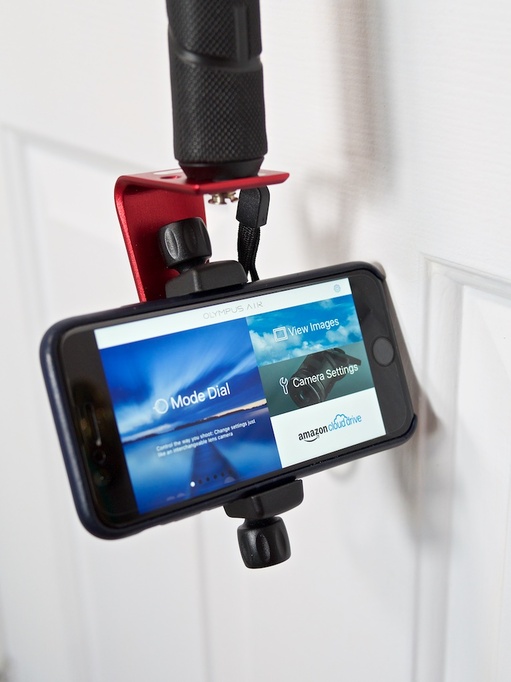
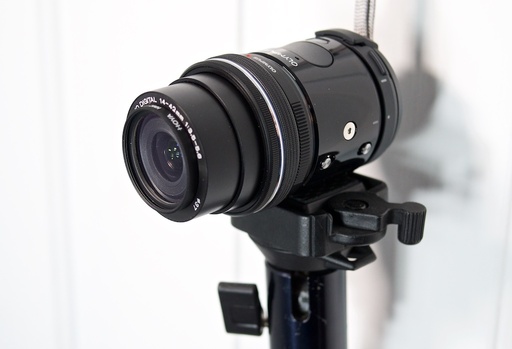
The Olympus Air A01 is a palm-sized cylinder with a 16MP M4/3 sensor and lens mount that allows photographers to attached any Micro Four Thirds lens and start shooting.

They can control the camera via their iOS or Android smartphone, not to mention view the images on those beautiful LCD screens.

What's different about this project compared to other competitors is that M4/3 optics are among the most compact in the interchangeable lens world. The pancake Oly 14-42mm EZ zoom, Panasonic 20mm f/1.7, Olympus 45mm f/1.8, (and on and on) are perfect for this device. Compact lenses plus compact body equals pocketable device.

If you're already shooting in this format, the admission price for the Air is $299. Smartphone not included.

So in addition to serving as a super nimble mobile device, the Olympus Air becomes the world's most compact, fully-featured backup camera.

That's pretty nice...


Nimble Photographer Logo

The Olympus Air has a high Nimbleosity Rating. What does that mean? You can learn about Nimbleosity and more by visiting TheNimblePhotographer.com.

Want to Comment on this Post?

You can share your thoughts at the TDS Facebook page, where I'll post this story for discussion.
This week on The Digital Story Photography Podcast: 5 Tips to Energize Your Portraits, New Camera Tech for Next iPhone?, Tip to Make Clients Happy - all of this and more on today's show with Derrick Story.

Weekly Update - "Apple's dual-camera technology rumored to be nearing completion". DP Connect reports: "Apple has been working on the dual-lens technology for three years, but until recently has been hindered by a number of issues, including image blur and supplier inadequacies. LinX's processing technologies may have solved those blurring problems, and Apple is said to have found a supplier for the components that is able to meet its production demands." Who knows if this will be ready for the next iPhone.

In other news... "Firmware 4.0 for the Fujifilm X-T1 Improves the Autofocus" The Phoblographer reports: "The Fujifilm X-T1 doesn't have terrible focusing performance to begin with, but now they're stating that it's much better than it was before. The new firmware 4.00 includes new wide and tracking methods as well as performance boosts to single AF point focusing. For portrait photographers, the camera will now have an Eye Detection focusing option too."

sf-portrait.jpg

Story #1 - "5 Tips to Energize Your Portraits" -

Most subjects tighten up when you point a camera in their direction. Here are 5 tips to breath life back in to your portraits.

  • One foot or the other.
  • Burst mode.
  • Twist and shout.
  • Give them confidence.
  • Change the scene.

Story #2 - "The Visual Shot List"

Here's how it works. The client figures out what type of images they want for a particular shoot. Then they research stock photography (they have an account) to find samples that come as close as possible to their ideas. They build the shot list with pictures and text.

Then, before the shoot, we have a phone conference to discuss the shot list. As a team, we look at the stock photos and talk about how "this comes close, but what we'd like is a little brighter background," and details like that.

Story #3 - From the Screening Room - Introducing Photoshop: Photography with Deke McClelland.

You can watch Deke in action by visiting the TDS Screening Room at lynda.com. While you're there, you can start your 7 day free trial to watch all of Deke's movies, plus every other title in the library (including over 20 by yours truly).

Virtual Camera Club News

Fall Color with Safari West: October 23-25, 2015 - Sonoma County has rolling hills covered in vineyards, beautiful trees, and gorgeous blue skies. What a prefect place to shoot Fall color and bolster your landscape library. But there's more. We include environmental portraiture with a professional model, and an exclusive African wildlife photo adventure at Safari West, led by a professional photographer, plus a few surprises. This is our longest running workshop of the season, and for good reason. Two full days plus pre-workshop reception, breakfast and lunch, excellent swag, professional model, private Safari West adventure with a pro photographer guide - all included for just $599.

Use the Send Me Info form to get all the details.

Moving from Aperture to Photos or Lightroom - August 7-8 - Now that Aperture will no longer be developed, many photographers are contemplating their next move. In this software workshop, we'll explore the two leading contenders: Photos (part of the Yosemite Update) and Adobe Lightroom. By the time we conclude, you'll have a much clearer idea about your photo management future. Two full days plus breakfast and lunch - all included for just $495.

Show Off with SizzlPix

Do you want to blow away friends and family with your photography? Then hang a 5k Ultra High Definition SizzlPix on the wall at home. You won't believe the comments.

Give it a try. They'll send Digital Story listeners and readers a free mini-proof before production; just put "proof first, TDS" in the comment space on the SizzlPix order page.

Save Money with Red River Paper

Did you know that Red River Paper has a Discounts and Clearance page? Ink, paper, greeting card stock, all at big savings.

Thanks to everyone who recently reviewed the TDS Podcast in iTunes!

BTW: If you're ordering through B&H or Amazon, please click on the respective ad tile under the Products header in the box half way down the 2nd column on thedigitalstory.com. That helps support the site.

Download the Show - MP3 Version

In addition to subscribing in iTunes, you can also download the podcast file here (33 minutes - MP3 version). You can support this podcast by purchasing the TDS iPhone App for only $2.99 from the Apple App Store.

More Ways to Participate

Want to share photos and talk with other members in our virtual camera club? Check out our Flickr Public Group. And from those images, I choose the TDS Member Photo of the Day.

Podcast Sponsors

lynda.com - Learn lighting, portraiture, Photoshop skills, and more from expert-taught videos at lynda.com/thedigitalstory.

Red River Paper -- Keep up with the world of inkjet printing, and win free paper, by liking Red River Paper on Facebook.

SizzlPix! - New 5k Ultra High Definition SizzlPix output for your photography. You've never seen your imagery look so good. SizzlPix.com.

Want to Comment on this Post?

You can share your thoughts at the TDS Facebook page, where I'll post this story for discussion.
DxO ONE vs iPhone 5S Sunset Shoot

I stepped out the front door the other evening to witness a beautiful sunset. Like most other folks, I pulled a smartphone out of my pocket to record the event. Unlike most others, however, I then pulled a DxO ONE from my other pocket to capture a few more pictures. I thought you might be interested in how they compare.

Note: The DxO ONE images were captured with pre-release hardware and processed with beta software. Specs and performance may change with the final release in September.

The Jpegs from both the iPhone 5S and DxO ONE are right out of the camera with no further processing. The DNG from the ONE was processed with automatic settings (no individual slider tweaking) in DxO OpticsPro 10 and saved out as a Jpeg.

iPhone 5S Jpeg

iphone-5s-sunset-web.jpg The iPhone does a good job of capturing the vibrancy of the sunset. Gradation with the brightest tones isn't quite as smooth as with the DxO, and the resolution is less at 3263 x 2448. But overall, a nice rendering of the scene.

DxO ONE Jpeg

dxo-one-jpeg-sunset-web.jpg The Jpeg from the DxO One is very good. Smoother gradation in the bright areas and more resolution at 5540 x 3688. Noise is very well controlled.

DxO ONE DNG

dxo-one-dng-sunset-web.jpg Where things get real interesting is the the DNG version of the twilight scene captured with the ONE and processed with automatic settings in DxO OpticsPro 10. The rendering is more dramatic with excellent tonality.

Even though the iPhone 5S is an excellent camera (with the 6 being even better), it's hard to compete against RAW files produced by a 1" sensor and matching software. I also like the wider proportions of the DxO One (3x5) compared to the iPhone (3x4).

Either way, how cool to have such excellent cameras comfortably stashed in the front pocket of my pants.


Nimble Photographer Logo

The DxO ONE has a high Nimbleosity Rating. What does that mean? You can learn about Nimbleosity and more by visiting TheNimblePhotographer.com.

Want to Comment on this Post?

You can share your thoughts at the TDS Facebook page, where I'll post this story for discussion.
The Visual Shot List

I have a commercial client who's very particular about the images we capture for their branding. They've spend a lot of time and money figuring out who they are and how to convey that to their customers.

One of the tools that we use to ensure that we work efficiently during our photo sessions is what I call the visual shot list. I think it's a great idea, and you might want to consider it too.

visual-shot-list-1024.jpg My assistant, Leah, reviewing the visual shot list before an important assignment at a salon in San Francisco. Image captured with a Canon 5D Mark II and a Yongnuo 35mm F/2.0 lens.

Here's how it works. The client figures out what type of images they want for a particular shoot. Then they research stock photography (they have an account) to find samples that come as close as possible to their ideas. They build the shot list with pictures and text.

Then, before the shoot, we have a phone conference to discuss the shot list. As a team, we look at the stock photos and talk about how "this comes close, but what we'd like is a little brighter background," and details like that.

If the client doesn't want to build the visual shot list, you can draft one, then review it with them. You'll be surprised at the things you learn during the discussion.

By the time that Leah and I arrive on location, we have an excellent idea about what we have to do and how we're going to do it. The success rate has been very high since using this approach.

I'm a big fan of creating shot lists for all assignments, but the visual shot list takes this concept to new heights.

Want to Comment on this Post?

You can share your thoughts at the TDS Facebook page, where I'll post this story for discussion.