Recently in Photography

  Page 97 of 386 in Photography  

I met Frederick Van Johnson last night at Oracle Arena to take-in a Warriors game. At one point he said to me, "What's missing here?" We both looked at each other, and neither had a camera other than our iPhones. "Times have changed, haven't they?"

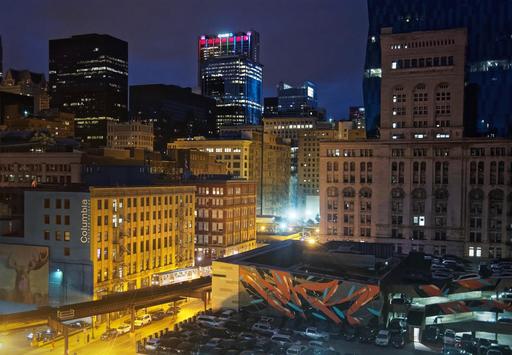
Oracle-Noise-Reduction.jpg Oracle Arena at Twilight. Photo by Derrick Story captured with an iPhone 6S and processed in Photos for macOS with Luminar editing extension.

Obviously, I still shoot with dedicated cameras most of the time. But there are those moments, such as going through security at Oracle Arena, where just having an iPhone is so convenient.

But I do notice, that with shots like this one of the arena at twilight, that the iPhone produces a little more noise in the sky than I like. Since my smartphone images go directly into Photos for macOS, this isn't much of a problem because I have the excellent noise reduction of Luminar waiting as an editing extension. (Luminar noise reduction is far more powerful than the noise reduction slider built into Photos.)

noise-reduction-web.jpg The noise reduction tool built into Luminar.

All I have to do is open the shot in Photos, then choose the Luminar editing extension. Its noise reduction tool provides many options allowing me to apply just the right amount. Plus, it puts the adjustment on its own layer. Nice. I then save the image, and it appears back in Photos, and it's shared across all of my devices.

The process is totally non-destructive, so I can view or revert to the original at any time. And having a robust noise reduction tool to complement my iPhone photography makes it that much easier to travel super light, yet still capture important moments as they present themselves.

Photos for macOS as Your Digital Darkroom

You can learn more about using Luminar as an editing extension in my lynda.com training, Photos for macOS: Advanced Editing Extensions.

And if you'd prefer to cozy up with a book, check out The Apple Photos Book for Photographers that features chapters on basic editing, advanced post processing, and editing extensions.

You can share your thoughts at the TDS Facebook page, where I'll post this story for discussion.

This is The Digital Story Podcast #569, Jan. 31, 2017. Today's theme is "Plugins: Cake and Eat it Too." I'm Derrick Story.

Opening Monologue

The phrase, "You can't have your cake and eat it too," refers to telling someone that they can't have two good things that don't normally go together at the same time, like eating a cake and then continuing to possess that same cake so you can eat later*. An exception to this rule in the world of photography is with our photo management apps and plugins. I explain more in today's show.

* as written by Jacob Shamsian of the Business Insider.

Plugins: Cake and Eat it Too

On one hand, we want continuity with our photo management applications. So whether you're using Lightroom, Photos for macOS, Capture One Pro, or something else, you want to know that your photos are safe and retrievable.

But at the same time, this is also our digital darkroom where we fine tune, experiment, and test new approaches to get the most our of our imagery. For these activities we want new tools and filters that fuel our creativity. And to be honest, new tools don't come fast in photo management applications.

A way that we can have both security and creativity is through the use of plugins. We don't have to give up our stable photo management system to experiment with new image editing tools. So I thought that I would share three interesting plugins with you today.

on1-Photo-RAW-web.jpg

On1 Photo RAW

Available for both Mac and Windows. No catalog means you (or anyone with access) can store and edit your photos anywhere (local network and cloud). Built-in layers, brushes, and masking tools. Includes all of the ON1 apps; Browse, Develop, Effects, Portrait, Layers, Resize, and Photo Via Works as a standalone app, as a plug-in (for Adobe� Photoshop� and Lightroom�), a host app (Google� Nik� and other apps), or as an extension (for Apple� Photos�).

I'm most interested in Photo RAW as a complement to Photos for macOS. But I think it's useful as a Lightroom plugin too. I downloaded the trial, and went for a test drive.

Bottom line was that Photo RAW worked well for Lightroom with smooth handoffs back and forth. But as an editing extension for Photos for macOS, it crashed Photos and didn't work. On1 Photo RAW is available for $99.

Luminar

No surprise here, I'm sure, that Luminar is at the top of this list. Mac users who rely on Lightroom, Aperture, or Photos for macOS, can expand their post processing chops with an array of sophisticated filters, layers, and localized editing brushes. You can purchase Luminar for $69 that includes the full set of plugins with a standalone version of the app.

DxO Film Pack

Available as a plugin for Lightroom, Photoshop, and Aperture 3, or as a standalone app. Mac and Windows compatible. In Lightroom you need to set it up as your additional external editor in Preferences. Once doing so, the roundtrip is painless, and the adjusted image is returned to Lightroom in a stack with the original.

This plugin gives access to more than 80 analogue films, and combines many original renderings with filter, vignetting, blur, texture, frame or light leak effects.

I really like these film emulations, and the fact that it is an excellent RAW processor at the same time. You can purchase versions starting at $79.

In the News: Advanced Editing Extensions from lynda.com

This is a very cool training from lynda.com: Photos for macOS: Advanced Editing Extensions. I show you how to use Luminar, DxO Optics Pro, Pixelmator, Affinity Photo, and Polarr. I cover standalone versus editing extension, and how to blend all of these tools into a creative, easy to use workflow.

Updates and Such

The registration forms for the The Chicago to New Orleans Rail Adventure - June 26-29, 2017, and for the San Francisco Street Photography Workshop - have been sent out to members of our reserve list. This workshop begins the day after Out of Chicago concludes. So if you're going to OOC, just add Sunday night to your hotel reservation if you plan on joining us. You can still get on the reserve list for this event, and for our others, by visiting the TDS Workshops Page and using the Send Me Info form on that page. I'm going to open both of these workshops to the general public soon. So if you're on the reserve list, and want to go, I would sign up soon.

Big thanks to all of our Patreon members! I was able to pay for the podcast server and the backup system from last month's pledges. Your contributions are making a positive impact.

B&H and Amazon tiles on www.thedigitalstory. If you click on them first, you're helping to support this podcast. And speaking of supporting this show, and big thanks to our Patreon Inner Circle members.

And finally, be sure to visit our friends at Red River Paper for all of your inkjet supply needs.

See you next week!

More Ways to Participate

Want to share photos and talk with other members in our virtual camera club? Check out our Flickr Public Group. And from those images, I choose the TDS Member Photo of the Day.

Podcast Sponsors

MindShift Gear - MindShift Gear is a group of committed professional photographers and product designers who support conservation and protection of our natural resources and planet.

Red River Paper - Keep up with the world of inkjet printing, and win free paper, by liking Red River Paper on Facebook.

The Nimbleosity Report

Do you want to keep up with the best content from The Digital Story and The Nimble Photographer? Sign up for The Nimbleosity Report, and receive highlights twice-a-month in a single page newsletter. Be a part of our community!

Want to Comment on this Post?

You can share your thoughts at the TDS Facebook page, where I'll post this story for discussion.

Even with Adobe's recent announcement that Creative Suite is Dead, meaning that Photoshop must be purchased through Creative Cloud, they have stayed true to always offer a perpetual license for Lightroom... at least after my testing here in the U.S.

Screen Shot 2017-01-29 at 8.08.36 AM.png

To download this version of Lightroom, go to Adobe's Product Page and scroll down to "Photoshop Lightroom." The next step is very important. Do Not click on the link for Photoshop Lightroom (that takes you to the Creative Cloud page), rather; click on the Buy link to reveal the Add to Cart button ($149), as shown in the top illustration.

Screen Shot 2017-01-29 at 8.09.12 AM.png

After your purchase, you'll be directed to a download page where you can secure a perpetual license version of the app (Mac/Win).

Want to Comment on this Post?

You can share your thoughts at the TDS Facebook page, where I'll post this story for discussion.
Check out this list of killer software: Luminar, DxO Optics Pro, Pixelmator, Affinity Photo, and Polarr - they are all explained in my latest title for lynda.com, Photos for macOS: Advanced Editing Extensions. Here's the overview movie.

All of this software is available in the Mac App Store and provides you with standalone versions or can be integrated into Photos for macOS as editing extensions. I show you how to use each of these great apps in one complete title.

luminar-in-adv-ext.png

If you want to supercharge your post production using the latest technology available, and have a blast doing so, check out Photos for macOS: Advanced Editing Extensions. I think you're going to love it.

Book or Videos: Photos for macOS

Explore the world of modern photography with my The Apple Photos Book for Photographers that features insightful text and beautiful illustrations.

And if you'd like to cozy up to a video at the same time, watch my latest lynda title, Photos for macOS Essential Training

You can share your thoughts at the TDS Facebook page, where I'll post this story for discussion.
When I'm out in nature taking pictures, one of the things that I look for are compositions for my fine art greeting cards. I've found that simple, elegant images make are perfect for printing on card stock.

Fine-Art-Card.jpg Washed up Bat Star on a beach in Pacific Grove, CA. Photo and card design by Derrick Story.

I add to the challenge by resisting the urge to move elements in the photograph, and try to stick with the compositions that nature presents me. Such was the case with this series of beach portraits after a storm in Pacific Grove, CA.

I try to find 6-8 compositions that work well together so I can produce a set of cards with a theme. Once I've settled on the shots I want, I design the cards in Photos for macOS, using the variety of templates and tools available in that app.

Then I can send off an order for the cards, or I can print them myself using Red River Paper greeting card stock. (I show how to do this in my latest book, The Apple Photos Book for Photographers).

Regardless of how you output, keep in mind that capturing these elegant, natural compositions when exploring the great outdoors can help you produce some handsome greeting cards when you return home.

Book or Videos: Photos for macOS

Explore the world of modern photography with my The Apple Photos Book for Photographers that features insightful text and beautiful illustrations.

And if you'd like to cozy up to a video at the same time, watch my latest lynda title, Photos for macOS Essential Training

You can share your thoughts at the TDS Facebook page, where I'll post this story for discussion.

This is The Digital Story Podcast #568, Jan. 24, 2017. Today's theme is "Why Churchill's Portrait was Burned." I'm Derrick Story.

Opening Monologue

When a subject allows us to photograph them, they are putting their hearts in our hands. And the decisions that we, the photographer, make in those moments together bear great weight on the final outcome. Is our goal to solely please the subject? Do we have a responsibility to integrate our own artistic vision into the work? Or should we ignore the desires of others and portray what we believe to be honest? I grapple with these questions in today's show.

Why Churchill's Portrait was Burned

blazing-fire.jpg

For Winston Churchill's 80th birthday, House of Commons and House of Lords commissioned a formal portrait by modern painter Graham Sutherland. The painting showed Churchill seated in a chair with his hands resting on its arms with him slightly slumped and portrayed in dark wintery tones.

Churchill hated the painting. Sutherland argued that he had painted what he honestly saw. During its public unveiling, Churchill quipped that it was, "a remarkable example of modern art."

The painting was never hung in public. And as the story goes, it was hidden away in the cellar of their Chartwell estate... until in the middle of one unparticular night, it was smuggled out and burned.

Years later, when Sutherland learned of the destruction of his work, he is claimed to have said, "without question an act of vandalism."

So who was right? Winston Churchill, who had tried to guide the artist toward a more flattering portrayal, but upon failing to do so, chose to destroy the work? Or Graham Sutherland, who despite pressure from his subject, stuck to his beliefs that his responsibility was to show the famous statesman as he truly looked in his 80th year?

I think the question comes down to what is honesty, and does it only exist on the exterior? Or should we as artists consider the human being beneath the surface when making our choices on how to portray them?

In the News

Fujifilm X100F steps up to 24.3MP, adds AF joystick. Fujifilm is taking the wraps off the X100F, the fourth generation of its popular enthusiast-focused compact series. It updates the house that the X100 built with a 24.3MP X-Trans III APS-C sensor and X-Processor Pro image processor borrowed from the X-T2.

Changes can also be seen on the top and rear panels of the camera - notably, an AF joystick makes its first appearance on the X100 series. Other controls have been shifted to the right of the LCD, and up top the shutter speed dial has been modified to include ISO controls. A front control dial has also been added. The hybrid viewfinder has also been updated, and now offers image magnification when using the electronic rangefinder mode.

The Fujifilm X100F will be available February 16th in black or silver for $1299/�1249. (As reported by DPReview.com).

87% of UK Freelance Photogs Asked to Work for Free in 2016; 16% Said Yes

The issue of businesses asking photographers to work for free has been a hot issue in recent years, and now we have some citable statistics that shed more light on it. According to a new study in the UK, 87% of photographers were asked to work for free in 2016, and 16% said yes.

The research was conducted by the UK startup Approve.io, which surveyed 1,009 part-time and full-time freelancers in the UK who have taken on freelance contracts over the past 5 years.

The study "reveals an alarming trend for corporate 'entitlement' when it comes to how freelance professionals are treated," Approve.io tells PetaPixel.

You can read the entire story on Petapixel.

Updates and Such

The registration forms for the The Chicago to New Orleans Rail Adventure - June 26-29, 2017 - have been sent out to members of our reserve list. This workshop begins the day after Out of Chicago concludes. So if you're going to OOC, just add Sunday night to your hotel reservation if you plan on joining us. You can still get on the reserve list for this event, and for our others, by visiting the TDS Workshops Page and using the Send Me Info form on that page.

Big thanks to all of our Patreon members! I was able to pay for the podcast server and the backup system from last month's pledges. Your contributions are making a positive impact.

B&H and Amazon tiles on www.thedigitalstory. If you click on them first, you're helping to support this podcast. And speaking of supporting this show, and big thanks to our Patreon Inner Circle members.

And finally, be sure to visit our friends at Red River Paper for all of your inkjet supply needs.

See you next week!

More Ways to Participate

Want to share photos and talk with other members in our virtual camera club? Check out our Flickr Public Group. And from those images, I choose the TDS Member Photo of the Day.

Podcast Sponsors

MindShift Gear - MindShift Gear is a group of committed professional photographers and product designers who support conservation and protection of our natural resources and planet.

Red River Paper - Keep up with the world of inkjet printing, and win free paper, by liking Red River Paper on Facebook.

The Nimbleosity Report

Do you want to keep up with the best content from The Digital Story and The Nimble Photographer? Sign up for The Nimbleosity Report, and receive highlights twice-a-month in a single page newsletter. Be a part of our community!

Want to Comment on this Post?

You can share your thoughts at the TDS Facebook page, where I'll post this story for discussion.
Crashing Waves with Luminar and Photos

The long overdue storm season in California is producing dramatic landscapes once again. I made a stop in Monterey yesterday for a bite to eat and to capture some of the action with my Olympus OM-D E-M5 Mark II.

Crashing Waves

Originally I opted for video to record the tumultuous sea. But then I wanted a few stills too. So I switched to RAW mode and worked with the Panasonic Lumix G II 20mm, F1.7 lens. I kept the shutter speed at a conservative 1/60th of a second to capture a little motion with the crashing waves.

You might think at this point that I would open the RAW in Lightroom or Capture One Pro. But I'm on vacation and wanted to play. So the images went into Photos for macOS. Then I used the Luminar editing extension to pull the drama that I knew lurked in that RAW file. And Luminar did just that.

Want to see the difference? Take a look at this before/after view in the Luminar editing extension.

luminar-edit.jpg

Back in Photos, I added a dash of Brilliance, then viewed the image in full screen mode on my MacBook Pro. Lovely. So wonderful to have this weather in California again...

Book or Videos: Photos for macOS

Explore the world of modern photography with my The Apple Photos Book for Photographers that features insightful text and beautiful illustrations.

And if you'd like to cozy up to a video at the same time, watch my latest lynda title, Photos for macOS Essential Training

You can share your thoughts at the TDS Facebook page, where I'll post this story for discussion.
If I were to switch right now, a serious contender would be the Fujifilm X-T20 mirrorless camera. I'll start by listing its impressive specs (including the $899 price tag), then I'll get to the real temptation.

Fuji-X-T20-Front.jpg

Terrific Baseline Features

  • 24.3MP APS-C X-Trans CMOS III Sensor
  • X-Processor Pro Image Processor
  • 3.0 inch 1.04M-dot Tilting Touchscreen LCD Monitor
  • 2,360K-dot OLED color viewfinder
  • UHD 4K Video Recording
  • Continuous Shooting Up to 5 fps
  • AF-C Custom Settings
  • Interval timer shooting for time lapse photography
  • Built-in WiFi for shooting from your smartphone
  • Wireless backup of data to a computer via WiFi
  • Weather and dust resistant

Clearly, this is a camera that can get the job done. But what pushes me over the edge is both the X-T20's button and dial layout, combined with its artistic film simulation modes.

Fuji-X-T20-top.jpg

I think Fuji's top deck is one of the best in the business. And for those of us who like a very tactile experience while shooting, these cameras are a delight.

Then there are the film simulation modes and grain control. Another thing that Fuji knows (very, very well) is film. And their evolution into digital imaging has retained the knowledge they gained during the analog years.

The Fujifilm X-T20... "also has a Grain Effect function for reproducing distinctive graininess seen in photographs taken with film cameras. The function can be set to Strong or Weak, and can be combined with any of the Film Simulation modes. You can easily obtain the look of film-based photos, with the effect most obvious when the image is printed out."

Combine this with the new ACROS Film Simulation mode (added to the already excellent simulated film emulsions), and I could truly extend my analog endeavors, even when it wasn't practical to shoot film.

Like I said, this is one tempting camera.


Nimble Photographer Logo

The Fujifilm X-T20. has a high Nimbleosity Rating. What does that mean? You can learn about Nimbleosity and more by visiting TheNimblePhotographer.com.

Want to Comment on this Post?

You can share your thoughts at the TDS Facebook page, where I'll post this story for discussion.
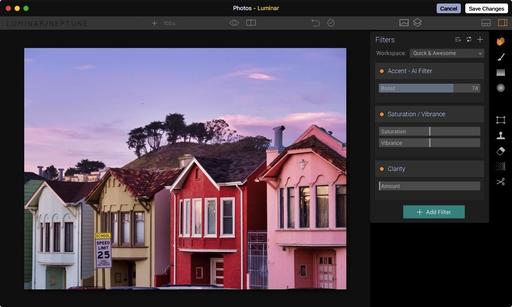
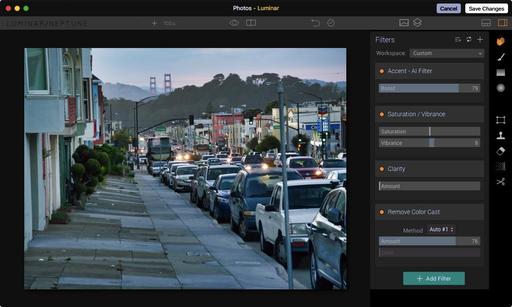
I love the RAW editing tools in Capture One Pro. But there are times when I want to tap the magic of Luminar and its extensive set of filters. And I don't want to compromise my digital asset management system to do so. As a result, I needed to figure out how to get these two kids to play together. And that's what I'm going to show you right now.

luminar-in-c1p.jpg Image edited in Luminar, then returned to Capture One Pro for asset management. Photos by Derrick Story.

Going from Capture One Pro to Luminar

Since you're not going to get a clean roundtrip from Capture One to Luminar then back, the next best thing is to use the Open With... command in Capture One (right-click on the image and choose Open With... from the popup menu). Luminar can process your RAW files, so you're sending over a high quality image for editing. Select Luminar from the popup menu, and the image will open in the app.

open-with-command.png

Edit in Luminar

Edit as you normally would in Luminar, using the filters and presets to achieve the look you want. Once the image is ready to send back to Capture One, choose the Export command in Luminar, File > Export. This is the point where you have to think about your file organization.

Sending Back to Capture One Pro

My recommendation is to set up a standard receiving folder for the Luminar images, then import from that folder back into Capture One. Mine is a referenced system, leaving the images where they are and pointing the Capture One database to them. I tend to send back full sized Jpegs to keep file size reasonable. But you can choose Tiffs or another format, if you wish, during the export process.

before-after.jpg The before and after for this image in Luminar.

I add the word Luminar to the file name when exporting it, so I will know a bit about the picture's history when reviewing it in the Capture One catalog. Since the file name for the edited image is the same as the original, except for having Luminar at the end, the picture shows up in the catalog next to the original.

image-in-c1p.jpg Luminar image back in Capture One Pro for asset management.

All my IPTC and EXIF metadata is intact, and I now have another powerful option for working on my images stored in Capture One. If I do a lot of work to the shot in Luminar, multiple layers for example, I may also want to save the image as a separate Luminar file so I can go back and pick up my work at a later time. I can always export the updated version into Capture One Pro for management with the others.

Haven't tried Luminar? You can download a free trial here.

More Capture One Pro Tips and Techniques

Improve your skills by watching Capture One Pro Essential Training now available on lynda.com. More than 5 hours of tips, tricks, and techniques. Plus many free movies using advanced techniques.

I've also created a dedicated Capture One Pro Training page on The Digital Story. You can follow all of the tips and techniques that I publish in one convenient spot.

Thinking About Making the Transition from Aperture or Lightroom? - Download my free eBook titled, Rocky Nook's Guide to Moving to Capture One Pro. I show you the steps to create a test library, then build the foundation for a smooth transition to Capture One Pro.

Want to Comment on this Post?

You can share your thoughts at the TDS Facebook page, where I'll post this story for discussion.
That innocent looking Preview app on your Dock can handle so many photography tasks that we sometimes forget all the things that it can do... such as digitize a snapshot in 3 easy steps.

Just make sure your Mac and Multi-Functional Printer are on the same network. Put the snapshot on the glass scanning surface, then fire up Preview.

01-Preview.png Step 1 - File > Import from Scanner.

Go to File > Import from Scanner. You should see your device online. Select it.

02-Scanning.jpg Step 2 - Choose your settings.

The scanner should begin to generate a preview for you. If you don't like what you see, such as wanting to make an adjustment or repositioning the snapshot on the glass, do so, then click the Overview button to generate another preview.

Now you can choose your settings such as B&W or Color, DPI (I like 600), Auto Selection (easy way to scan just the image and not the entire surface), Format (Jpeg is the most common), and any image correction necessary. Once you've set those, click on the Scan button (see figure 2).

03-SaveImage.jpg Step 3 - Save the image.

Soon, your scanned image will popup in Preview ready for you to name it and save to your hard drive. Or, if you wish, you can print the scanned file, thereby making a semi-instant duplicate of it. (And don't forget to add the file to your photo management software for cataloging.)

Book or Videos: Photos for macOS

Explore the world of modern photography with my The Apple Photos Book for Photographers that features insightful text and beautiful illustrations.

And if you'd like to cozy up to a video at the same time, watch my latest lynda title, Photos for macOS Essential Training

You can share your thoughts at the TDS Facebook page, where I'll post this story for discussion.