Recently in Photography

  Page 126 of 384 in Photography  

Olympus has packed a lot of technology into its smallest OM-D. But what's improved over its award-winning predecessor? Let's take a look.

e-m10Mk2-angled.jpg

  • Upgraded image stabilization: 3-axis to 5-axis, 4 EV compared to 3.5 EV (the E-M5 Mark II has 5 EV steps).
  • Added electronic shutter to complement the mechanical shutter.
  • 8.5 fps sequencial shooting compared to 8 fps.
  • Upgraded EVF to 2,360K dots with OLED compared to 1,440K dots in previous model.
  • Full HD upgrade to 60P/50P/30P/25P/24P from straight 30P.
  • Two new Art Filters bringing the total to 14.
  • New AF Targeting Pad.
  • Improved time lapse movie mode to output to 4K, compared to HD previously.
  • Added Keystone Compensation like on the E-M1 and E-M5 Mark II

This Micro Four Thirds camera looks like a great value at $649. You can hear more about this robust entry into the mirrorless market by listening to this week's TDS podcast.


twitter.jpg Follow me on Twitter

This week on The Digital Story Photography Podcast: The Inside Scoop on the Olympus OM-D E-M10 Mark II, Eye-Fi for WiFi Cameras? Apple RAW Update - all of this and more on today's show with Derrick Story.

Weekly Update - "Modulo Camera Promises Unlimited Dynamic Range" The Photography Blog reports: "The new solution, developed by MIT researchers, gets around the limited well capacity of conventional sensors by resetting the sensor capacitors whenever the 'well' gets full, and uses an inverse modulo algorithm to calculate how much light the reset sensors took in. This algorithm recovers a much larger dynamic range. For example, if a certain camera sensor can record eight bits of information, then when those eight bits are filled, the capacitor will be reset to zero. The number of resets is recovered by the algorithm, which then calculates the relative brightness of each area of the photo. Interested readers are encouraged to visit the project's website and read the technical paper published by the researchers."

In other news, the Phoblographer posts: Reports of Sony's New APS-C E Mount Camera Boast 4K 30fps Stills - "The Sony A6000 is a great camera, but apparently there is something coming that won't succeed the camera but instead live above it as the company's flagship APS-C E mount camera. Mirrorless Rumors states even more beyond what they were telling us, and this time around these reports claim that the camera will have a 2.8 million dot EVF and many more video-centric features. Besides mic input support, the camera is said to have a 30 fps 4K photo mode similar to what Panasonic offers with their latest cameras. Plus, even more video-centric features will be added according to what the reports state."

e-m10-mark2-top.jpg

Story #1 - The Inside Scoop on the Olympus OM-D E-M10 Mark II

Olympus has upgraded both the interior and exterior of the very popular OM-D E-M10. The new model still retains the 16MP Four Thirds sensor and very compact body. Beyond that, however, the dials and body have been upgraded with premium components. And under the hood, we see better image stabilization and more versatile movie options. Here's an overview of the improvements.

How is it different than the original?

  • Upgraded image stabilization: 3-axis to 5-axis, 4 EV compared to 3.5 EV (the E-M5 Mark II has 5 EV steps).
  • Added electronic shutter to complement the mechanical shutter.
  • 8.5 fps sequencial shooting compared to 8 fps.
  • Upgraded EVF to 2,360K dots with OLED compared to 1,440K dots in previous model.
  • Full HD upgrade to 60P/50P/30P/25P/24P from straight 30P.
  • Two new Art Filters bringing the total to 14.
  • New AF Targeting Pad.
  • Improved time lapse movie mode to output to 4K, compared to HD previously.
  • Added Keystone Compensation like on the E-M1 and E-M5 Mark II

Fairly Incredible Feat of Technology

Olympus was able to squeeze 5-axis image stabilization into a super compact body while still keeping the popup flash. I think the flash is important, not only for spontaneous fill light, but to serve as the wireless controller for off-camera lighting.

Additionally, the sequential frame rate is now a very respectable 8.5 fps. And Olympus has added the clever AF Targeting Pad that allows you to use the LCD to control AF functionality.

What the E-M10 Mark II Doesn't Have

The new model doesn't include weather sealing or 40MP High Rez Shot. Also, movie recording is staying at HD - no 4K video. But the price tag is also $649 compared to more than a thousand for its big brothers. In my estimation, that's a lot of camera for the money.

Story #2 - "Even if You Have WiFi, Eye-Fi Can be Useful"

Here's why I sometimes use Eye-Fi cards in my cameras that have built-in WiFi. You can read more about this by visiting c't Digital Photography Magazine.

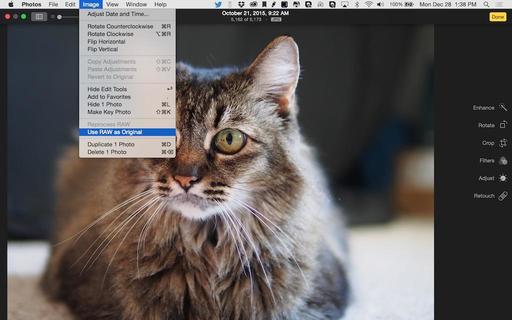
Story #3 - Apple adds support for 6 new cameras in its latest Digital Camera RAW update (via Imaging-Resource.com)

Apple has released the latest version of Digital Camera RAW for OS X Yosemite, adding support for half a dozen cameras. The 6.06 update now supports RAW photos from the following cameras:

  • Canon PowerShot G3 X
  • Leica Q (Typ 116)
  • Panasonic LUMIX DMC-GX8
  • Sony Alpha A7R II
  • Sony Cyber-shot DSC-RX10 II
  • Sony Cyber-shot DSC-RX100 IV

The update can be downloaded by visiting the 'Update' tab in the Mac App Store.

Virtual Camera Club News

New Article from Red River Paper - Epson SureColor P800 Reviewed. The Epson SureColor P800 became available in June, 2015. It is the successor to the Epson Stylus Pro 3880. The P800 is a 17" wide professional and prosumer level photo and fine art inkjet printer featuring nine individual ink cartridges with the "UltraChrome HD" pigment ink system. Like the venerable UltraChrome K3 system, the new inkset uses five color ink cartridges along with three black ones.

Fall Color with Safari West: October 23-25, 2015 - Sonoma County has rolling hills covered in vineyards, beautiful trees, and gorgeous blue skies. What a prefect place to shoot Fall color and bolster your landscape library. But there's more. We include environmental portraiture with a professional model, and an exclusive African wildlife photo adventure at Safari West, led by a professional photographer, plus a few surprises. This is our longest running workshop of the season, and for good reason. Two full days plus pre-workshop reception, breakfast and lunch, excellent swag, professional model, private Safari West adventure with a pro photographer guide - all included for just $599.

Thanks to everyone who recently reviewed the TDS Podcast in iTunes!

BTW: If you're ordering through B&H or Amazon, please click on the respective ad tile under the Products header in the box half way down the 2nd column on thedigitalstory.com. That helps support the site.

Download the Show

In addition to subscribing in iTunes, you can also download the podcast file here (28 minutes - MP3 version). You can support this podcast by purchasing the TDS iPhone App for only $2.99 from the Apple App Store.

More Ways to Participate

Want to share photos and talk with other members in our virtual camera club? Check out our Flickr Public Group. And from those images, I choose the TDS Member Photo of the Day.

Podcast Sponsors

lynda.com - Learn lighting, portraiture, Photoshop skills, and more from expert-taught videos at lynda.com/thedigitalstory.

Red River Paper -- Keep up with the world of inkjet printing, and win free paper, by liking Red River Paper on Facebook.

SizzlPix! - New 5k Ultra High Definition SizzlPix output for your photography. You've never seen your imagery look so good. SizzlPix.com.

Want to Comment on this Post?

You can share your thoughts at the TDS Facebook page, where I'll post this story for discussion.

Frame Your Shot (When Appropriate)

Photography is as much about remembering what we've already learned, as it is about trying new techniques. One of the first compositional tips most of us were taught is framing the shot. It's not appropriate for every photo, obviously, but sometimes it really helps transform a rather bland scene into something a bit more interesting.

frame-your-shot-web.jpg

For example, if you need to take a picture for real estate work, or just to show someone a location, this is the perfect time for framing. Chances are the subject isn't that scintillating, and a nearby tree can spice up the shot.

Just something to keep in your back pocket as you're out exploring the world with your camera.

Want to Comment on this Post?

You can share your thoughts at the TDS Facebook page, where I'll post this story for discussion.
Old School Flash Rig

My assistant Leah had been hired to photograph one of those challenging midday backyard weddings. She was very nervous about the contrasty lighting.

I told her, "Worry not." We'll get you fixed up with a flash rig that I've used since the film days, and it's still amazing today. I use a Stroboframe Quick Flip 350 Flash Bracket ($20), with a Nissin Digital i40 Speedlite Flash ($269), and a Canon OC-E3 Off Camera Shoe Cord 3 ($69) - although you can get third party versions for as little as $19.

Here are the basic components shown as individual pieces. The Quick Flip bracket works for both horizontal and vertical shots. When you turn the camera to portrait position, just "flip" the bracket arm. The flash is always positioned over the lens.

P8218549.jpg

I set the flash to TTL, dial down Flash Exposure Compensation 2/3rds of a stop or so, and connect all the parts. I told Leah to use the flash outside and in. In the backyard it helped tame nasty shadows. Inside, it helped illuminate the happy couple. And because the flash is away from the lens on a bracket, she never had to worry about red eye or unsightly shadows cast on the wall.

Here's a before and after comparison. The image on the left is with fill flash, and on the right, without. Quite a difference!

with-and-without.png Photos by Leah Gerber.

Regardless of the type of cameras we have, photography is photography. And taming contrasty light is essential for weddings and events.

More Photo Technique

You can see this technique, and more, in action by watching my Fill Flash Portraits title on lynda.com.

Want to Comment on this Post?

You can share your thoughts at the TDS Facebook page, where I'll post this story for discussion.

I need lighting for product shots, macro work, video interviews, and gosh-knows-what when I'm on the go. But my camera bag has only inches of space to spare. So I've devised a kit using the Ikan iLED-MS Micro Spot On-Camera Light, a film can diffuser, and a Joby GorillaPod Tripod. The entire kit weighs less than 7 ounces, yet provides powerful, flexible, diffused lighting.

portable-lighting-rig.jpg The Ikan LED light with DIY film can diffuser and Joby Tripod. Photos by Derrick Story.

The Ikan light by itself is a nifty unit. It's a lightweight, cool-to-the touch, daylight-balanced, LED about the size of a small flashlight (5" long). The front of the light incorporates a lens system that creates a 30 Degree beam angle providing a directional light well suited for on-camera use or also as a kicker light.

The unit features a discrete on/off switch and is dimmable from 100 to 10 percent on using an integrated thumb wheel on the side. It also includes a built-in diffuser panel, CTO filter for balancing with ambient indoor lighting, and a set of barn doors. Everything folds up neatly. You can recharge it via any USB charger you already have in your bag.

I was impressed with the built-in diffuser panel that simply flips over the LED bulb. But there were instances when I wanted even a softer light. So I retrofitted a FujiFilm 35mm canister to create a gentle light for macro and product photography.

diffuser-with-gaffers.jpg FujiFilm 35mm canister with white gaffer's tape for a snug fit.

The film can mounted pretty well in the LED light, but it was just a tad loose. So I wrapped a few strips of white gaffer's tape to create a snug fit.

close-up-rig-lighting.jpg

The modified light with the film can diffuser works great for close up work. And since I can adjust the output from 10-100 percent, I can get just the look I want. The entire kit weighs just ounces and fits nearly anywhere in my camera bag. In fact, it's so nimble, I may set up a second kit so I can use two-light schemes.


Nimble Photographer Logo

The Ikan iLED-MS Micro Spot On-Camera Light kit has a high Nimbleosity Rating. What does that mean? You can learn about Nimbleosity and more by visiting TheNimblePhotographer.com.

Want to Comment on this Post?

You can share your thoughts at the TDS Facebook page, where I'll post this story for discussion.
This week on The Digital Story Photography Podcast: 10 Pro Posing Tips from Roberto Valenzuela, Is Now the Time to Buy the Panasonic GM5?, Hair light Hair Light, Epson SureColor P800 Reviewed - all of this and more on today's show with Derrick Story.

Weekly Update - "Nikon P900 Review" (Phenomenal zoom range from 24mm wide-angle to 2000mm super-telephoto). Imaging Resource reports: "All told, this camera is simply a great value. Yes, it has obvious limitations and trade-offs that accompany any long-zoom fixed lens camera as of this writing, but it does enough well at this price to warrant the "great value" seal from us here at IR. If you're shooting wildlife or similar outdoor subject matter and need the best zoom range currently offered in an all-in-one package at a great price, this is the best option out there and certainly earns a Dave's Pick.."

In other news, PetaPixel asks: "Is Shooting 4K Resolution Worth It for Web Video?" "So if you're producing web video, you may actually be better served by a superior 1080p camera this time," Linus concludes, "because lenses, encoding settings, codecs, sensor size, and sensor quality all impact the finished product." However, not everyone necessarily agrees with what he has to say about the matter.

posing-tips.jpg

Story #1 - 10 Posing Tips from Roberto Valenzuela

I sat in on Roberto's class at Photoshop World in Las Vegas. And I have some wonderful posing tips to share with you from his session.

  • Don't fight the body.
  • Don't move limbs past their threshold.
  • Do a plane check. What does the camera see first.
  • Eyes looking away allow the viewer to enjoy the photo easier.
  • Straighten the spine right before taking the shot - 5 second rule.
  • Fingers need to be pointing the same way.
  • Keep your energy up, so they will have energy.
  • Right angles are strength, oblique angles are elegant.
  • Make a fist, then relax it. Use the relaxed fingers for the pose.
  • Elbows pointing down, not toward the camera.

If you want more detail about these tips, check out his "Perfect Posing" article in the Summer edition of c't Digital Photography Magazine

Story #2 - "Is Now the Time to Buy a Panasonic GM5?" -

There's been a $200 price drop on the Panasonic Lumix GM5 Mirrorless Micro Four Thirds Camera with 12-32mm Lens, bringing the kit price down to $698. The 12-32mm Mega OIS zoom is worth $350 by itself. Just to refresh, here are the highlight features of this camera:

  • 16MP Digital Live MOS Sensor
  • 3.0" 921k-Dot LCD and 1,166k-Dot EVF
  • Full HD 1080p Video at 60 fps
  • Contrast-Detection Autofocus
  • Built-in Wi-Fi Connectivity
  • Highly Compact Magnesium Alloy Body
  • External Flash Hot Shoe & Included Flash

In all honesty, it's one of the nice super compacts you can buy. DPReview gave it a Silver Award. And being able to use your interchangeable MFT lenses with it... nice combo. I discuss in today's first feature story.

Story #3 - Are You Lighting the Hair as Well as the Face?

When we're shooting portraits, most photographers take great care with creating a flattering light on the subject's face. But I've learned over the years that adding light to the hair really makes these images pop. Here are some of my favorite techniques.

Story #4 - From the Screening Room - Black and White with Lightroom and Photoshop with Bryan O'Neil Hughes.

You can watch Bryan in action by visiting the TDS Screening Room at lynda.com. While you're there, you can start your 7 day free trial to watch all of Bryan's movies, plus every other title in the library.

Virtual Camera Club News

New Article from Red River Paper - Epson SureColor P800 Reviewed. The Epson SureColor P800 became available in June, 2015. It is the successor to the Epson Stylus Pro 3880. The P800 is a 17" wide professional and prosumer level photo and fine art inkjet printer featuring nine individual ink cartridges with the "UltraChrome HD" pigment ink system. Like the venerable UltraChrome K3 system, the new inkset uses five color ink cartridges along with three black ones.

Fall Color with Safari West: October 23-25, 2015 - Sonoma County has rolling hills covered in vineyards, beautiful trees, and gorgeous blue skies. What a prefect place to shoot Fall color and bolster your landscape library. But there's more. We include environmental portraiture with a professional model, and an exclusive African wildlife photo adventure at Safari West, led by a professional photographer, plus a few surprises. This is our longest running workshop of the season, and for good reason. Two full days plus pre-workshop reception, breakfast and lunch, excellent swag, professional model, private Safari West adventure with a pro photographer guide - all included for just $599.

Thanks to everyone who recently reviewed the TDS Podcast in iTunes!

BTW: If you're ordering through B&H or Amazon, please click on the respective ad tile under the Products header in the box half way down the 2nd column on thedigitalstory.com. That helps support the site.

Download the Show

In addition to subscribing in iTunes, you can also download the podcast file here (29 minutes - MP3 version). You can support this podcast by purchasing the TDS iPhone App for only $2.99 from the Apple App Store.

More Ways to Participate

Want to share photos and talk with other members in our virtual camera club? Check out our Flickr Public Group. And from those images, I choose the TDS Member Photo of the Day.

Podcast Sponsors

lynda.com - Learn lighting, portraiture, Photoshop skills, and more from expert-taught videos at lynda.com/thedigitalstory.

Red River Paper -- Keep up with the world of inkjet printing, and win free paper, by liking Red River Paper on Facebook.

SizzlPix! - New 5k Ultra High Definition SizzlPix output for your photography. You've never seen your imagery look so good. SizzlPix.com.

Want to Comment on this Post?

You can share your thoughts at the TDS Facebook page, where I'll post this story for discussion.

P8170284.jpg

At the last TDS Photography Workshop I was introduced to the Neewer Black Metal Quick Release L-Plate Bracket Grip ($28) by one of the participants, Kevin Miller. He was sporting one on his black E-M10.

The integrated Arca-Swiss mounting plate that comprised the bottom and side of the grip was just what I was looking for. I have a similar rig for my E-M5 Mark II, but unlike that accessory that cost me $149, the Neewer is only $28. And it's terrific.

P8170259.jpg Neewer grip with side plate attached. Photos by Derrick Story.

The side plate is removable, so if you don't need a quick release for the vertical position, you can unscrew it, as I normally do. (See top photo for without, and above image for with.) Regardless of what you do on the left side, the right side grip is very comfortable, especially for larger hands that like a little extra real estate to hold on to. Smaller hands, however, might not like having to reach back a bit with the index finger to press the shutter button. You'll have to try it to determine for yourself.

P8170262.jpg

The bottom features an opening that allows you to change battery and memory card with the grip attached. There's also a tripod socket for those situations when you're not using Arca-Swiss. And a nice touch is the mounting screw that accepts both an allen wrench (included) or a slot for coin tightening. So if you misplace your allen wrench, then you can still attach and remove the accessory.

P8170278.jpg

The grip's design works well with the E-M10. And the aluminum material is light and durable. And to tell you the truth, after having the grip on and shooting with it, the camera feels a bit awkward without it.


Nimble Photographer Logo

The Neewer Black Metal Quick Release L-Plate Bracket Grip has a high Nimbleosity Rating. What does that mean? You can learn about Nimbleosity and more by visiting TheNimblePhotographer.com.

Want to Comment on this Post?

You can share your thoughts at the TDS Facebook page, where I'll post this story for discussion.
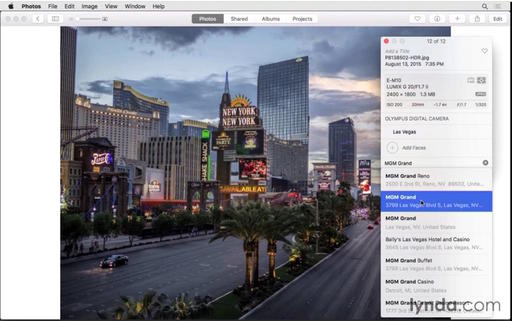
When Adobe introduced Photo Merge to Lightroom CC, it improved my high dynamic workflow. Even though I like the occasional over-the-top HDR image, generally speaking, I'm just looking to make a better photograph. If that's your intent also, here's a simple workflow that you can put into practice today.

Identify the HDR Candidate. This isn't something you want to do with every image. Practice spotting scenes where expanding the dynamic range will improve the photograph. My favorite is a twilight sky with foreground that's a bit to dark.

las-vegas-no-hdr-web.jpg Las Vegas at Twilight - Here's a perfect HDR candidate. Nice sky, but foreground is backlit and too dark. Wouldn't it be nice to have both properly exposed? Photos by Derrick Story.

Enable auto-bracketing on your camera with a -2, 0, +2 sequence. You only need 3 frames for Lightroom's Photo Merge. If two stops are too extreme for you, you can use -1.5, 0, +1.5. I recommend that you shoot in RAW. I have my Olympus OM-D E-M5 Mark II programmed so I can turn this off an on with the HDR button on the top deck.

Process the 3 Frames in Lightroom. Load the files into Lightroom CC, select the 3 you want to process, then choose Photo > Photo Merge > HDR. Lightroom will preprocess the images for you. I usually check the boxes next to Auto Align and Auto Tone. For most of my sequences, Low deghosting works just fine.

las-vegas-lr-hdr-web.jpg Improved scene created by combining 3 frames using Photo Merge in Lightroom CC.

Adding Finishing Touches in the Develop Module. Now that you have a high resolution RAW merge, finish off the shot in Lightroom's develop module. The file should respond well to your exposure adjustments.

That's all there is to it! If you want to learn more about this process, download my free eBook, HDR & Panoramas with Photo Merge in Lightroom CC, available at the Rocky Nook site.

Want to Comment on this Post?

You can share your thoughts at the TDS Facebook page, where I'll post this story for discussion.
I've heard people say over and over that they don't know what to do with their hands during a portrait shoot. I don't want them to worry, yet that's a concern for photographers too. Natural hand gestures are an important finishing touch for these compositions.

D_Story IMG_3706.jpg Photo by Derrick Story.

This topic was addressed beautifully today in Roberto Valenzuela's Masterful and Graceful Posing session at Photoshop World in Las Vegas. I have three tips to pass along from that class.

First, to get a natural hand gesture, have the subject make a fist, hold it for a few seconds, then relax the grip. As the fingers unfold, reposition the hand to the desired position for the portrait. The hand will look more elegant.

Second, remember to keep the fingers aligned in the same direction. If the hands are spread wide with digits pointing every which way, that will cause a distraction in the composition. The thumb doesn't have to follow exactly, but keep an eye on it so it appears relaxed.

And finally, keep those elbows pointing down or away from the camera. Too often photographers let an elbow aim directly at the lens. This will be unsettling to the viewer.

You can read more about Roberto's posing tips in the latest issue of c't Digital Photography Magazine. His article, Perfect Posing is featured on the cover.

Want to Comment on this Post?

You can share your thoughts at the TDS Facebook page, where I'll post this story for discussion.
BW Sunrise Las Vegas

The world looks much different in Black & White, especially the normally colorful Las Vegas landscape. Here's a morning shot from 21 stories high, with the airport and mountain range in the background.

sunrise-vegas-bw-web-crop.jpg Captured with an Olympus OM-D E-M10, 17mm f/1.8 lens. Photo by Derrick Story.

Want to Comment on this Post?

You can share your thoughts at the TDS Facebook page, where I'll post this story for discussion.