Recently in Photography

  Page 122 of 383 in Photography  

Version 5.4.7 of EyeFi Mobi is also compatible with more than 50 WiFi enabled cameras. This means that you can integrate image transfer from older models (without WiFi using the Mobi card) and newer models (with built-in WiFi) using just one app.

eyefi-camera-import.jpg

In my testing, the system works, but there are a few details you should be aware of. The options are not the same for WiFi cameras as they are for the latest Eyefi Mobi Pro card. The most notable changes are that with camera WiFi, you don't have the selective transfer option, and if you shoot RAW+Jpeg, both files are sent to your mobile device.

For my workflow, this is a big problem. I want to decide which images are transferred to my mobile device, as I can with the EyeFi Mobi Pro. Plus, I need to shoot RAW+Jpeg, but I only want the selected Jpegs to be delivered wirelessly.

So the bottom line is, yes there are over 50 cameras that can send images to the EyeFi Mobi app, but you don't really have any control over that process. Once you connect the two devices, pictures just start streaming to your smartphone or tablet.

There might be some situations where this isn't a problem, and you could take advantage of all your cameras transferring all their images to one location. But for me, I still need the selective transfer of Jpegs only, for the app to be useful with my WiFi cameras.

Want to Comment on this Post?

You can share your thoughts at the TDS Facebook page, where I'll post this story for discussion.
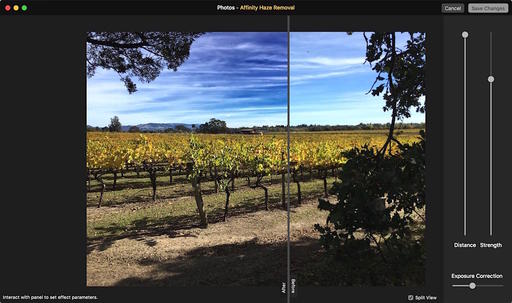
Lightroom 2.0 for the iPhone and iPad include the newish Dehaze feature that made a big splash on the desktop versions a while back. Adding Dehaze to an already set of excellent editing tools pushes Lightroom up near the top of mobile editing apps.

Dehaze Added to Mobile Lightroom Dehaze has been added to the list of editing options.

I tested Lightroom 2.0 on my new iPhone 6S. I hadn't used this app often on an iPhone previously, opting for the iPad instead, but the additional real estate of the 6S made it a reasonable experience.

A key aspect is being able to take a quality image with the 6S, edit it in Lightroom mobile, then push it up to Instagram or other social sites in a fast, seamless workflow.

Palace of Fine Arts - San Francisco CA I captured this image at the Palace of Fine Arts in San Francisco with the iPhone 6S, refined in Lightroom 2.0 using the Dehaze tool (as shown here), then pushed up to Instagram via the Open In command. Photos by Derrick Story.

Even if you don't have a Creative Cloud account, you can tap your Camera Roll with Lightroom 2.0. There's a robust set of tools there, now including Dehaze.

Want to Comment on this Post?

You can share your thoughts at the TDS Facebook page, where I'll post this story for discussion.
El Capitan After One Week

Now that I've had a chance to spend a bit more time with Mac OS X 10.11, I thought I'd share my experience with it installed on a 2012 15" MacBook Pro with Retina Display.

el-capitan-mac.jpg

In general, performance is very good. Windows open quickly, apps launch cleanly, and things feel healthy. One area that seems to move a bit slower than before is switching from one user to another. Not quite sure what's going on under the hood, but it's not a deal breaker.

Photo Apps

Photos for OS X is the snappy performer that you'd expect from an app recently written from the ground up. The new Photo Extensions are cool. And I like the addition of geotagging.

Aperture 3.6 seems to have a stay of execution on El Capitan. The only real bug I've found so far is that onscreen proofing no longer works. Other than that, all seems good. I even sent a print via WiFi to the Epson R2000 from Aperture. Beautiful!

Lightroom CC 2015.2 generally runs OK for me, but there seems to be a few lingering issues in the community. If you're noticing a performance hitch, turn off "Show 'Add Photos' Screen" via the General tab in Preferences. Some feedback from our TDS photography clan has been harsher, with reports of having to roll back to the previous version of the app. I've read online experts recommending holding off on the LR CC upgrade for the time being. You might want to research this if Lightroom is a mission critical app for you.

Audio Recording

Audio had been a far more challenging issue for me. None of my M-Audio USB interfaces are working with El Capitan. The MobilePre device just records static, and the FastTrack doesn't capture anything.

I finally found a device in my stash that would work: the MXL-TEMPO-KR Condenser Microphone with built-it USB audio interface records well with Mac OS X 10.11. This is a bit ironic for me. With all of my expensive audio recording gear, the device that saved me is a $69 condenser all-in-one device. And for some reason, it sounds better with El Capitan than it ever did before. Go figure. (I really like the snappy red and black design, however.)

Other Apps and Final Word

Everything else that I use daily: Pages, Audio Hijack Pro, Fission, Perfect Browse 9, Transmit, Moon Invoice, iA Writer... and more, all seem good

So my bottom line, after one week, is that El Capitan is a positive upgrade that appears to improve performance. The only current gotchas for me have been some audio interfaces and possible Lightroom hiccups. If either of these are important to you, you might want to wait a bit longer.

Want to Comment on this Post?

You can share your thoughts at the TDS Facebook page, where I'll post this story for discussion.
A PodSpectacular Event

I've covered a lot of ground over the course of 500 podcasts. In this week's 10th Anniversary Show, I play segments from a selection of those previous episodes and tell the stories behind them. It's a 1-hour PodSpectacular Event!

podcast-spectuclar-web.jpg Here are the original icons we were going to use for the launch of The Digital Story.

The show debuted in October of 2005. Podcasts had just been included in iTunes, and I felt like it was the time to join the party. Over the years I've learned much about broadcasting, technology, and photography. And I've shared that knowledge weekly on The Digital Story.

I hope you enjoy this 1-Hour Special Broadcast. If you've been with me for a long time, you'll recognize many of the bits and musical spots. If you're new to the show, I can't think of a better way to welcome you aboard.


Join me on my Instagram site as I explore the world of mobile photography. And now Instagram features movies too.

Episode 500 begins with a stroll down memory lane, with the first steps at Podcast 1, then wandering through events over the last decade. This special 1-hour presentation is a retrospective that you don't want to miss. So sit back and join me as we celebrate 10 years The Digital Story.

"After 499 shows, Derrick Story finally gets it right..." A Photographer in Northern California.

"The best Digital Story ever! Santa Rosa Shooter.

Show 001 - Photo Flash Techniques - Oct. 4, 2015

Compact cameras generally use "Auto Flash" as their default mode. And for most flash photography, auto gets the job done. But if you want to improve your photos, to the point where they rival professional images, spend a few minutes exploring the other flash modes on your camera.

derrick-2006-ready-to-record.jpg Derrick Story in 2006, ready to record a remote interview for the TDS podcast.

Show 069 - What's in My Bag - Feb. 13, 2007

There's no greater satisfaction than having packed the perfect camera kit for the assignment at hand. In this podcast, I discuss what was in my camera bag as I ventured out to shoot an indoor basketball game. After covering all the items in the picture above, I then solicit readers for what's in their camera bags.

Show 100 -Top Ten $100 Photo Accessories - Sept. 25, 2007

Tony writes: I can't believe it's 100 Digital Story podcasts already! Congratulations! I've been there since the beginning - I think I first heard about your podcast on the Inside Mac Radio podcast. If I remember correctly, Scott interviewed you to debut your podcast.

Anyway, it is by far my favorite podcast. Your topics are interesting, relevant, and inspiring and your delivery truly encourages the sense of community that you like. And don't worry about the production quality of those first few podcasts (I do remember those); the slickest production means nothing if you don't have good content, and good content stands on its own without any gloss. Keep up the great work!

Show 138 - Visit to the Olympic Media Center - Aug. 4, 2008

The Olympic Media Center has over 200 workstations set to help journalists share Olympic moments with the world. In this podcast, I'll provide some insights about this "city within the city," which will also be my home for the next 10 days.

Show 181 - Meet the Olympus E-P1 - June 16, 2009

State of the art technology melded with Olympus Pen tradition, the E-P1 digital camera is a new breed of DSLR featuring HD video, Raw format, micro 4/3rds, in a stylish stainless steel compact body. In this podcast, I walk you through the feature set of this latest innovation by Olympus.

Show 199 - Tom Hogarty on Lightroom 3 beta - Oct. 26, 2009

Tom Hogarty, Lightroom senior product manager, talks about Lightroom beta 3 that was announced on the eve of PhotoPlus Expo in New York.

Show 363 - No Camera for You - Feb. 19, 2013

Derrick, Very funny stuff today, absolutely loved this podcast , not that I don't like them all, I do! As well as really hitting my funny bone, it happened to be very timely to boot, as I had just yesterday finally succumbed to the wicked call of the OMD! And of course this came after weeks and weeks of finding reasons why I shouldn't buy it. It's absolutely hopeless resisting! Take care, and keep up your excellent work. -Brad

Show 434 - End of Aperture - July 1, 2014

Apple Halts Development of iPhoto and Aperture, Migrates Users to New Photos App. Aperture users have three basic options: do nothing, switch to Lightroom, or migrate to Photos. I talk about these options in today's second segment.

Thank you for being with me all these years

I can't tell you how important your support has been for the last decade. I do this show for you, and your feedback and support has fueled its evolution. Thank you so much. Let's do another 500!

Download the Show

In addition to subscribing in iTunes, you can also download the podcast file here (59 minutes). You can support this podcast by purchasing the TDS iPhone App for only $2.99 from the Apple App Store.

Our Podcast Sponsors

lynda.com - Learn lighting, portraiture, Photoshop skills, and more from expert-taught videos at lynda.com/thedigitalstory.

Red River Paper -- Keep up with the world of inkjet printing, and win free paper, by liking Red River Paper on Facebook.

SizzlPix! - New 5k Ultra High Definition SizzlPix output for your photography. You've never seen your imagery look so good. SizzlPix.com.

Zenfolio If you want your site to look as good as your photos, visit www.zenfolio.com today.

Want to Comment on this Post?

You can share your thoughts at the TDS Facebook page, where I'll post this story for discussion.
Many camera manufacturers still include PC terminals on their enthusiast and pro bodies. This gift is often overlooked by photographers, which is unfortunate, because they're truly useful.

em5mk2-front.jpg What is that connector on the upper right side of the camera? It's a female PC terminal that can be used to sync just about any flash.

I use the PC terminal for off-camera flash work when I don't need (or want) wireless. This is particularly handy at home or in the studio when I want to move the flash a few feet off the camera. Since I'm shooting in manual output mode anyway, all I need is clean synchronization between the flash and my mirrorless.

This allows me to use older flashes, or I can adapt any new flash with an inexpensive adapter. Sync speeds remain the same. I can get a clean exposure up to 1/320th of a second on my OM-D E-M5 Mark II.

flash-terminal.jpg A favorite combination for studio work - The E-M5 Mark II connected to the venerable Sunpak 383 via a sync cord that has a PC terminal on the camera end and a plug that goes directly in the Sunpak on the other. These cords are cheap and readily available.

Adorama carries a variety of these cords, such as the Adorama 15' Coiled Sync Cord, PC Male to PC Female for $10.95. How many photo accessories can you purchase for that amount? My CowboyStudio NPT-04 Wireless Triggers include a female PC connector on the receivers, so they can serve double duty (wireless and cord connected), and that set only costs $31.

And in fact, I think it's a good idea to carry a quality PC Male to PC Mail Coiled Sync Cord with you, just in case you have to connect your wireless receiver to the camera if you experience radio malfunction. And we know that never happens...

The bottom line is that whether you use PC cords as an easy home studio solution, or for emergency backups in the field, it's nice to have these options. See if your camera has a PC connector on it. And think about how you can put it to use.

Want to Comment on this Post?

You can share your thoughts at the TDS Facebook page, where I'll post this story for discussion.
Previously, you could view location data in the Info box, but that was about it. Great for iPhone pictures that already had geotags. But what about the other shots captured with regular digital cameras?

look-up-location.jpg In Photos for OS X 1.1, you can look up location data for any image and apply it to previously non-geotagged pictures.

In the version of Photos that ships with El Capitan, this all changes, giving you much more control. Here's how it works.

First, open an image in the viewer and enable the Info box (CMD-I). At the bottom of the box, you'll see text that reads, Assign a Location. Start typing the place where the picture was captured. Photos will offer locations matching your entry (see top picture). Pick one that works.

location-found.jpg Location found for this image.

In the case of this blue jay image, the photograph wasn't actually recorded at the club house as initially indicated. I saw the bird alongside a fairway quite a distance from the offices. So I clicked and dragged the pin to the actual location of the capture. It's easier to do this precisely if you use the zooming tools in the lower right corner of the location box. Pinching outward and inward works too.

adjust-location-new.jpg I dragged the pin to the proper location for this image.

If I decided that I wanted to remove the location at a later date, I can choose Remove Location from under the Image menu (Image > Location > Remove Location). I can also revert to the original location here.

There doesn't appear to be any batch processing for geotagging. But you can copy the location text and paste it in a subsequent picture. it's not super elegant, but it does save a little time.

When you export images out of your Photos library, you may want to do so without the location data. You'll find that control under the General tab in Preferences.


Get Up and Running with Photos for OS X

Want to get up to speed with Apple's latest photo management application? Then take a look at my latest online video training, Up and Running with Photos for OS X. Soon, both you, and your pictures, will be comfortable in their new home.

And don't forget about the Photos for OS X Special Feature Section on The Digital Story. It's a roundup of tutorials, videos, and articles focused on helping you master Apple's latest photo management software. You can also find it under Photography in the top nav bar.

Want to Comment on this Post?

You can share your thoughts at the TDS Facebook page, where I'll post this story for discussion.

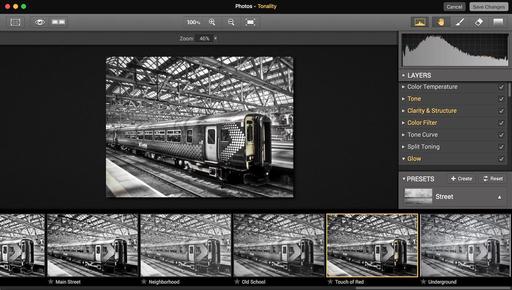
Photos for OS X now accepts Photo Extensions, and this changes everything. Out of the gate, there are four available with many more to come.

apps-for-photographers.jpg Look what's featured atop Apps for Photographers in the Mac App Store: Yes, the first wave of Photo Extensions.

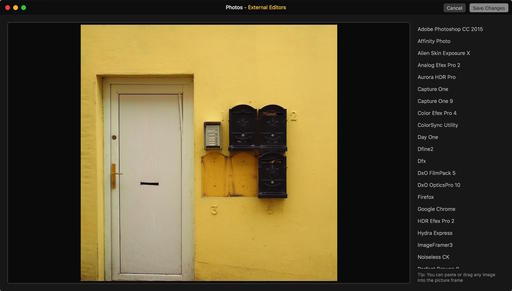
The implementation is very smooth. Now, when you edit an image in Photos, there's an additional option in the right side toolbar called Extensions. Click on it, and you'll see a popup menu listing the Extensions you have loaded. Choose one, and your Photos interface transforms into that of the Extension.

Once you finish your work in the new environment, click on Save Changes, and you're returned to the Photos interface. What's really cool is that this is a totally nondestructive workflow. You can revert back to the original photo by returning to edit mode in Photos, then choosing Revert to Original. Want to see what the master looked like? Press the M key when in edit mode.

tonality-for-photos.jpg Tonality is a B&W Photo Extension that's available right now for El Capitan Photos.

Setting up an Extension is easy. First, purchase the software from the Mac App Store and install it. Then, go to your System Preferences, click on Extensions > Photos and enable your new app. Now it will appear in the Extensions popup menu in Photos for OS X.

I'll keep you posted about new Extensions as they are available. But already, Photos for OS X is far more powerful than it was a week ago.


Get Up and Running with Photos for OS X

Want to get up to speed with Apple's latest photo management application? Then take a look at my latest online video training, Up and Running with Photos for OS X. Soon, both you, and your pictures, will be comfortable in their new home.

And don't forget about the Photos for OS X Special Feature Section on The Digital Story. It's a roundup of tutorials, videos, and articles focused on helping you master Apple's latest photo management software. You can also find it under Photography in the top nav bar.

Want to Comment on this Post?

You can share your thoughts at the TDS Facebook page, where I'll post this story for discussion.
If you're see what looks like a white screen overlay on the images in your Viewer when running Aperture 3.6 in El Capitan, turn off Onscreen Proofing (View > Onscreen Proofing). This was the case for me after my initial testing on a mid-2012 MacBook Pro 15" running Mac OS X 10.11 and Aperture 3.6.

Here's what happens with Onscreen Proofing turned on (using any of the profiles):

Screenshot 2015-09-30 13.58.37.png Thumbnail appears normal in Aperture 3.6

Screenshot 2015-09-30 13.59.17.png Viewer mode displays image with washed out appearance when Onscreen Proofing is turned on.

I'll continue to test Aperture 3.6 on El Capitan. So far, this is the first major bug I've found.

Want to Comment on this Post?

You can share your thoughts at the TDS Facebook page, where I'll post this story for discussion.
Before Upgrading to El Capitan

Over the next few days, many Mac-toting photographers will be upgrading their operating system to Mac OS X El Capitan. Before doing so, take a few minutes to prepare your machine.

el-capitan-mac.png

Test Machine

Not everyone has the luxury of more than one modern computer. But if you do, prepare your secondary machine for the upgrade first. This will give you the opportunity to test mission critical applications without disrupting your daily workflow.

A big test for many of us will be seeing how Aperture performs on the new OS. The results of that testing, and others, will determine the timing for adding El Capitan to your primary computer.

Back Up on iCloud and Hard Drives

We all know to back up our machines, nothing new there. But the transition to the new OS can be streamlined by making sure your iCloud account is up to date. This will simplify data transfer of Address Book, Calendar, Safari bookmarks, etc.

As for your photo content and documents, those should be on hard drives. Again, going back to Aperture and iPhoto, make sure those libraries are in a safe place so you have all of your options available moving forward.

From all indications, the transition from Yosemite to El Capitan should be a smooth one. Taking these few basic steps should seal the deal.

Want to Comment on this Post?

You can share your thoughts at the TDS Facebook page, where I'll post this story for discussion.