Recently in Photography

  Page 89 of 386 in Photography  

This is The Digital Story Podcast #590, June 27, 2017. Today's theme is "Out of Chicago." I'm Derrick Story.

Opening Monologue

It was the day after Summer Solstice when we touched down at O'Hare Airport. You could feel the heat seeping through the cracks in the covered walkway that connected the plane to airport. There was no mistake. It was summer and I was in Chicago. And what transpired over the next few days is the top story for today's show.

Out of Chicago

Jackson-Station-1024.jpg

Later that night I was awakened from my sleep by the sound of rain blowing hard against my window. And there was thunder as well. I had a pre-conference workshop the next morning that included a photo walk.

"What is our Plan B?" I asked myself. "I don't know," I answered.

I picked up my phone and checked the weather. The rain was predicted to stop by 8 am. And what was predicted to follow was three days of glorious spring-like weather.

"If that's true," I thought, "then we're in for a great conference." I rolled over and fell asleep again.

It was true, and we had a fantastic event. Here are some of the highlights with a few embarrassing moments mixed in.

My Favorite and Slightly Embarrassing Moments in Chicago

  • A Favorite: Catching up with Valerie Jardine (Hit the Streets podcast) about her transition away from Street Focus on TWiP.
  • Embarrassing: When I accidentally called one of my favorite people on staff Michelle when her name is really Malinda.
  • A Favorite: Watching participants in my Analog workshop try to figure out what camera the wanted to choose while they were all hidden from sight in old Crown Royal cloth bags.
  • Embarrassing: Privately swearing to conference organizer Chris Smith when he was joking with me about my needing a meal break after a very long day. He later said he didn't even remember the incident. (Nice guy!)
  • A Favorite: Finding the best street taco joint on State Street for my first lunch in Chicago.
  • Embarrassing: Not realizing that I had met Scott Wyden Kivowitz years earlier at Photo Plus Expo.
  • A Favorite: Seeing a room full of people waiting for my printing talk to begin.
  • A Favorite: All of the TDS listeners who introduced themselves to me at the conference, in restaurants, and on the streets of Chicago.

Mirrorless Panel Discussion

On Sunday I moderated a panel discussion with a terrific slate of mirrorless photographers including Giulio Sciorio, Mike Boening, and Jamie MacDonald. I thought that you might want to hear part of the discussion, so here's an excerpt for your listening pleasure where I'm talking about sensor size, then turn it over to Guido for his thoughts. After that, Jamie and Mike chime in.

Using ImageFramer 4 with Lightroom

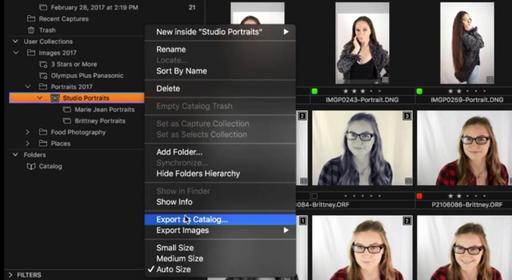
ImageFramer's Lightroom plugin is a Post-Processing Action plugin that will add itself to your Export flow. After the plugin is installed, it will be listed in the bottom-left panel of the Export dialog and a "Process with ImageFramer" section appears in the right panel, if the plugin is enabled.

To use the plugin, type the name of the template in ImageFramer that you want to use (case sensitive). During Export, after all the Lightroom adjustments are applied, ImageFramer will be launched, the image will be processed with the template and saved back into Lightroom's flow.

So, if you want to create your own greeting cards and original art from images stored in Lightroom, ImageFramer can be a terrific tool for you.

ImageFramer is used by artists, professional and amateur photographers, scrapbookers, framers, and simply people who simply want their family photos to look better.

ImageFramer helps you to:

  • Themed frames: Frames for holidays, seasonal frames, kid frames, romance (for weddings) and many more creative designs. Great for greeting card designs, scrapbooking, enriching family photos etc.
  • Overlays: Text or image overlays can be used for adding copyright notices, signatures, descriptions, and even automatic data, like file name, date (file or EXIF), location, caption and headline from IPTC metadata. New in version 4: Snapping overlays to center or edges and simplified interaction with text color and fonts.
  • Design Templates. ImageFramer comes with some preset templates. It's easy to add your own templates. These can be used in-app or through Lightroom or in built-in Batch Processor. New in version 4: Saving templates to files and importing them into a another ImageFramer installation.
  • Mats. ImageFramer has a special color mat frame types that can look beveled with control over bevel width, and the colors of both the mat and the bevel. Size of mat can be different in each direction (often useful to have a wider mat on the bottom). Multiple mat (and frame) layers allow limitless combinations.
  • Integration with Workflows: Adobe Lightroom Export plugin, Photos.app, Sharing extension. Useful for portfolios, web site exports, printing (even simple designs like overlays or a simple white border).

We want everyone to enjoy the benefits of the new ImageFramer. ImageFramer 4.0 is a free upgrade for ImageFramer 3 customers. Note that it requires macOS 10.11 (El Capitan) or later. TDS listeners can receive a 20 percent discount by visiting: our ImageFramer landing page.

Updates and Such

Big thanks to all of our Patreon members!

While you're listening to this, I'm most likely on a train heading south to New Orleans. The anticipated weather looks a lot more challenging than the first leg of the trip here in Chicago. I'll share the inside scoop in next week's podcast.

Registration invitations have gone out to Reserve List members for the Autumn in Wine Country Photography Workshop. If you are on the Reserve List, but didn't get your invite, please contact me. You can learn more about the workshops by visiting the TDS Workshops Page.

B&H and Amazon tiles on www.thedigitalstory. If you click on them first, you're helping to support this podcast. And speaking of supporting this show, and big thanks to our Patreon Inner Circle members.

And finally, be sure to visit our friends at Red River Paper for all of your inkjet supply needs.

Texas-based Red River Paper recently announced a new fine art paper, Palo Duro Etching. The new paper is a 100 percent cotton rag paper and is free of optical brightener additives. The paper is designed to offer warm white tones, deep blacks and a subtle texture to accurately recreate traditional darkroom fine art prints.

See you next week!

More Ways to Participate

Want to share photos and talk with other members in our virtual camera club? Check out our Flickr Public Group. And from those images, I choose the TDS Member Photo of the Day.

Podcast Sponsors

ImageFramer 4 - ImageFramer is used by artists, professional and amateur photographers, scrapbookers, framers, and people who simply want their family photos to look better.

Red River Paper - Keep up with the world of inkjet printing, and win free paper, by liking Red River Paper on Facebook.

The Nimbleosity Report

Do you want to keep up with the best content from The Digital Story and The Nimble Photographer? Sign up for The Nimbleosity Report, and receive highlights twice-a-month in a single page newsletter. Be a part of our community!

Want to Comment on this Post?

You can share your thoughts at the TDS Facebook page, where I'll post this story for discussion.
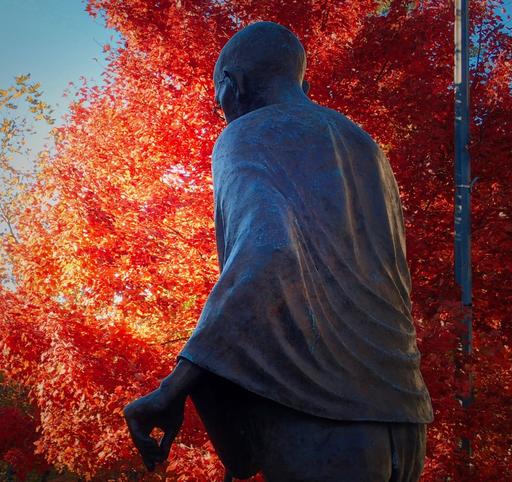
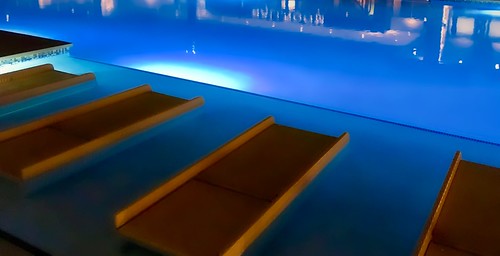
I've always preferred shooting at twilight in the city compared to the dark of night. Having just a little luminance in the sky rounds out the image so nicely.

Chicago Night Scene.jpg Chicago with Train at Twilight - Olympus PEN-F, Panasonic 40mm f/1.7, ISO 3200. Processed in Photos for macOS and Luminar. Photo by Derrick Story.

But color comes into play here as well. And with a little bit of adjustment on your end, you can take advantage of a complementary color scheme for additional visual appeal.

Complementary colors directly oppose each other in the color spectrum. In our case, we're working with blue and orange. Red and green are also a popular complementary tandem. These colors, when combined in the right proportions, produce white light. They also are attractive to viewers' eyes.

In the case of our twilight cityscape, the blue will come from the sky after the sun has set. We often refer to this time of day as blue hour. The orange is provided by the city lights themselves. Get them in the right combination, and image really glows.

When creating the shot, I typically have to tame the orangish/yellow tones of the city lights. They can overpower the composition. I do this by shooting with the white balance set to Tungsten, then backing off the blueish tones in post. Or I can capture in auto white balance and deal directly with the oranges in the editor.

Choose the method that works best for you. But once you're aware of this compositional element, you can use it to further enhance your cityscapes.

You can share your thoughts at the TDS Facebook page, where I'll post this story for discussion.

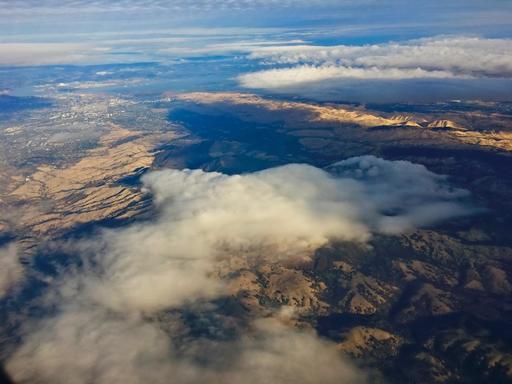
Recently I wrote about ACDSee Pro for iOS and how easy it is to shoot in RAW with an iPhone.

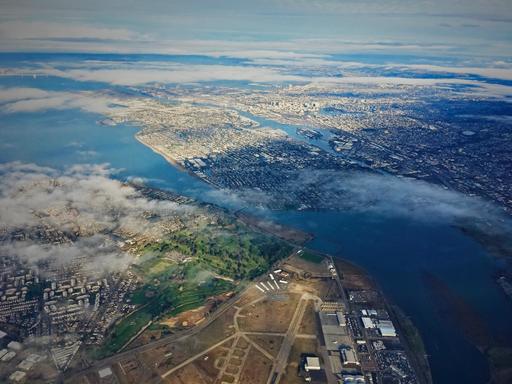
clouds-over-aurora-1024.jpg "Clouds Over Aurora" captured with an iPhone 6S and ACDSee Pro. Photo by Derrick Story.

One of the subjects I was looking forward to capturing in RAW was the landscape from above while flying. I wasn't disappointed.

Using ACDSee Pro, my images were stored as both Jpegs and DNGs. I saved the RAW files to my Camera Roll, which added them to iCloud as well. Once I reached my hotel room, I opened the images in Photos for macOS and quickly processed them using Luminar Neptune and the native tools in Photos.

And this is just quick and dirty stuff. Later on, if I want to apply noise reduction or other advanced adjustments, those RAWs will hold together nicely while doing so.

Having those DNGs, instead of Jpegs, for challenging subjects like this made my iPhone all the more valuable as a travel camera. I really like this workflow.

Photos for macOS as Your Digital Darkroom

You can learn more about using Luminar as an editing extension in my lynda.com training, Photos for macOS: Advanced Editing Extensions.

And if you'd prefer to cozy up with a book, check out The Apple Photos Book for Photographers that features chapters on basic editing, advanced post processing, and editing extensions.

You can share your thoughts at the TDS Facebook page, where I'll post this story for discussion.

Photography and the Apple Watch

You're not going to show off your portfolio on an Apple Watch, but there are a few photographer tricks that come in handy. Here are my favorites.

apple-watch-1024.jpg

The Camera App Companion

This app is included with the watch and adds functionality to your iPhone camera. You can find it by looking for the gray icon that shows a shutter release. And that's its primary function: allowing you to remote release the camera on your iPhone.

But if you explore it a bit more, the Camera App Companion has other tricks up its sleeve. For example, once it displays what the lens is viewing on the watch, you can change the focus point by tapping the area you want focused on the watch face image.

If you tap and hold, then a menu appears that allows you to change to the FaceTime camera, adjust the flash setting, control HDR, and even turn on and off Live View.

For single shot images, tap the shutter button on the watch face. For burst images, tap the 3s icon.

So, essentially, you have a full remote control for your iPhone camera. Combine this with a portable stand or tripod mount, and you can substantially expand its capabilities.

DxO One Camera Remote

If you shoot with the DxO ONE camera, then you can also use your Apple Watch to remotely trigger that camera when it's connected to the iPhone.

The Apple Watch app comes bundled with the iOS version of DxO ONE for the iPhone. With this configuration, you now have a full 1" sensor that can be remote released for long exposure shots or for compositions that require some separation between you and the phone. It's a handy bonus always having a remote release on your wrist.

And More...

Other apps that have watch compatibility include ProCamera, ProCam 4, Camera Plus, and Hydra. If you have any of these apps, and they are not showing on your watch, simply go to the My Watch app on the iPhone, scroll down the list of iOS apps, tap on the app you want to enable, then move the slider to green for: Show App on Apple Watch.

Soon after that, the watch app will appear in the software cluster on your device. You can add it to your dock if you plan on using it often.

Once I realized the additional capability that I have with the watch interacting with my camera phone, it expanded my use of the iPhone itself. If nothing else, always having a remote release is really handy.

You can share your thoughts at the TDS Facebook page, where I'll post this story for discussion.

This is The Digital Story Podcast #589, June 20, 2017. Today's theme is "ISO 3200 is the New 400." I'm Derrick Story.

Opening Monologue

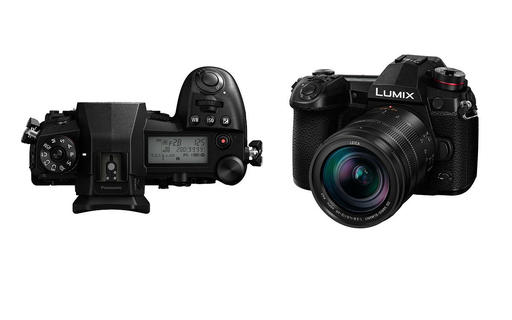
My nimble lifestyle depends a lot on not having to carry large, expensive lenses in my daily messenger bag. And thanks to the great design of my micro four thirds optics, I don't have to. But the one thing I do have to sacrifice for the zooms is a fast maximum aperture. That has become less of an issue with the latest crop of cameras providing terrific ISO 3200 performance. We'll take a closer look in today's show.

ISO 3200 is the New 400

I'm going to open today's show with a story about my latest photo shoot in San Francisco. I hadn't plan on it, but there it was nonetheless.[Tell the Vanagon story and why I needed ISO 3200.]

coming-home-1024.jpg

What's Inside My Bag for Chicago/New Orleans

ImageFramer 4 as an Editing Extension

ImageFramer is used by artists, professional and amateur photographers, scrapbookers, framers, and simply people who simply want their family photos to look better.

But it's also a powerful editing extension for Photos for macOS. Here's how to use it.

  • Install ImageFramer 4 on your Mac.
  • Go to System Preferences > Extensions > Photos and check the box next to "Frame In ImageFramer".
  • Open a picture and go into Edit mode by pressing the Return key.
  • Go to Extensions at the bottom of the Tools list, and choose Frame In ImageFramer from the popup menu.
  • Design your frame, then go to File > Save Image. Close the ImageFramer design window, then click on Save Changes in the Photos window.
  • You can continue working on your shot in Photos. Once you're finished, click the Done button. You can always Revert to Original if you change your mind and want a different frame.

What's even wilder, is that even once you've created a frame for a picture, you can open it again in ImageFramer and continue to adjust it.

We want everyone to enjoy the benefits of the new ImageFramer. ImageFramer 4.0 is a free upgrade for ImageFramer 3 customers. Note that it requires macOS 10.11 (El Capitan) or later. TDS listeners can receive a 20 percent discount by visiting: our ImageFramer landing page.

Updates and Such

Big thanks to all of our Patreon members! You will be receiving a free copy of my next eBook!

Registration invitations have gone out to Reserve List members for the Autumn in Wine Country Photography Workshop. If you are on the Reserve List, but didn't get your invite, please contact me. You can learn more about the workshops by visiting the TDS Workshops Page.

B&H and Amazon tiles on www.thedigitalstory. If you click on them first, you're helping to support this podcast. And speaking of supporting this show, and big thanks to our Patreon Inner Circle members.

And finally, be sure to visit our friends at Red River Paper for all of your inkjet supply needs.

Texas-based Red River Paper recently announced a new fine art paper, Palo Duro Etching. The new paper is a 100 percent cotton rag paper and is free of optical brightener additives. The paper is designed to offer warm white tones, deep blacks and a subtle texture to accurately recreate traditional darkroom fine art prints.

See you next week!

More Ways to Participate

Want to share photos and talk with other members in our virtual camera club? Check out our Flickr Public Group. And from those images, I choose the TDS Member Photo of the Day.

Podcast Sponsors

ImageFramer 4 - ImageFramer is used by artists, professional and amateur photographers, scrapbookers, framers, and people who simply want their family photos to look better.

Red River Paper - Keep up with the world of inkjet printing, and win free paper, by liking Red River Paper on Facebook.

The Nimbleosity Report

Do you want to keep up with the best content from The Digital Story and The Nimble Photographer? Sign up for The Nimbleosity Report, and receive highlights twice-a-month in a single page newsletter. Be a part of our community!

Want to Comment on this Post?

You can share your thoughts at the TDS Facebook page, where I'll post this story for discussion.
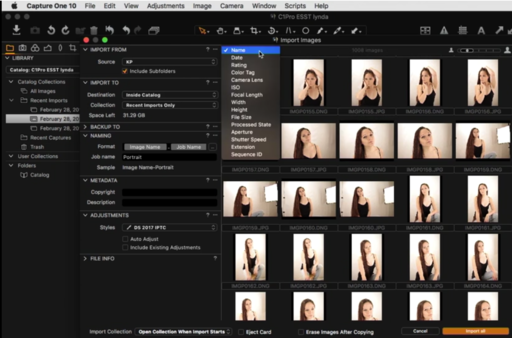
With the introduction of the Accent AI filter in Luminar Neptune, you can create what Macphun calls the "Quick and Awesome" workflow that yields beautiful images quickly.

looking-down-19th.jpg

Photos for macOS users have it even better because Luminar is also an editing extension for their host application. So not only do you get the built-in tools in Photos, but you can tap the additional power of the rapidly evolving Luminar. Here are the steps.

  • Open your image in Photos, then press the Return key to enter Edit mode.
  • If you have a Jpeg/RAW stack, switch to RAW mode via Image > Use RAW as Original.
  • Click on Extensions at the bottom of the tools panel, and choose Luminar from the popup menu.
  • Once the file opens in Luminar, choose the Quick & Awesome Workspace (as shown in the illustration below).
  • Use the Boost slider in the Accent - AI filter to adjust your image.
  • Tap Save Changes to return to Edit mode in Photos.

quick-awesome.jpg

Once you back in Photos, you can use the M key to toggle the before and after. You can continue to refine the image, let's say adding Definition or Sharpness, if desired. But it probably won't need much.

Then, thanks to iCloud, your awesome photo will be updated and live on all of your devices.

This is a wonderful, powerful, and to be honest, fun workflow. If you haven't explored Luminar Neptune yet, I highly recommend it.

Photos for macOS as Your Digital Darkroom

You can learn more about using Luminar as an editing extension in my lynda.com training, Photos for macOS: Advanced Editing Extensions.

And if you'd prefer to cozy up with a book, check out The Apple Photos Book for Photographers that features chapters on basic editing, advanced post processing, and editing extensions.

You can share your thoughts at the TDS Facebook page, where I'll post this story for discussion.

This is the update that many Luminar users have been waiting for, Luminar Neptune. In addition to the features that I'll cover in a minute, this version runs faster than the previous Pluto that we've been using. And that speed is exactly what this app needed.

luminar-neptune.jpg

But there's plenty more as well. Take a look at this highlights list.

  • Accent AI Filter - Uses artificial intelligence to improve images with a single slider movement, tapping into the power of dozens of filters all at once.
  • Quick and Awesome workspace - A workspace consisting of the Accent AI, Saturation and Vibrance, and Clarity filters. Great for achieving fast results in a fun and easy way.
  • Plug-in integration with Creative Kit and Aurora HDR 2017 - Seamlessly access Macphun's other photo editing tools you own with Luminar as the host application.
  • Brush, Gradient, and Radial Gradient tools - Dramatically faster performance yields smoother selective editing.
  • Vignette filter - Addition of Vignette Styles, Place Center and Pre- and Post-Crop modes deliver even more flexibility to this popular photo finishing tool.
  • Memory management - Increased overall performance for large files and 5+ simultaneous open images.
  • User Interface changes - Extensive improvements to in-app animation and mode transitions make for a more pleasing editing experience.
  • Crop tool update - Added the ability to specify custom crop ratios.
  • Local history - Provision for reviewing separate history while in Transform, Denoise, Clone and Stamp modes helps optimize editing.

In terms of features, the Accent AI Filter is at the top of the list. The Accent AI Filter uses artificial intelligence to analyze different areas of an image based on its structure, objects, dark and light zones, colors, and other parameters. As a user moves the slider, the filter intelligently and automatically "understands" what each area on the photo is lacking, then improves it. Moving the slider can also adjust the intensity of changes, making the picture look more natural, or revealing a more dramatic look, depending on the desired effect.

Special Offer to Celebrate the Neptune Release

By clicking here between Thursday June 15th and Sunday June 25th, you will receive: Luminar + Video Training, eBooks, and Presets and Overlays... all for only $69. (Total value of $309.)

Here's what's in the offer package:

  • Luminar, The Supercharged photo editor for Mac that adapts to your skill level. ($69 Value)
  • Photography Fundamentals Video Training - In this series, you'll learn all about the essential concepts of photography from professional photographer and educator Richard Harrington. ($99 Value)
  • The Grand Landscape eBook by Ian Plant - In this eBook, Ian Plant shows you how to make great landscape photos in no time, helping your work to stand out from the rest. ($19 Value)
  • 2 Luminar Preset packs - ($45 Value)
  • Over 500 Overlays - ($49 Value)
  • The Black and White Landscape & Candid Portrait eBooks from Andrew Gibson ($28 Value)

Luminar Neptune works great as a standalone app, and editing extension for Photos for macOS, and as a plugin for Lightroom.

You can share your thoughts at the TDS Facebook page, where I'll post this story for discussion.
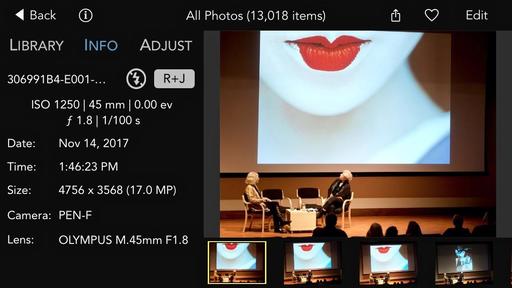
Earlier today, I read a ACDSee Pro for iOS review by Quentin Decaillet on Fstoppers. I wasn't familiar with this app, but the fact that it could capture and process in RAW caught my eye.

ACD-1024.jpg

So I ponied up the $6.99 and took it for a test drive this morning around my garden. Quentin was right, this is a terrific, robust, and easy to use app.

There are three different compression settings for Jpeg, plus DNG RAW. There's practically every basic setting that you could want, and they're easy to find and use.

The metadata readouts are outstanding (one of my complaints with normal iPhone photography). The Summary screen provides a histogram, basic EXIF, and location data. If you want more, just go to the Metadata tab for the comprehensive readout.

Tap the Edit button to enhance your image. In addition to all of the usual suspects for adjustments, you can create your own presets as well. I also appreciate the Undo and Redo buttons as I'm working through the corrections, plus I can tap to see the original shot.

Images captured in RAW, unprocessed, show up in my Photos library as RAW files. Very nice.

If you want to learn more about ACDSee Pro for iOS, I recommend reading Quentin's review. This is a terrific app.

You can share your thoughts at the TDS Facebook page, where I'll post this story for discussion.
This is The Digital Story Podcast #588, June 13, 2017. Today's theme is "Tiny Gardens for Big Pictures." I'm Derrick Story.

Opening Monologue

Regardless if you live in a cozy apartment with just a narrow balcony, or have your own house with a spacious back patio, you can create a photo wonderland with container gardening. Not only do you enjoy the benefits of nurturing your botanical friends, but they will reward you with stunning images. I'll plant those seeds on today's show.

Tiny Gardens for Big Pictures

IMG_2059.jpg

Yes, most of us would love to travel to exotic places to photography flora and fauna. And for a week or two a year, we might get that opportunity.

But for the other 50 weeks, cultivating your own botanical paradise can provide you with hours of photographic entertainment. And to help you get started, here are some of my favorite container plants.

  • Pansies and Violas - Vibrant multicolor blooms. Partial sun.
  • Dwarf Hydrangea - Most hydrangeas bloom white or whitish-pink, then turn to shades of pink, purple, lime green, or a combination of shades. Mostly shade.
  • Summer Snapdragon (Angelonia) - Can take direct sun and will bloom all summer long. They come in pinks, mauves, deep purple, purple-blues, white, and more.
  • Begonias - Like partial sun exposure. Don't overwater them. Come in a vast array of colors.
  • Double Impatiens - Open flowers all season long--and never need deadheading. Choose double impatiens for areas offering part to full shade. Look for blooms in a variety of colors, including white, red, pink and purple tones.
  • Swan River Daisy - A spreading annual, the swan river daisy is ideal for hanging baskets. It produces white, pink, or purplish flowers.
  • Florists' chrysanthemum - Pot rooted cuttings midwinter to early spring, using porous, fibrous, moisture-holding planting mix. Move plants to larger pots as growth requires--don't let them become root-bound. Pinch and/or stake as required. Plants need water daily in warm weather, every other day in cool conditions. Feed with liquid fertilizer every 7 to 10 days until buds show color.
  • Flowering kale and cabbage - Flowering kale (and cabbage, too) has interesting rosettes that really pop in containers.
  • Johnny Jump-Up - Very cheery flower that does great in pots.
  • Chives - Chives are without a doubt, one of the hardiest herbs that you can plant. They grow very well in containers or just about anywhere else you want to plant them. Chives are great for adding flavor to soups, dips, and of course, baked potatoes. Chives are also perennials so once you plant them, they'll come back year after year. You can move them indoors if you want to keep your harvest going all year long, but they do prefer a bit of sunlight throughout the day so choose a spot where they can get some sun at least through a window during the winter.

Plus, you can practice using your macro lens. And maybe even justify that LED ring light you have had your eye on.

Review: Lomography Lomo'Instant Automat Glass Magellan

As reported by The Phoblographer.

The Lomography Lomo'Instant Automat Glass Magellan answers the prayers and wishes of almost every Fujifilm Instax Mini film user-and it's arguably one of the absolute best cameras shooting the format on the market.

Obviously, part of this appeal is the glass lens on the front of the camera. This lens is the same optic used on the company's Lomography LCA 120-and so it is the sharpest and the fastest aperture lens available for use on any Instax camera (at the time of publishing this review.) That quality will appeal to a lot of photographers; and though there are a number of shooters who still want manual controls, you'd be shocked at how great the photos are from the Lomography Lomo'Instant Automat Glass Magellan.

It's available on the Lomography site for $189.

Digging Deeper with ImageFramer 4

ImageFramer is used by artists, professional and amateur photographers, scrapbookers, framers, and simply people who simply want their family photos to look better.

ImageFramer helps you to:

  • Themed frames: Frames for holidays, seasonal frames, kid frames, romance (for weddings) and many more creative designs. Great for greeting card designs, scrapbooking, enriching family photos etc.
  • Overlays: Text or image overlays can be used for adding copyright notices, signatures, descriptions, and even automatic data, like file name, date (file or EXIF), location, caption and headline from IPTC metadata. New in version 4: Snapping overlays to center or edges and simplified interaction with text color and fonts.
  • Design Templates. ImageFramer comes with some preset templates. It's easy to add your own templates. These can be used in-app or through Lightroom or in built-in Batch Processor. New in version 4: Saving templates to files and importing them into a another ImageFramer installation.
  • Mats. ImageFramer has a special color mat frame types that can look beveled with control over bevel width, and the colors of both the mat and the bevel. Size of mat can be different in each direction (often useful to have a wider mat on the bottom). Multiple mat (and frame) layers allow limitless combinations.
  • Integration with Workflows: Adobe Lightroom Export plugin, Photos.app, Sharing extension. Useful for portfolios, web site exports, printing (even simple designs like overlays or a simple white border).

We want everyone to enjoy the benefits of the new ImageFramer. ImageFramer 4.0 is a free upgrade for ImageFramer 3 customers. Note that it requires macOS 10.11 (El Capitan) or later. TDS listeners can receive a 20 percent discount by visiting: our ImageFramer landing page.

Updates and Such

Big thanks to all of our Patreon members! You will be receiving a free copy of my next eBook!

Registration invitations have gone out to Reserve List members for the Autumn in Wine Country Photography Workshop. If you are on the Reserve List, but didn't get your invite, please contact me. You can learn more about the workshops by visiting the TDS Workshops Page.

B&H and Amazon tiles on www.thedigitalstory. If you click on them first, you're helping to support this podcast. And speaking of supporting this show, and big thanks to our Patreon Inner Circle members.

And finally, be sure to visit our friends at Red River Paper for all of your inkjet supply needs.

Texas-based Red River Paper recently announced a new fine art paper, Palo Duro Etching. The new paper is a 100 percent cotton rag paper and is free of optical brightener additives. The paper is designed to offer warm white tones, deep blacks and a subtle texture to accurately recreate traditional darkroom fine art prints.

See you next week!

More Ways to Participate

Want to share photos and talk with other members in our virtual camera club? Check out our Flickr Public Group. And from those images, I choose the TDS Member Photo of the Day.

Podcast Sponsors

ImageFramer 4 - ImageFramer is used by artists, professional and amateur photographers, scrapbookers, framers, and people who simply want their family photos to look better.

Red River Paper - Keep up with the world of inkjet printing, and win free paper, by liking Red River Paper on Facebook.

The Nimbleosity Report

Do you want to keep up with the best content from The Digital Story and The Nimble Photographer? Sign up for The Nimbleosity Report, and receive highlights twice-a-month in a single page newsletter. Be a part of our community!

Want to Comment on this Post?

You can share your thoughts at the TDS Facebook page, where I'll post this story for discussion.
App for Instagram - Viewer Only

Ah, the dream. To be able to manage my Instagram account from my computer as well as my mobile devices. Well, it's still a dream.

app-for-insta.png

I took App for Instagram for a spin. What did I have to lose? There's a free version available in the Mac App Store.

It's fine for viewing what's going on. You can like images and comment as well. Your profile page is also available. So you can see how people are responding to your shots. So for all of those niceties, the price is right.

However, if your hope is to post to Instagram via your computer, this app is not the ticket. Even if you upgrade to the Pro version for $4.99, that feature isn't listed.

Now before you send me email about this being prohibitive on Instagram's end, yes, I understand that. And there have been workarounds. And they have eventually been thwarted. So we can wonder and hope. And that's what I'll continue to do.

You can share your thoughts at the TDS Facebook page, where I'll post this story for discussion.