Recently in Photography

  Page 223 of 386 in Photography  

Black and White Vegas

Subjects that we normally think of in color can often resonate without it too. That's the premise for my project, B&W Vegas. This is also the focus of today's webinar, A Fresh Look at Familiar Subjects in Black and White.

For those who attended my online talk, here are some of the featured photos. All of the processing was handled by Aperture 3 and Nik Silver Efex Pro 2for the B&W conversion.

Morning Sky, Las Vegas

Morning Sky, Las Vegas

Street Man

Street Man

Treasure Island

Treasure Island

Casino at Midnight

Casino at midnight.

Escalator, MGM Grand

Escalator, MGM Grand, Las Vegas

Aperture Tips and Techniques

To learn more about Aperture 3, check out my Aperture 3 Essential Training on Lynda.com. Also, take a look at our Aperture 3 Learning Center. Tons of free content about how to get the most out of Aperture.

My next open Aperture Workshop is scheduled for Nov. 2012, in Santa Rosa, CA. You can get on the pre-registration list, plus learn about all the other photography workshops offered this season by visiting the TDS Workshops page.


The Digital Story on Facebook -- discussion, outstanding images from the TDS community, and inside information. Join our celebration of great photography!


Pentax Refines Its DSLR Lineup

pentax_k30.jpg

I became a Pentax fan (again!) when I reviewed the Pentax K-5 for Macworld Magazine. In addition to its outstanding image quality, the K-5 felt like a camera designed by photographers. I now use it as my "hiking camera" because it's compact, weather resistant, and accepts affordable zoom lenses that are designed for the outdoors.

Now, we have more goodness coming our way with the just-announced K-30 and the 50mm f/1.8 prime. Both have reasonable price tags of $899 (K-30 with kit zoom) and $299 (50mm) respectively.

In addition to being great image making machines, I like the value that Pentax offers. For example, for $900 you'll be able to buy the K-30 with 18-55mm zoom (which is excellent). You can expand your capability by adding the Pentax DA 50-200mm zoomthat's also weather resistant for $215. Then, for your prime lens, get the new 50mm f/1.8 for (my guess) around $250. You have an excellent all weather kit with 3 lenses for a total investment of $1,365.

And if you're worried that because Pentax isn't part of the big 2, your investment might be at risk. Forget that. On the business side they have been making smart moves too.

So if you're a photographer that enjoys taking pictures in the great outdoors, I would definitely keep an eye on Pentax. They certainly have their eye on the ball.


The Digital Story on Facebook -- discussion, outstanding images from the TDS community, and inside information. Join our celebration of great photography!


LED lighting for photographers has evolved from exotic to affordable. No better case in point than the Neewer Ring Light for $30. I talk about the joys of using LEDs, and how we're never going back.

Then we take a look at the new Panasonic 12-35mm f/2.8 pro zoom for micro four-thirds. One report says it's tack sharp wide open, then another says it's soft. Which is it?

After sharing a favorite image editing tip, I wrap up with an inside peek at the upcoming Sonoma Coast workshop in August. Yes, we're returning to the Bodega Bay Lodge, (yaay!) but this year we'll have the VW Vanagon parked at the beach as a field station. It's going to be so cool! All this and more on the TDS podcast.

Would you like to improve your B&W photography? I have a webinar coming up on May 23, "A Fresh Look at Familiar Subjects in B&W." It's free, but you have to reserve your seat in advance.

Listen to the Podcast

You can also download the podcast here (34 minutes). Or better yet, subscribe to the podcast in iTunes. You can support this podcast by purchasing the TDS iPhone App for only $2.99 from the Apple App Store.

Monthly Photo Assignment

Action is the May 2012 Photo Assignment. You can read more about how to submit on our Member Participation page. Deadline for entry is May 31, 2012.

More Ways to Participate

Want to share photos and talk with other members in our virtual camera club? Check out our Flickr Public Group. And from those images, I choose the TDS Member Photo of the Day.

Podcast Sponsors

Red River Paper -- The $7.99 Sample Kit is back! And with free shipping.

Make Your Photos Sizzle with Color! -- SizzlPix is like High Definition TV for your photography.

Need a New Photo Bag? Check out the Lowepro Specialty Store on The Digital Story and use discount code LP20 to saven 20% at check out.


Technorati Tags:
, , , , ,


panasonic_12-35_zoom.jpg

I just read a review of the Panasonic LUMIX G X VARIO 12-35mm F2.8 ASPH zoom lens on PhotographyBLOG that helped me understand more about this promising fast aperture zoom lens. As continue to depend on micro four thirds cameras for some of my work, I'm looking for a zoom I can use for existing light assignments.

Based on the review, this looks like a finely constructed lens with excellent mechanical performance. I could use it on my Olympus bodies by simply turning off the optical stabilization on the Panasonic lens (Olympus builds IS into the body).

But the problem is that the center sharpness at all focal lengths is soft with the aperture wide open. PhotographyBLOG writes, "It is a little soft at F2.8 though, so it's best used stopped down to F4 for the best results..." And their test images clearly bear that out.

I don't want to spend good money ($999 in this case) for a fast lens, just to stop it down. If I have a f/2.8 zoom, chances are that I'm shooting wide open most of the time.

So, for the time being, looks like I have to stick to prime lenses in low light situations. Too bad. That Panasonic zoom looks like a great lens at f/4 and beyond.

I've been fascinated with B&W photos from the moment I saw my first Life Magazine. Even today I have prints by Eisenstaedt and Bresson hanging in my studio. And currently I'm working with Nik Silver Efex Pro 2to explore subjects that we commonly think of in color, to see how they might appear otherwise.

If you too are interested in seeing the world in black and white, join me for this week's webinar titled, A Fresh Look at Familiar Subjects in B&W, Wednesday, May 23, 2012, 10am PDT/1pm EDT.

stratosphere_bw.jpg Night scene from my series "Las Vegas in B&W." This will be one of the images I discuss during the webinar.

Together, we'll examine a series of photos and see how the experience changes when we take away the color. I'll then show you my easy, but effective workflow using Nik Silver Efex Pro 2in conjunction with Aperture. This same approach works with Lightroom too.

The webinar is free, but you do have to reserve a spot. Hope you can join me Wednesday.


The Digital Story on Facebook -- discussion, outstanding images from the TDS community, and inside information. Join our celebration of great photography!


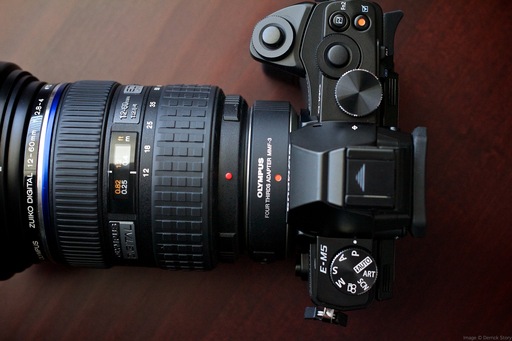
Macworld Magazine has published my full review of the Olympus OM-D E-M5, including lab test scores from the PC Mag lab. The camera earned 4.5 mice, the highest rating for a camera I've personally reviewed.

om-d_tilt_screen.jpg

In short, my pros and cons are:

Pros

  • Outstanding image quality
  • Highly customizable feature set
  • Compact design
  • Wide selection of accessories and lenses
  • Weather resistant body
  • Art Filters add fun factor
  • Good macro mode on 12-50mm zoom
  • Fast autofocus and burst mode
  • Cons

  • Menu system can be daunting
  • No built-in mic adapter
  • Small buttons can be difficult for large fingers
  • Soft humming noise when powered up

Price when rated: $1000 (body only); $1300 with 12-50mm 1:3.5-6.3 zoom lens

Now, if I could only get my hands on one for personal use...


The Digital Story on Facebook -- discussion, outstanding images from the TDS community, and inside information. Join our celebration of great photography!


NEEWER 48 LED Ring Light for $30

neewer_ring_light

I've been having a blast with the $30 NEEWER 48 LED Ring Lightthat mounts directly to my macro lens and is powered by 2 AA batteries. Sound too good to be true? It isn't.

You don't have to worry about flash sync or TTL communication since the NEEWER lighting is continuous. There are 3 lighting options: full, left side only, or right side only. The output is approximately 15GN (both lights on), which is plenty bright for macro photography, and helpful for portrait shooting in good ambient light.

I've found the light so useful, and easy to use, that I just leave it mounted on my Canon 100mm f/2.8 macro lens. The kit includes mounting rings in the following diameters: 49mm, 52mm, 55mm, 58mm, 62mm, and 67mm. You also get a plug-in wall adapter if you don't want to use batteries, although I've been getting more than an hour of use from two rechargeable AAs.

passion_flower_ring_light.jpg Passion Flower in the shade illuminated with the NEEWER 48 Ring Light.

On the downside, this isn't the most rugged unit. So it probably won't take extended abuse. Also, the ring light does swivel on the adapter. I've found that by moving the power cord under the lens then bringing it up to the hot shoe from the opposite side helps stabilize the ring light. You could also use a bit of gaffer's tape.

Aside from that, however, this light is fun... and a bargain. If you've wanted to experiment with ring lighting for your close-up photography, I would give this unita try.


The Digital Story on Facebook -- discussion, outstanding images from the TDS community, and inside information. Join our celebration of great photography!


I'm thrilled to be leading the Sonoma Coast Photography Workshop for a second year. I have an amazing weekend planed.

The Sonoma Coast Photography Workshop begins Saturday morning, August 24, 2012 and runs through Sunday evening August 25th. Our headquarters during the day will be the lovely Library Conference Room at the Bodega Bay Lodge, in Bodega Bay, CA. We also have a campsite reserved at Doran Regional State Park, a 10-minute walk from the Lodge. We will use the campsite as our field headquarters during the weekend. Paid workshop attendees are welcome to come out and visit the Field HQ on Friday afternoon.

During the weekend, we will work on environmental portraiture with a professional model, landscape shooting at Ft. Ross State Historical Park, and nature photography at Goat Rock... and plenty more.

If you want to learn more about this event and receive a registration form with all of the workshop details, use the Send Me Info form on the TDS Workshops page.

When there's a dark area in your photograph that you want to lighten, the common inclination is to reach for the Dodge tool. I don't know about you, but I find the Dodge tool one of the most difficult to use for getting natural looking results. On my images, it always looks like someone spilled bleach on the photo.

A more elegant approach to lightening a dark area is to use the brushing tool in the Shadows & Highlights brick. It's nearly foolproof in use, an the results are fantastic.

highlights_shadows_aperture.jpg The Shadows & Highlights brick in Aperture's Adjustments panel.

Here are the steps for using the Shadows & Highlights brush

  • Click on the gear icon in the Shadows & Highlights brick (as shown in the illustration).
  • Choose Brush Shadows & Highlights In
  • Don't click on the check box on the left side. That will happen automatically.
  • In the adjustment brick, move the Shadows slider to about 25 for a starting point.
  • In the floating palette (that will appear over your photo), move the Strength slider to 1.
  • Choose your brush size and softness (in the floating palette).
  • Start painting in the dark area you want to lighten.
  • Once you've painted an area, you can adjust the strength of its effect by moving the Shadows slider in the adjustment brick.
  • If you need to clean up an overpaint, click on the eraser icon in the floating palette.

floating_palette.jpg The floating palette

You can always reset the adjustment and start over by clicking on the gear icon in the floating palette and selecting "Clear from entire photo." But I don't think you'll have to do that often, because this is such a beautiful method for lightening dark areas.

More Aperture Tips and Techniques

To learn more about Aperture 3, (especially brushing techniques) check out my Aperture 3 Essential Training on Lynda.com. Also, take a look at our Aperture 3 Learning Center. Tons of free content about how to get the most out of Aperture.

My next open Aperture Workshop is scheduled for Nov. 2012, in Santa Rosa, CA. You can get on the pre-registration list, plus learn about all the other photography workshops offered this season by visiting the TDS Workshops page.


The Digital Story on Facebook -- discussion, outstanding images from the TDS community, and inside information. Join our celebration of great photography!


iPhone Printing Made Easy

hp_iphone_app.png

Your iPhone captures terrific pictures. And now, so does the iPad. So when you want to give a print to someone, what do you do?

There are actually quite a few options available for printing directly from your iPhone or iPad. In the Macworld Magazine article, Mobile printing gets easier with or without AirPrint, I cover a number of options that don't include your Mac. Just send the file from your iOS device directly to a printer.

This works for photos and documents alike. While working on this article, I printed from a web browser, Pages word processing app, Keynote, and more.

Printing from your iOS device isn't something that you do every day. But when you need to, you usually have to do it quickly. So setting up your workflow now will save you anxiety later. Take a look at the article and see what you think.


The Digital Story on Facebook -- discussion, outstanding images from the TDS community, and inside information. Join our celebration of great photography!