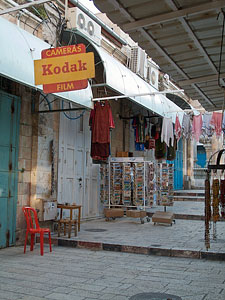
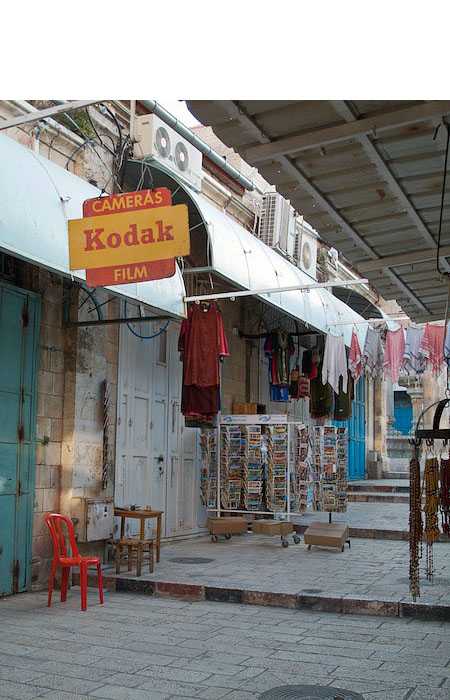
"Thought I'd submit this shot from Jerusalem's Old City," writes Roderick James. "The sign didn't look out of place in this old market, but seemed jarring in our digital world -- especially since I grabbed this image with my Canon G10."
Roderick set his G10 to ISO 80, 1/80th at f/3.2 for this trip down memory lane.
Photo by Roderick James. Click on image to zoom to larger size.
If you have a candid you'd like to share, take a look at our Submissions page, then send us your Grab Shot. We'll try to get it published for you on The Digital Story.
And you can view more images from our virtual camera club in the Member Photo Gallery.
Capturing, trimming, and sharing video with the new iPhone 3G S is literally a snap. After a bit of testing, the easiest way to share is directly from the device itself. So if you're tempted to transfer the video to your computer and monkey around with it, you might want to resist. See my examples below for more on that.
The iPhone 3G S records SD video (640x480) and saves it in the H.264 format. The frame rate when I was playing it back on my MacBook was an odd 17 fps (but as some readers pointed out, that was probably because I was recording in low light. Outside I should get a full 30 fps). One minute of video will create an approximate 26 MB file size. The audio is captured with the onboard iPhone mic and saved AAC mono at 44.100 kHz.
Once you capture the video, you can trim it right there on the iPhone by dragging the handles on the timeline, then hitting the Trim button. I recommend that you watch the area you have selected before hitting Trim. I haven't found an "Undo" command yet for hasty edits. But trimming is very easy and fun on the device. And after some testing, I think it's the best place to make these edits.
You can share the video by emailing it from the iPhone, sending to MobileMe, or uploading it directly to YouTube. The YouTube function is great for on-the-fly publishing, and it works well. If you want to save it to you Mac's hard drive, connect the iPhone 3G S and launch Image Capture (in your Applications Folder). Click on the "Download Some" button to reveal the movies and pictures on your iPhone. Movies will have the .Mov extension, and still photos will be .Jpg. Then, if you want, you can further edit or enhance your video using QuickTime or iMovie.
Here's a sample that I captured at "arm's length." I instinctively held the camera horizontally when I recorded the video. But since I was recording a vertical subject (me), I got this video:
The video plays fine, but it's oriented the wrong way. [What one of our readers pointed out, Alan, is that I confused the sensors on the iPhone by not fully rotating the camera. I hit the record button while the camera was in the vertical position, but then didn't do a clean rotate to the horizontal position.] In an attempt to fix the problem, I downloaded it to my MacBook, rotated it in QuickTime, and got this, but now it's out of sync. So even the simple edit in QuickTime compromised the movie (when publishing on YouTube, on my Mac it plays fine).
So next, I recorded the video holding the iPhone in the vertical position and not rotating it after I initiated the recording. When I did that, and uploaded directly to YouTube from the iPhone, it looks like this:
As Alan pointed out when he commented on this article, you have to be careful not to confuse the sensors. So make sure you're explicit in your movements when holding the iPhone to get the orientation the way you want it. I found the easiest way to do this is simply not rotate the camera once you start recording. If you want a horizontal movie, start that way.
Also, I think the video on YouTube actually looks better when you let the iPhone 3G S compress it and upload it directly. When I edited on the computer, just doing a simple rotation command, then uploading to YouTube, things got out of sync.
In other words, just let the iPhone do the work, don't confuse its sensors, and you'll be fine. All my monkeying around simply compromised the output. If I just record, trim and upload directly from the device, things work perfectly.
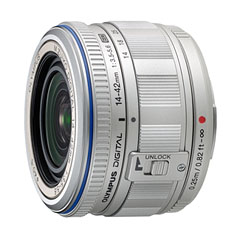
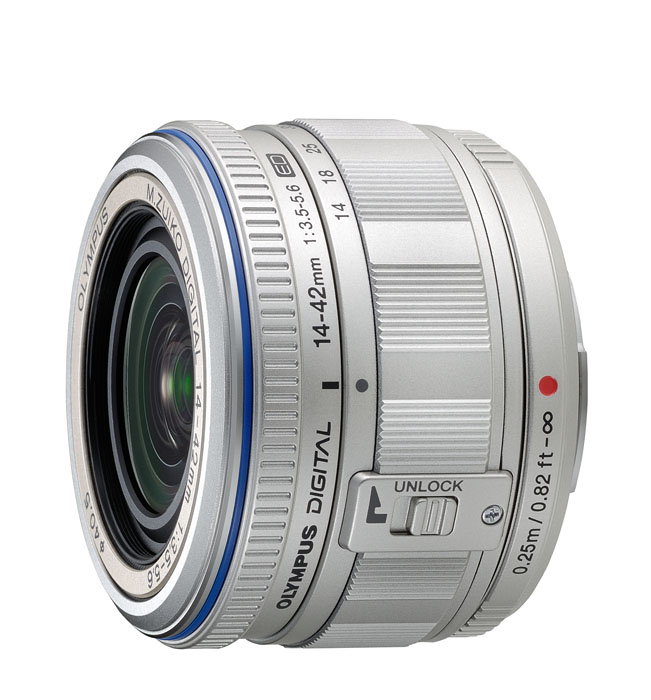
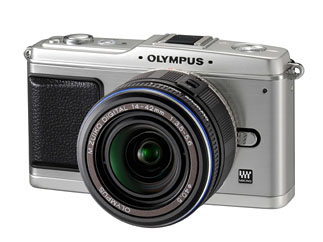
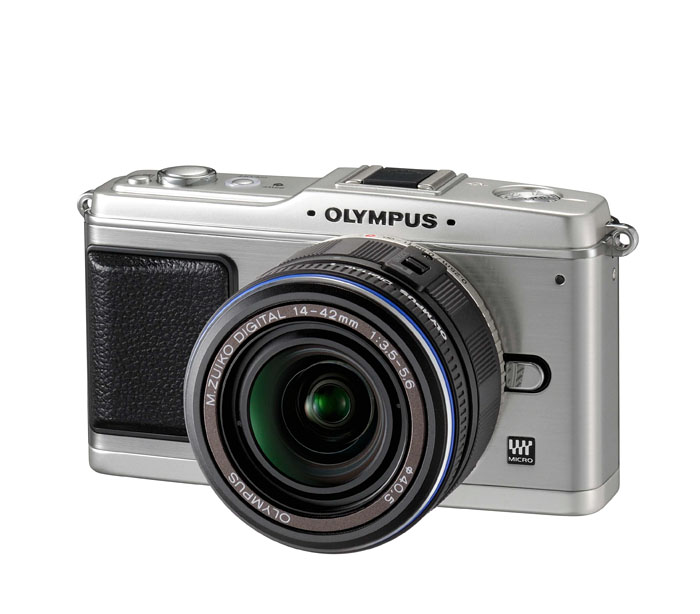
When your first mount the 14-42mm micro zoom lens on the Olympus E-P1, you might see this message on your LCD: "Please check the status of the lens." Do not fear. Nothing is wrong.
All it means is that the lens is in the "locked" position. The message is E-P1 speak for "unlock the lens." All you have to do is twist the zooming ring to the left until you hear a click. Then lens extends, and you're in business.
When finished shooting, there's a little switch on the zoom ring that you hold down while twisting to the right. This allows you to lock the lens again so it's as compact as possible. This quickly becomes second nature. But it can throw you for a loop when you first get the camera.
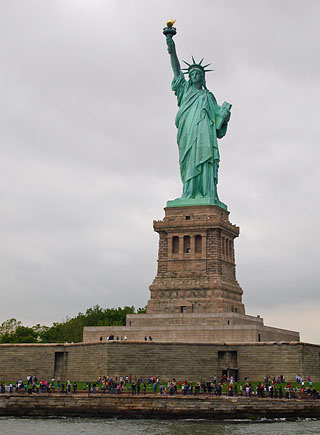
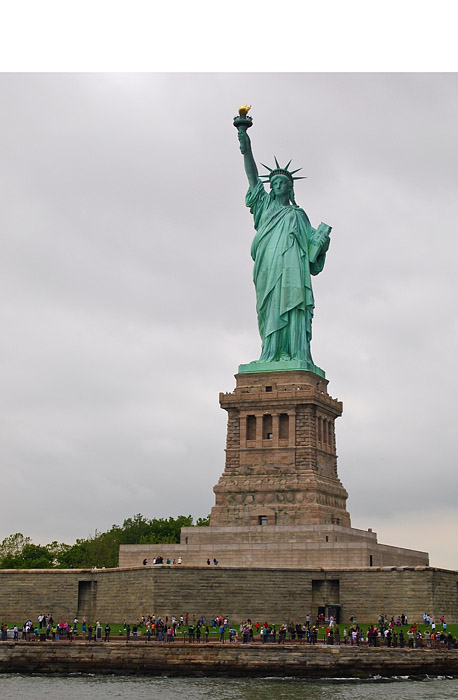
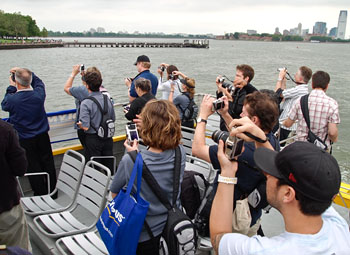
What's more fun than shooting the Statue of Liberty? Taking pictures of photographers trying to get their own shot of the grand lady.
On a recent trip to New York to test the Olympus E-P1, we took a water taxi out to Coney Island. On the way, we made a "drive by" stop near the Statue of Liberty for a quick photo op. It was fun to get my own stock photo of the Statue, but maybe just as fun to grab this candid of the photographers working the shot. As we always say on a photo shoot, after you get the first shot, turn around and look to see what's behind you.
Photos by Derrick Story, captured with the Olympus E-P1 digital camera.
The number one question I've received since readers knew I was testing the Olympus E-P1 Digital SLR was about its low light performance. So I've put together a batch of images ranging from ISO 100 all the way through ISO 6400 so you can see for yourself how the E-P1 (with new image processing engine) performs.
Both Jpeg and Raw (processed with Olympus Master 2 software) versions are included on the Digital Story Flickr page. The images were captured in Mahattan's Lower East Side around 8 pm on June 16, 2009. Here's how I took the shots.
The Olympus E-P1 was on a tripod using the self-timer to trip the shutter. I had the kit 14-42 mm lens mounted using Programmed exposure and auto white balance. I used the Raw+Jpeg recording format. The Jpegs you see on my Flickr page have not been processed. They are full size and straight from the camera. If you click on "All Sizes," you can see the original image at full size.
This image was captured at ISO 400 in Raw mode on an Olympus E-P1. Click on the picture to see a 100 percent magnification of a portion of it.
The Raw files on that page were processed in Olympus Master 2 using a white balance setting of 7500 K with exposure set to +0.2 EV. Sharpening was set to +1. The images were then exported as Jpegs from Olympus Master 2 and uploaded to the Flickr page without any further editing.
In the Raw files, I like ISO 200, 400, and 1600. I haven't done enough testing to understand why there was some smearing at ISO 100 and 800 with the Raws. ISO 3200 and 6400 should be reserved for special situations where getting the shot outweighs its high level of noise.
ISO performance is a very personal thing among photographers. Everyone has their threshold for image noise. Take a look at this collection of shots and decide for yourself how the Olympus E-P1 performs in low light.
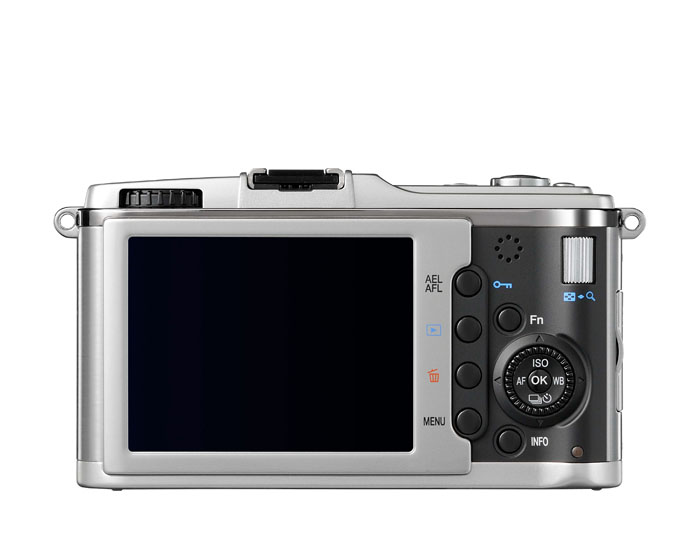
State of the art technology melded with Olympus Pen tradition, the E-P1 digital camera is a new breed of DSLR featuring HD video, Raw format, micro 4/3rds, in a stylish stainless steel compact body. In this podcast, I walk you through the feature set of this latest innovation by Olympus.
Pros
Well-crafted, attractive stainless steel body.
Raw, JPEG, and 720p recording formats.
Excellent image quality with 12.3 MPs resolution.
Good combination of manual controls and automation.
Many creative features such as multiple exposure.
Clear menu system and easy to use camera controls.
SD and SDHC memory card instead of xD Picture Card media.
Splash is the June 2009 Photo Assignment. You can capture anything from a child jumping in a pool to an olive dropping into a martini. You can read more about how to submit on our Submissions page. Deadline for entry is June 30, 2009.
The Olympus E-P1 digital SLR camera blends traditional looks with modern capability. Visually, it celebrates the styling of the original Olympus Pen camera that was introduced in 1959. But at its heart, it features the latest Olympus technology, including a micro four-thirds lens mount, 12.3 megapixel capture, and Raw, Jpeg, and AVI recording formats. In many ways, it's the most exciting Olympus release in recent history.
On June 19, 09, a handful of photographers will be testing more extensively the Olympus E-P1 in New York City. This will give us a chance to drill down into its features, examine the images it captures, and share those pictures with you. In my case, I already have opinions about the things I like and don't like about the camera. This shoot will help me better articulate those thoughts.
More to report soon. In the meantime, if you want to get the scoop on the feature set for this camera, listed to my podcast titled, Meet the Olympus E-P1 digital SLR camera.
It's almost as if the Eye-Fi folks heard our grumbling. No Raw file transfer, no selective uploads, no Ad Hoc connections. Well, they've fixed all of that with the new Eye-Fi Pro 4GB SD WiFi memory card.
The $149.99 card provides you with both Jpeg and Raw upload capabilities, the option to send-up only the pictures you want to transfer, and still includes Geotagging and widespread HotSpot access. You'll need a SDHC compatible camera, and of course some sort of WiFi access. The uploading can work in the background while you continue shooting.
If you have a hankering to transfer images directly from your camera, and you sometimes shoot Raw, this might be one of your most affordable choices.
"I was trying some low-light candids during a high school graduation last week." writes Joann Wilson. "It was a little frustrating because the graduates looked bored and fidgety much of the time, making it hard to get a group shot where everyone looked alive."
"The fidgeting was a particular problem since the low light forced me to shoot at about 1/15 sec. I was about to pack up and leave when they announced the last thing on the program: a music slideshow with pictures of the graduates through the years. Suddenly they all woke up and sat in rapt still attention for the whole 5 minute slideshow, allowing me to finally get a decent shot."
Joann used her Canon 20D with a Canon 24-70mm f/2.8L on a monopod. Settings were: ISO 1600, f/2.8, 1/15 sec., and 70mm focal length.
Photo by Joann Wilson. Click on image to zoom to larger size.
If you have a candid you'd like to share, take a look at our Submissions page, then send us your Grab Shot. We'll try to get it published for you on The Digital Story.
And you can view more images from our virtual camera club in the Member Photo Gallery.
Does the just-announced iPhone 3G S finally qualify as a reasonable compact camera? In addition to its resolution bump to 3 megapixels, the new device includes autofocus with "tap to focus" control, VGA video recording with editing, auto-macro, and improved battery life. I take a closer look at this device to see if it's the mobile camera we've been waiting for.
Monthly Photo Assignment
Splash is the June 2009 Photo Assignment. You can capture anything from a child jumping in a pool to an olive dropping into a martini. You can read more about how to submit on our Submissions page. Deadline for entry is June 30, 2009.