Recently in Photography

  Page 136 of 385 in Photography  

Fujifilm X20

I've been testing the eyefi mobiPRO 32 GB SDHC card with a variety of WiFi-less cameras, and have settled on using it regularly with the Fujifilm X20 compact. (Jump here to see the full report on the eyefi mobiPRO.)

But through my testing I've discovered that the user experience is much better if I follow a specific set of steps when using the new mobiPRO. So I'm sharing that "magical" sequence with you now, because it most likely works for other cameras too.

  • First, set the preferences for your eyefi mobiPRO card by using its bundled USB reader. (More on that here.) For mobile device usage, I recommend that Selective Transfer is on, and that RAW Transfer is off. Eject the card and put it in your camera.
  • In the camera menu, Turn Eye-Fi Transfer to "off." This saves precious battery power while you're out shooting.
  • When it's time to take a break and send your favorites to a mobile device, enable Eye-Fi Transfer on your camera (via the menu) and "Protect" the first photo you want to send to your device.
  • On your device, go to the Wi-Fi settings and log in to the personal network that the eyefi mobiPRO card is transmitting. Then go to the iOS or Android Eyefi Mobi app and receive the first photo.
  • With everything still connected, "Protect" the other images that you want uploaded to your mobile device. They should flow over instantly.
  • Once all the images have been transferred, go to your camera's menu and turn off Eye-Fi Transfer.

At this point, you can play with your photos on the mobile device, upload them to social network sites, or display them for others. I recommend that when you return home, copy all of the pictures off the eyefi mobiPRO card to your computer, and organize them in your standard photo management application.


More Help on Managing Your Mobile Photos

In my lynda.com title, Managing Your Mobile Photos, I cover a variety of backup solutions for both iOS and Android users. These tutorials will help you build the perfect backup solution for you, so that you never lose a single memory.

Want to Comment on this Post?

You can share your thoughts at the TDS Facebook page, where I'll post this story for discussion.
When I returned from Cuba, I had many requests for pictures of classic American cars. The thinking being that once the embargo is lifted (if indeed that happens), the streets of Havana will soon look much different.

Instead of putting a gallery online, I decided to make fine art notecards to give as gifts and to sell in the Nimble Photographer store. This was a good choice because the images on paper feel more like my experiences in Cuba than they would as a gallery on a computer display.

Fine Art Notecards of Classic American Cars in Cuba

After selecting a handful of pictures to feature, the next step was to decide the "look" for the prints. I wanted something that felt like traditional Havana. I played with various color palettes and opted for a rendering that had a mild tobacco tint. I then added an old style film edge as the finishing touch.

The Lone Freeway - Cuba "The Lone Freeway, Cuba" - We traveled on this quiet highway from Havana to Trinidad. Photo by Derrick Story.

Red River Paper

The paper selection was also important. I chose 72lb. GreenPix Photo Matte 7x10 by Red River Paper. GreenPix Photo Matte is made of 100 percent post-consumer recycled content (this felt consistent with Cuba's judicial use of resources). Plus it has a subtle warm tone that complemented the tobacco palette I was using for the photos.

Producing these prints feels far more satisfying than a web gallery. During my time in Cuba, I interacted with many artists and often purchased their work to bring home. I remember how carefully I guarded the items until I returned to my room that night.

Producing prints that I can hand to others keeps those good feelings alive. And now, I feel more connected than ever to the artists who inspired me during my visit.

More About Cuba

I've also published the following articles about Cuba:

Want to Comment on this Post?

You can share your thoughts at the TDS Facebook page, where I'll post this story for discussion.
For the Feb. 2015 gallery, TDS shooters waved farewell to 9 years of photo assignments. Join them for one last showing: Goodbye.

farewell-br-feb2015.jpg


Photo by Brian Reynolds. Brian writes, "Since October 2007, I've participated in 42 Photo Assignments. This is my 43rd and last Photo Assignment. It shows prints of the previous selected entries along with some of the cameras and equipment used to make them. In the back (propped up by just a few of my camera bags) you can see the Sizzlpix from the "Eyes" assignment. So long, and thanks for all the fish." See all of the great images from this month's assignment by visiting the gallery, Goodbye.


Want to Comment on this Post?

You can share your thoughts at the TDS Facebook page, where I'll post this story for discussion.
It's probably no coincidence that the impressive Alpha a7 II mirrorless full frame camera features 5-axis sensor-based image stabilization, which arrives not too long after Sony's substantial investment in Olympus (who developed the technology for their Micro Four Thirds bodies). And like any good marriage that produces beautiful offspring, everyone just counts their blessings.

sony-a7ii-front.jpg

Unlike the earlier a7 that uses optical stabilization only, the a7 II can, according to DP Review, "When shooting with Sony FE lenses that are already stabilized, denoted by 'OSS' on the lens, the a7 II will use both the sensor-based and lens-based IS together, to get the optimal image stabilized performance. The affects of image stabilization can be seen in a live preview when looking through the EVF or LCD." Talk about the best of both worlds, at least when it comes to IS.

This also opens the door for using practically any optic that can be mounted to the camera, while still enjoying top-notch stabilization. That's one way to fill out your lens roadmap in a hurry.

For me personally, the 1.3 pound, 5" x 3.78" x 2.36″ body is a bit heftier than I like to carry for my mirrorless shooting. But then again, if I didn't already have a full frame camera, this $1,700 beauty might just turn my head.

Want to Comment on this Post?

You can share your thoughts at the TDS Facebook page, where I'll post this story for discussion.
This week on The Digital Story Photography Podcast: Nifty Street Shooting Trick, Hands On with the Olympus SH-2 compact zoom, Color Calibration - All of this and more on today's show with Derrick Story.

Weekly Update - Uploader for Instagram in Mac App Store - Now you can send images to your Instagram account from a Mac. (Source: The Digital Story)

In other news... "X-Transformed? Fuji film X30 Review" The lovely X30 didn't fare as well as its predecessors, largely because its 2/3" sensor seems to be falling behind the competition. Other cons included:

  • Vigorous noise reduction at higher ISO settings destroys detail
  • Colors can be a little odd especially in overcast conditions
  • Takes too long to wake from sleep mode
  • Control ring could be made more use of for menu navigation and play back
  • Limited exposure compensation because of physical dial design

(Source: DP Review)

Story #1 - Double Your Street Shooting Pleasure - Unless you're in the state of Arkansas operating under the potential dark cloud of the Personal Rights Protection Act (not law yet, thankfully), I have a few techniques for you to consider during your next street shoot.

Assuming that you'll be using a mirrorless or other non-DSLR camera, dust off your favorite fast aperture prime lens, and tune in to the first feature story of today's show. Cameras that I've tested these techniques on include the Fujifilm X-20, Olympus OM-D E-M10, and the Samsung NX3000.

olympus-sh-2-front.jpg

Story #2 - "First Look at the Olympus SH-2 RAW Shooting Compact" - This pants-pocketable compact features an impressive 25-600mm zoom, one-touch WiFi, and RAW format. Other goodies include:

  • 16MP 1/2.3" BSI CMOS Sensor
  • TruePic VII Image Processor
  • 3.0" 460k-Dot Touchscreen LCD Monitor
  • 5-Axis Sensor-Shift Image Stabilization
  • Full HD 1920 x 1080p Video at 60 fps
  • Live Composite, Filters, and Photo Story

I've been carrying one around for about a week, and I have a hands-on report for you in today's second feature.

Story #3 - From the Screening Room - Advanced Color Workflows for Photographers with Joe Brady. Do you want to demystify color calibration for your monitors and mobile devices. Joe explains it all in this informative lynda.com title.

You can watch Joe in action by visiting the TDS Screening Room at lynda.com. While you're there, you can start your 7 day free trial to watch all of Joe's movies, plus every other title in the library (including over 20 by yours truly).

Virtual Camera Club News

News from Red River Paper: Have you made your archive 6 prints yet for 2015? The best backup system in the world is high quality prints properly stored. I recommend that photographers do a print run of their best twice a year. Here's why.

Thanks to everyone who recently reviewed the TDS Podcast in iTunes!

BTW: If you're ordering through B&H or Amazon, please click on the respective ad tile under the Products header in the box half way down the 2nd column on thedigitalstory.com. That helps support the site.

Download the Show

In addition to subscribing in iTunes, you can also download the podcast file here (38 minutes). You can support this podcast by purchasing the TDS iPhone App for only $2.99 from the Apple App Store.

More Ways to Participate

Want to share photos and talk with other members in our virtual camera club? Check out our Flickr Public Group. And from those images, I choose the TDS Member Photo of the Day.

Podcast Sponsors

lynda.com - Learn lighting, portraiture, Photoshop skills, and more from expert-taught videos at lynda.com/thedigitalstory.

Red River Paper -- Keep up with the world of inkjet printing, and win free paper, by liking Red River Paper on Facebook.

SizzlPix! - High resolution output for your photography. You've never seen your imagery look so good. SizzlPix.com. SizzlPix! now is qualified for PayPal "Bill Me Later," No payments, No interest for up to 6 months, which means, have your SizzlPix! now, and pay nothing until May!

Want to Comment on this Post?

You can share your thoughts at the TDS Facebook page, where I'll post this story for discussion.

Now it's easier than ever to move images from your Mac to Instagram. A new app, Uploader for Instagram ($4.99), allows you to right-click on a photo and send it to your account.

upload-to-instagram.jpg

The app isn't going to win any awards for design, but it does work. Once you control-click or right-click on the picture, choose Share to Instagram from the Services popup menu, then you're greeted with a spartan interface that lets you zoom and position the picture.

uploader-interface.jpg

There are also filters available, but I wasn't impressed with them (especially compared to the native IG filters). You can add a caption and hashtags, however, and performance is snappy. Within a few seconds my photo was displaying happily in my Instagram feed.


Join me on my Instagram site as I explore the world of mobile photography. And now Instagram features 15-second movies too.

Want to Comment on this Post?

You can share your thoughts at the TDS Facebook page, where I'll post this story for discussion.
Regardless if you use natural light or strobes for your portraits, you'll probably like the Westcott Omega Reflector Kit.

Sophie Natural Light Portrait Indoor window light portrait with the Omega reflector providing the fill light. Photos by Derrick Story.

For this portrait of Sophie, I used the Olympus OM-D E-M5 Mark II with the Panasonic 12-35mm f/2.8 zoom lens, f/2.8, 1/250th, ISO 1600, -2.0 EV. Main light (on the photographer's right) is from the north window at my studio, and the fill light is provided by the Omega reflector.

full-reflector-omega Omega reflector suspended from a DIY frame made of PVC pipe.

When fully expanded, the Omega measures a substantial 38″ x 45″, which is a versatile size for most portrait shoots. It has multiple surfaces to help you control both color and intensity. And what's really unique, the center "window" can be opened, allowing you to shoot through the reflector if you wish.

The collapsable Westcott Omega Reflector Kit is available for $119 at B&H Photo.

Want to Comment on this Post?

You can share your thoughts at the TDS Facebook page, where I'll post this story for discussion.

Back button focus - reprogramming a function button to handle focusing duties instead of a partial press on the shutter button - is particularly helpful for portrait shoots. I can set the focus on the eyes, then recompose and shoot without losing my focus point. I don't have to focus again until either I or the subject move.

e-m5-ii-illustration.jpg

It's easy to set up on an Olympus OM-D once you know where to go. The steps here are for the Olympus OM-D E-M5 Mark II, but they also can be used for other models.

gear-menu-a.jpg

  • Press the Menu button and navigate to Gear-A (AF/MF)
  • Go to AF Mode and select S-AF - Press OK
  • Check that Full-time AF is Off
  • Go to AEL/AFL, click on S-AF, and select mode3, Click OK, Click Menu (See illustration to find S-AF)
  • Navigate to Gear-B (Button/Dial/Lever), Press OK
  • Click on Button Function
  • Click on Fn1 and select AEL/AFL, Click OK, Click Menu, Click Menu

Now, when you press Fn1, the camera focuses. Pressing the shutter button half way locks in the exposure. If you're using the Olympus vertical grip, also Program B-Fn1 to AEL/AFL. That gives you back button focus in the vertical position too.

Once my portrait shoot is over, I go back to AEL/AFL in Gear-A, click on S-AF, and select mode1. This is my normal way of shooting, using a half press on the shutter button to focus the camera. The Fn1 button then becomes exposure lock.

If you use back button focus often, you may want to program the 1/2 Lever on the E-M5 Mark II or the EM-1 (see illustration, the lever is right next to the Fn1 button). Position 1 could be normal half-press of the shutter button for focusing, and position 2 can be programmed for back button focus. That way you could change focusing modes quickly.

Want to Comment on this Post?

You can share your thoughts at the TDS Facebook page, where I'll post this story for discussion.
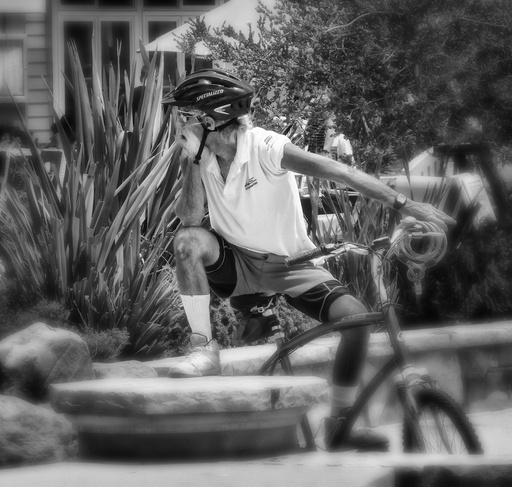
I've started using the 2X digital zoom function on all of my Olympus OM-D cameras. By doing so, I am able to use a fast prime lens, such as the fabulous Olympus M. Zuiko Digital ED 45mm f1.8 at wide apertures, then double its magnification without losing any light gathering power.

In the field, this means that I can work at an effective focal length of 90mms or 180mms at f/1.8. The question is, how much am I giving up by using the 2X digital zoom?

digital-zoom-comparison Side by side comparison of the RAW file at 45mm (left) and the Jpeg at 90mm (2X digital zoom) on the right. Images opened in ACR 8.8 with no adjustments.

For my real world test, I shot in RAW+Jpeg with the Jpeg mode set to Super Fine on an Olympus OM-D E-M5 Mark II with the 45mm lens set to f/2.2. I was able to keep the ISO at a reasonable 800, and I used +1 exposure compensation, giving me a shutter speed of 1/100th.

The RAW file dimensions are 3456 x 4608 with a file size of 15.31 MBs. The Jpeg has the same 3456 x 4608 measurements, and weighs in at 5.16 MBs. I opened both images in ACR 8.8 on a 15" MacBook Pro with Retina Display and captured these screen shots.

raw-file-400-percent.jpg RAW file at 400 percent.

jpeg-file-200-percent.jpg Super Fine Jpeg with 2X digital zoom at 200 percent.

Bottom Line

The 2X digital zoom fares well against its RAW file companion. The RAW file has not been processed, so it has more to offer in post production. The Jpeg can be published as is without further work.

I've set a function button on all of my OM-D cameras to toggle the digital zoom on and off. By doing so, I can shoot more with my prime lenses, knowing that I can zoom in without having to change the glass.

For critical work, I'll probably stick with RAW only. But for my street shooting, photojournalism, and event photography, I'm loving the 2X option. In fact, in these shots, I like the Jpegs better.

Want to Comment on this Post?

You can share your thoughts at the TDS Facebook page, where I'll post this story for discussion.

This week on The Digital Story Photography Podcast: Essential Tools for Event Photography, 5 Additional Things to Do with a 50MP Camera, ACR 8.8 New Camera Support (but not Lightroom) - All of this and more on today's show with Derrick Story.

Weekly Update - Ten New Cameras Supported by ACR 8.8 -

  • Casio EX-ZR3500
  • Canon EOS 750D (Rebel T6i, Kiss X8i)
  • Canon EOS 760D (Rebel T6s, Kiss 8000D)
  • Fujifilm X-A2
  • Fujifilm XQ2
  • Hasselblad Stellar II
  • Nikon D5500
  • Olympus OM-D E-M5 II
  • Panasonic Lumix DMC-GF7
  • Panasonic Lumix DMC-ZS50 (DMC-TZ70, DMC-TZ71)
(Source: DP Review)

In other news... "Ricoh reveals pixel-shifting high-resolution mode: Coming soon to a camera near you?" Unlike Olympus' approach, which grabs 8 frames and uses a half-pixel shift between two groups of four to interpolate additional pixels, Ricoh's method uses just four shots, to bring the four pixels of each Bayer color filter array cell into alignment with each other. The resulting file has the same number of pixels as conventional shots, but each pixel contains full, uninterpolated RGB data. (Source: Imaging-Resource)

cheese-at-the-festival.jpg

Story #1 - Essential Tools for Event Photography - Whether you're getting ready to shoot a wedding, trade show, or birthday party, these tools will help you capture better images while increasing your enjoyment. I'll explain each of these in the second feature of today's show.

  • A professional wide to moderate zoom. The constant aperture f/2.8 zoom that covers roughly from 24-70mms is a workhorse for the event photographer.
  • A fast portrait lens. I prefer a f/1.8 or f/2.0 85, 90, or 100mm prime lens to complement my zoom.
  • A lightweight flash modifier. I always carry at least one Rouge FlashBender to help me tame the light coming off my strobe.
  • Battery grip. Even when I shoot mirrorless, I keep a battery grip on the camera. This allows me to shoot the entire day without changing batteries, which usually occurs at the worst time possible.
  • A skilled assistant. Have an extra set of hands to manage the shot list, set up group shots, keep an eye on an activity not yet ready to photograph, and serve as a second shooter when needed is a blessing beyond description.

Story #2 - 5 Additional Things to Do with a 50 MP Camera - Yes, there are the obvious choices such as landscape and product photography with a new Canon 5DS R. But what about...

  • Start a business shooting life size portraits.
  • Become the first indoor sports photographer that only uses a 50mm lens.
  • Advertise yourself as a billboard photographer by shooting the first 50 MP selfie, then putting it on a billboard.
  • After the next holiday, send a 50MP RAW file attachment to a family member with a 5-year-old Dell with the caption, "Can you believe what Aunt Jenny revealed at the party?"
  • Rent your 50MP camera to other photographers who can't afford one, then use the money to buy stock in 4TB drives.

Story #3 - From the Screening Room - Black-and-White Project: Creating a Dramatic Landscape with Lightroom and Photoshop with Chris Orwig

You can watch Chris in action by visiting the TDS Screening Room at lynda.com. While you're there, you can start your 7 day free trial to watch all of Chris' movies, plus every other title in the library (including over 20 by yours truly).

Virtual Camera Club News

News from Red River Paper: Have you made your archive 6 prints yet for 2015? The best backup system in the world is high quality prints properly stored. I recommend that photographers do a print run of their best twice a year. Here's why.

Thanks to everyone who recently reviewed the TDS Podcast in iTunes!

BTW: If you're ordering through B&H or Amazon, please click on the respective ad tile under the Products header in the box half way down the 2nd column on thedigitalstory.com. That helps support the site.

Download the Show

In addition to subscribing in iTunes, you can also download the podcast file here (35 minutes). You can support this podcast by purchasing the TDS iPhone App for only $2.99 from the Apple App Store.

More Ways to Participate

Want to share photos and talk with other members in our virtual camera club? Check out our Flickr Public Group. And from those images, I choose the TDS Member Photo of the Day.

Podcast Sponsors

lynda.com - Learn lighting, portraiture, Photoshop skills, and more from expert-taught videos at lynda.com/thedigitalstory.

Red River Paper -- Keep up with the world of inkjet printing, and win free paper, by liking Red River Paper on Facebook.

SizzlPix! - High resolution output for your photography. You've never seen your imagery look so good. SizzlPix.com. SizzlPix! now is qualified for PayPal "Bill Me Later," No payments, No interest for up to 6 months, which means, have your SizzlPix! now, and pay nothing until May!

Want to Comment on this Post?

You can share your thoughts at the TDS Facebook page, where I'll post this story for discussion.