I'm a big fan of what Nik Silver Efex Pro 2 can do for my B&W photography, so when I heard that they've just released Color Efex Pro 4 for color work, I wanted to give it a try.
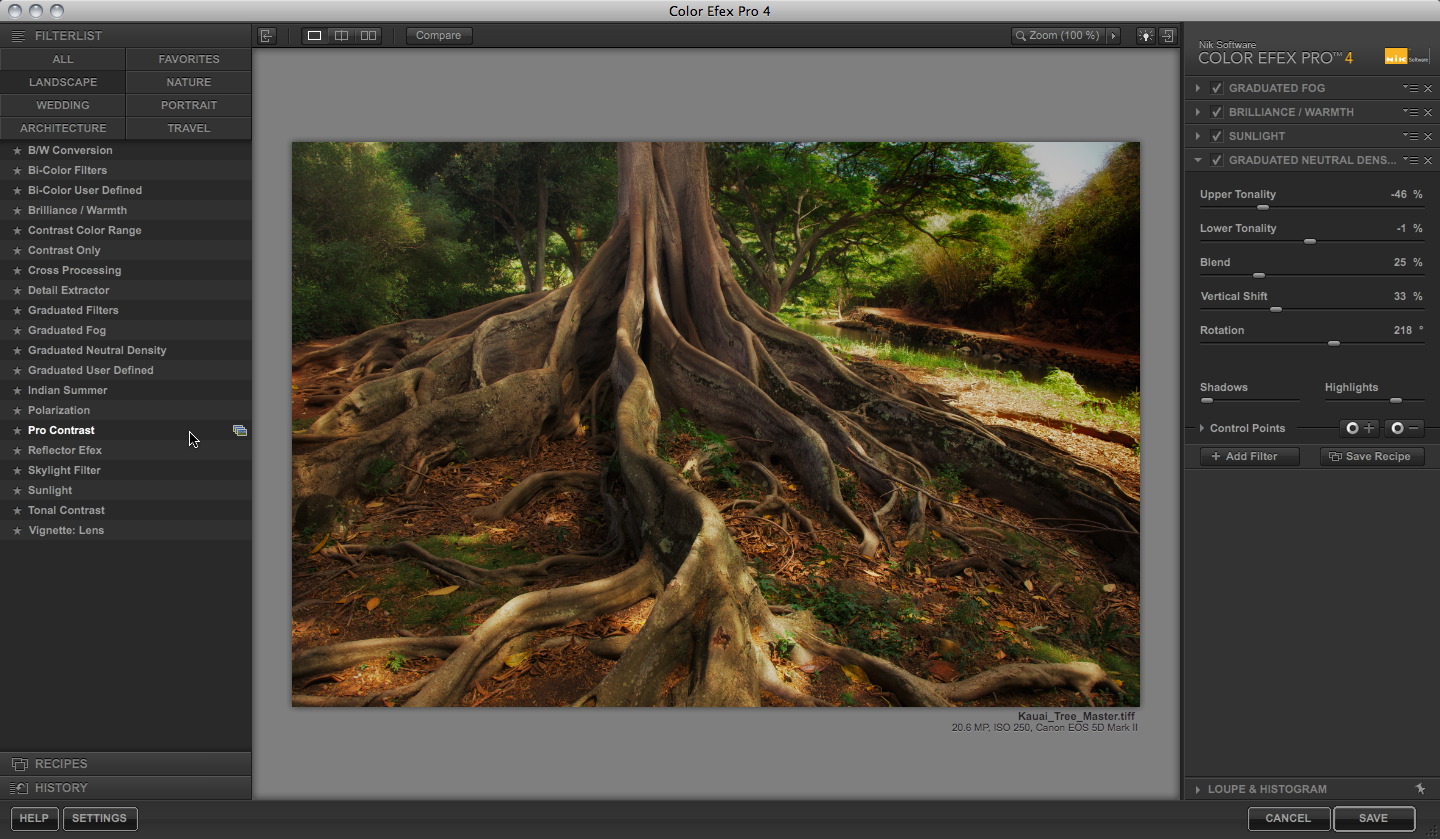
 Project in process with 4 filters active. Click on image for larger version. Photo by Derrick Story, shot in Kauai.
Essentially, this software provides a set of 55 customizable photo filters that you can combine in just about any imaginable way. When you build a set of filters that results in a look you want to repeat, save them as a recipie to apply to other shots.
As with Silver Efex Pro 2, there are plenty of sliders to tailor the intensity of highlights, shadows, contrast, color, etc. And, as you'd expect, control points are available to fine tune a specific area.
I combined four filters on this shot from Kauai to create a look I had always had in my mind for this image, but hadn't been able to achieve. My workflow went like this.
- Make basic image adjustments in Aperture 3 to the master Raw file.
- Choose Color Efex Pro 4 from the Photos > Edit with Plug-in menu.
- Click on the Landscape filter grouping in the left column.
- Choose a filter that looks appropriate and preview its options by clicking on the variations icon to the right of the filter name (see illustration).
- Pick a variation I want, then tweak to taste.
- Click the Add Filter icon in the right column to add another effect to the image (if you don't use Add Filter, then the next effect you choose replaces the previous one).
- Repeat process until I've added the right amount of filters and adjusted them for the look I want.
- Click on Save Recipe in the right column to save my settings. Give the recipe a name.
- Click the Save button in the lower right corner to process the image and send the Tiff file back to Aperture,
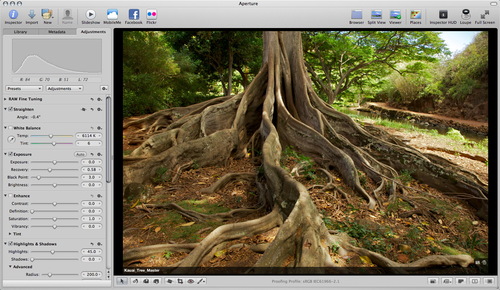 Here's the original tree image in Aperture before working on it in Color Efex Pro. The shot is fine, but it doesn't have the Jurassic Park mood that I wanted.
Just like with any Edit plug-in in Aperture, you're adding another image to your library. I like to stack them together to keep things organized. Color Efex Pro 4 works with Adobe Lightroom and Photoshop also. So, regardless of your preferecne for image editing software, you can use these filters.
A few of the other features I like in Color Efex Pro 4 include a zooming tool, compare mode, choice of background shade, and history browser. There are two editions of the software available from the Nik site: Standard (26 filters) $99.95 or Complete (55 filters) for $199.95. Works great on both Macs and Windows machines. If you own a previous version, you can upgrade to the Compelte Edition for $99.95. And if you purchase Color Efex Pro 3.0 or the Complete Collection on or after August 7, 2011 you are eligible for a free upgrade to Color Efex Pro 4.
Bottom line: I was able to learn the software quickly by watching a couple videos on Nik's On Demand Video Training page, then put these effects to work on my images. The visual nature of the interface makes it easy to create the look you want. It's not for every image, in part because I don't want to fill up my Aperture library with large Tiff files. But for that special shot you want to get just right, Color Efex Pro 4 can get you there quickly.
More Aperture Tips and Techniques
My next Aperture Workshop is Nov, 12-13, 2011 in Santa Rosa, CA. Write me if you're interested in attending.
To learn more about Aperture 3, check out my Aperture 3 Essential Training on Lynda.com. Also, take a look at our Aperture 3 Learning Center. Tons of free content about how to get the most out of Aperture.
The Digital Story on Facebook -- discussion, outstanding images from the TDS community, and inside information. Join our celebration of great photography!