Recently in Photography

  Page 370 of 385 in Photography  

Red Photo Assignment

If you haven't submitted your photo assignment for August yet, today is the deadline. The theme for this month is "red."

Our monthly Photo Assignment on The Digital Story is designed to make us all working photographers. It helps us apply the techniques we learn and produce a body of work to show to the public. We have a great line up in the works for the August gallery. I'll showcase the entries on Monday, Sept. 4. For more information about how to submit your photo assignment, go to the Submissions page and follow the instructions for Photo Assignment.

Featured photo: This "red" entry is from Jennifer Tofani. "I was bleary eyed with bloodshot eyes," she said about her return trip home. "As I leaned on the window watchng the sky go by, I saw red! Although the red was but a dot on the tip of a wing, it really stood out against the pale blue sky and white clouds."

Technorati Tags: , ,

How to Animate Your iPhoto Titles

Motion Title

You can put your great looking slideshow titles in motion without ever leaving iPhoto. In a previous post, I explained how to use the Greeting Card function in iPhoto 6 to generate compelling title slides. You can take these images to the next level by animating them.

Start by making a copy of your title slide and placing the two identical images side by side at the beginning of your iPhoto slideshow. Then apply the Ken Burns effect to the first slide. For the "Start" point, zoom in a little (using the Zoom slider setting located at the lower right of the frame). The set the "End" point of the effect to show the slide at 100 percent (no magnification).

Open the "Adjust" panel and set the slide appearance length to 6 seconds or so with no transition. Now go to the second slide and set its length to 2 seconds with a Dissolve transition. You won't use the Ken Burns effect for this image. Now click once on your first slide and hit the Preview button to see the effect.

I've posted an example so you can see the effect in action. You can play with the settings to create exactly the look you want. It's a professional way to start your slideshow that's so easy to create in iPhoto.

See It in Person

If you're in Northern California on the weekend of October 7, stop by the Macintosh Computer Expo and sit in on my iPhoto 6 Tips and Tricks session. It's free, and I'll show you this tip plus lots of other cool iPhoto goodies. For those who really want to dig into some shooting techniques, stick around another day and sign up for my Digital Photography Made Amazing half day workshop on Oct. 8. But sign up early because seating is limited.

Technorati Tags: , , ,

iPhoto Ppostcard

Here's a great graphics trick that many people don't know. You can easily build fantastic slideshow titles right within iPhoto 6. Start by clicking once on an image in your iPhoto library that would be a good opening title. Now click on the "Create a new card" icon at the bottom of the iPhoto window. (It's the greeting card picture with a plus sign.) iPhoto will open a new window and ask you to choose a theme.

Go to the popup menu in the upper left corner of the dialog box and select "Postcard." Then browse the different themes until you find one you like. Select it by clicking on it once, then click on the Choose Theme button. This prompts iPhoto to open a new window with the preliminary design of your card.

To add text to the front of your postcard, which will soon become your opening title, click on the Design icon to reveal a popup menu, and select option #2. You can add type to your card by clicking on "Insert Title" and typing.

You have lots of design control. You can change backgrounds by clicking on the Background button, switch themes by clicking on the Themes button, and even change fonts and size by clicking on the Settings button. Once you have the postcard designed to your liking, go to the File menu and choose Print. iPhoto will assemble your card for you then present you with another dialog box.

If you're greeted with the standard view of the dialog box (that doesn't give you any options), click on the Advanced button. Now set up "From 1 to 1" for your Pages selection. You don't need the back of the postcard for this assignment. Go to the PDF dropdown menu and select "Save PDF to iPhoto."

Your Mac will run a little workflow that soon asks you which iPhoto Library to save the image in. Select your slideshow album from the "Choose Album" popup menu and hit "Continue." iPhoto will place a 1200 x 800 Jpeg of your postcard in your album. Rename the image "Opening Title" and drag it to the first position in the album. You can create as many of these graphics as you need throughout the show. You now have a stupendous opening graphic for your slideshow.

See It in Person

If you're in Northern California on the weekend of October 7, stop by the Macintosh Computer Expo and sit in on my iPhoto 6 Tips and Tricks session. It's free, and I'll show you this tip plus lots of other cool iPhoto goodies. For those who really want to dig into some shooting techniques, stick around another day and sign up for my Digital Photography Made Amazing half day workshop on Oct. 8. But sign up early because seating is limited.

Technorati Tags: , ,

ExpoDisc

Capturing accurate color under different types of lighting isn't always easy. Fortunately, most of the time the auto white balance setting does a good job. And if you shoot Raw, you always have the option to fiddle with your white balance settings in post production.

But imagine setting all of those concerns aside and just get the color right when you take the picture. I've been using the ExpoDisc recently, and my colors have never looked better.

The ExpoDisc works hand in hand with your Custom White Balance setting. By following just a a few easy steps, you essentially create a new white balance preset tailored specifically for the light source that's illuminating your subject. I can set up a custom white balance setting in less than a minute on my Canon DSLRs.

In my next podcast I cover the custom white balance setting and explain how to use it with a variety of accessories including a sheet of white paper, a coffee filter, and the ExpoDisc. You can find my podcasts on iTunes Music Store. The custom white balance episode will be available this coming Tuesday.

The ExpoDisc is available for $80 - $115 depending on what diameter you buy.

Technorati Tags: , ,

Canon Rebel 400D Announced

Canon Rebel 400D

Canon announced the Rebel 400D today along with two new lenses (50mm f-1.2 and 70-200mm IS). The new Rebel features a bigger 2.5" LCD, sensor dust management system, and a new CMOS 10.2 MP sensor.

Canon has also lowered the price $100 from the previous Rebel, which means you can get the 400D body for $799 USD. This is a tempting package for those with the original 6MP Rebel, and I bet even current Rebel 350D users will give this new model a close look. The larger LCD and image sensor puts this camera on par with many of Canon's more expensive offerings. Combined with the fact that existing 350D accessories and battery work with the new model, the upgrade path is quite smooth.

We'll keep an eye on availability...

Technorati Tags: , ,

Olympus SP-510 UZ Debuts at Photokina

Olympus SP-510uz

This is a camera to keep an eye on. Olympus is unveiling the SP-510 UZ at Photokina. It's specs are impressive: 7.1 million pixels, 10x optical zoom, 2.5" LCD, ISO 50-1600 at 7.1 megapixels, ISO 2500/4000 at 3 megapixels resolution, and... RAW mode.

In a recent post, Are "Prosumer" Cameras on the Way Out?, I wonder if full-featured compact cameras with Raw capability are becoming a thing of the past. Apparently, Olympus doesn't think so. This camera has so much: spot metering, advanced white balance adjustment, 3 frames per second, and f-2.4 maximum aperture. The only missing feature is its lack of a hot shoe. Other than that, it appears to be a dream packed into 325 gram package.

I can't wait to see what the first wave of reviews have to say.

Technorati Tags: , ,

Model Gallery Now Online

Iceland Model

I've just posted a gallery of model shots from the Iceland shoot that Maggie Hallahan and I discussed in podcast 45. This gallery covers three of the locations we visited, including the steam shots we recorded at 10pm as the final sequence of the day.

I used Adobe Lightroom to process the images and built the gallery using its Web module. I recorded most of the images with a 70-300mm Canon USM IS zoom lens mounted on a Canon 5D body. For the steam series, I attached the camera on a tripod and set the camera to 1/30th of a second at f-5.6, ISO 100.

As with the wedding couple series that I published earlier, I made sure I got model releases for all of the subjects featured in these galleries.

Technorati Tags: , ,

Iceland Wedding

Imagine as you arrive to the chapel on your wedding day, you're greeted by a professional photographer whom you've never seen before and he says he'll shoot your ceremony for free. All you have to do is sign a model release. Oh, and he doesn't speak your native language.

This is just one of the amazing events that happened in Iceland. In the story, The Couple from Sweden, I describe the series of events that led to my photographing one of the sweetest weddings I've ever encountered. I've also posted the gallery on my Story Photography site.

Unlike the commercial weddings that I normally shoot, I captured this one existing light with no flash. I had complete artistic freedom. I then processed the images in Adobe Lightroom, and used its Web module to generate the gallery pages. From start to finish, this was a very satisfying self-assignment.

Technorati Tags: , ,

Nikon D80 for Serious Enthusiasts

Nikon D80

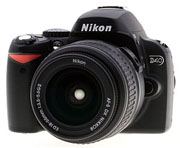
The new Nikon D80 is a 10.2 megapixel sophisticated DSLR designed for serious enthusiasts who want great images but don't have the budget for a high-end Nikon.

The specs are impressive: new 12-bit image processing engine, 2.5" LCD, 0.18 sec. start-up with fast 80ms shutter response, three metering modes including spot, 3 frames per second, built-in flash with wireless commander, and bright 0.94x optical glass viewfinder. The body should retail for $999, or get the kit for $1,299 that includes the new 18-135mm DX Zoom Nikkor lens. Personally, I think the kit sounds like a better deal.

This camera is clearly a cut about the D50 and D70. It has more resolution, better image processing, and lots of new features. It's not inexpensive by any means. $1,300 for body and lens is a sizable investment for most enthusiasts. But I think Nikon had done their homework here and put together a camera that will satisfy this demanding niche. I'll report more once the test results begin to surface. The camera should be available sometime in September.

Technorati Tags: , ,

retouch_tool.jpg

The Retouch tool in iPhoto 6 has more capability than most people realize. The default mode is a frustratingly blunt cross hairs that provides very little control. You can, however, enable an advanced mode that lets you set the diameter of the brush for more precise retouching.

First launch iPhoto 6, choose a picture and enter Edit mode by clicking on the Edit button in the row of buttons beneath the thumbnails. Click on the Retouch tool and your mouse pointer will become the normal cross hairs that we're accustomed to with Retouch.

To enable the advanced options, press the "Caps Lock - CTRL - 9" keys all at the same time. You won't notice any difference at first, but you have activated the advanced mode. Now press the Tab key, and your cursor will change from a cross hairs to the brush diameter indicator as show in the illustration above. You can make the diameter of the brush bigger by pressing the right bracket key ] and smaller by using the left bracket key [.

You can also control the density of the retouching by holding down the SHIFT key and using the right and left curly braces { }. SHIFT - Right Brace } increases the density of the retouch and SHIFT - Left Brace { decreases the density.

If you press the Tab key again, you go to Lighten mode. This tool is good for lightening areas of the image that have a little too much density. Again, you can control the diameter of the brush via the left and right bracket keys. Press the Tab button again and you return to the normal cross hairs mouse pointer.

The advanced options stay on as long as iPhoto is open. If you relaunch the application, then you'll need to enable them again via the "Caps Lock - CTRL - 9" keys. You can read more about these tools in Rob Griffiths excellent Macworld article, Use advanced iPhoto 6 edit tools.

Technorati Tags: , , ,