Recently in Photography

  Page 325 of 386 in Photography  

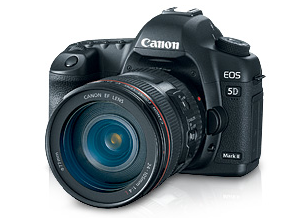
5d_markii_top.jpg

I received the Canon 5D Mark II yesterday and have had a chance to get to know this latest full-sensor DSLR in Canon's lineup. By now, most folks know about the big changes with the body. The 21-megapixel resolution and HD movie recording are the headliners. But there are some other more subtle improvements that I really like.

Finally, a Real Battery Status Indicator

I've wondered for years why Canon cameras didn't do a better job of reporting on the remaining battery charge. My far less expensive Sony compact told me more about the battery than my expensive DSLR body. But no more!

The 5D Mark II now sports a Battery Info screen that shows me remaining capacity in perecent, shutter count, and recharge performance. It also lists the actual battery model number and where it's located (grip or internal). It's terrific!

Intelligent Auto Rotate

Previously, we only had two options for Auto Rotate. Either you turned it off so you could utilize the entire LCD for verticals, but then had to rotate the images yourself on the computer. Or you could turn it on for rotating on the computer, but then had to look at verticals using the short side of the LCD.

Well, now there's a third option that lets you turn on rotation for the computer only. That way I can see verticals long ways on my camera LCD but have them correctly orientated on the computer. I'm very thankful for this improvement.

Live View Feedback on Kelvin Color Temperature Settings

We've been able to set Kelvin color temperature for some time, but it was always a shot in the dark. Now, thanks to Live View, I can activate my White Balance menu, go to Kelvin, rotate the dial, and get visual feedback on each temperature setting. When it looks right, I stop. This is faster than using Custom White Balance, and a big improvement for working quickly in the field.

Focus Magnification in Live View

When you're in Live View mode, you press the AF-ON button to focus the camera. If you set the AF mode in the menu to Live Mode, then you have the option to increase the magnification of the focus area to 5X or 10X by pressing the magnifying glass icon when focus is activated.

This will help you nail a particular element in your composition. When you're ready to return to normal view, just press the magnifying button again.

Silent Shooting

Another great feature thanks to Live View is Silent Shooting mode. You'll find the option in the Live View set up menu. By using Mode 1 and turning off the "beep" confirmation, you can capture images at a fraction of the noise level that we traditionally endure with DSLR bodies. This is perfect for certain occasions such as wedding vows.

More Features in the Future

I'll continue to pass along tips that I learn using the Canon 5D Mark II in future posts. Happy New Year!


twitter.jpg Follow me on Twitter. I'll be posting live from Macworld Expo everyday next week.

-


Technorati Tags: , , , , ,

macworld_2009.png

I have a busy speaking schedule at Macworld Expo 2009. Here's a brief overview of the week in San Francisco.

Aperture Power Tools 2-Day Workshop

This two-day Power Tools workshop will introduce you to all of Aperture's major functions, making post production as enjoyable as capturing the images in the first place. You can read the complete course outline on the Power Tools page.

Monday, January 5, 2009, 11:00 AM - 6:00 PM; Tuesday, January 6, 2009, 11:30 AM - 6:30 PM. Room 301, South Hall. Register online here. The Power Tools workshops have an additional fee.

Five Ways to Work More Efficiently in Photoshop

With each new release, Adobe has added a handful of photographer-friendly tools to Photoshop - little gems that you might not be aware of yet. But, when incorporated into your workflow, these tools can make a world of difference. You can read the complete outline on the Users Conference page.

Wednesday, January 7, 2009, 1:00 PM - 2:15 PM. Room 2010, West Hall. Register online here. This is part of the Users Conference.

The State of the Art of Digital Photography

A group of America's leading photographers will share tips, tricks and hacks to help you make the most of your digital cameras they'll show before and after examples of software tools to make your photos sing, and they'll answer questions about how to be a better photographer. Session led by Rick Smolan. You can read the complete outline on the Users Conference page.

Wednesday, January 7, 2009, 3:00 PM - 4:15 PM. Room 2002, West Hall. Register online here. This is part of the Users Conference.

Build a Better Workflow with Photoshop

In this hands on lab, see how you can build an amazing workflow with Bridge, Adobe Camera Raw, and Photoshop. You'll learn the inside tricks that will enable you to make your images look great without having to learn complicated techniques. You can read the complete outline on the MacLabs page.

Thursday, January 8, 2009; 4:00 PM - 6:00 PM. Room 111, North Hall. Register online here. This is part of the MacLabs program.

Expert Photo Tips from Real Experts

Curious about digital photography? Want some post-production tricks? Wondering what camera is right for you? Join expert photographers and O'Reilly authors Derrick Story, Mikkel Aaland, and Deke McClelland for an inside perspective on the world of digital photography and learn to get the most out of your digital images.

Apple Store, San Francisco (One Stockton Street San Francisco, CA 94108 415-392-0202). 7:30 PM - 9:00 PM. Free.

O'Reilly Media Booth

I'll be spending as much time as possible in the O'Reilly Media booth on the Expo Hall floor. I have two formal talks there, Photoshop Made Easy on Thursday Jan. 8 and Friday Jan. 9 at 1 PM. I'll hang around afterward to chat and sign books too. So be sure to stop by and say hello. This is a freebie!


twitter.jpg Follow me on Twitter. I'll be posting live from Macworld Expo everyday next week.

-


Event Calendar

Events! See the TDS Event Calendar for photography workshops, speaking engagements, and trade show appearances.


Technorati Tags: , ,

sharp_hdtv.jpg

Digital picture frames were quite popular this holiday season. And for good reason. They are an easy and enjoyable way to show off your best shots.

But if most digital picture frames are the size equivalent to snapshots, then imagine your images displayed in all of their glory on an HDTV? As prices continue to fall for large screen high definition LCDs, photographers are discovering that they can be used for more than watching Sunday sports. With screen dimensions ranging from 19 inches all the way up to a whopping 60 inches, they are the digital equivalent to large format prints.

Many HDTVs have a slideshow function built in. All you have to do is load your images on USB flash drive, plug it in to the USB port on your TV, and off you go. Also, devices such as the Apple TV have photo display software that will tap image folders on a networked computer or via your iPhoto or Aperture libraries.

For best results, make sure you crop your images to 16:9 dimensions. In this case, displaying on the TV is very much like making a print. You want to make sure the proportions of your images match the output size.

If you have access to an HDTV, take a look at its photo display options. It's a great way to impress viewers with your photographic prowess.

Technorati Tags: , , , ,

hp_iprint.jpg

If you have an HP printer connected to a WiFi network that can produce 4x6 snapshots, then you might be interested in their mobile app, HP iPrint Photo. It's available in the iTunes App Store and works on the iPhone and iPod touch. You can now print the images on your iPhone directly to any compatible HP printer on a wireless network. That's fairly cool.

I've downloaded it and am going to give a spin today.


twitter.jpg Follow me on Twitter

-


Technorati Tags: , , ,

Good Tutorial on Creating HDR Images

david_nightingale_hdr.jpg

Even as good as today's digital cameras are, they can't reproduce the extended range of darks and lights that our eyes can see -- at least not in one exposure. But by combining many different exposures, we can approximate our vision with a technique called High Dynamic Range photography (HDR).

My experience with HDR hasn't always been predictable. Sometimes the final product looks terrific, and other times it just turns our weird. But I found an excellent tutorial by David Nightingale on the PhotographyBLOG that does a great job of explaining the theory and practice of HDR. I'm going to try a few of these tips and see if I can increase my success rate.

HDR image by David Nightingale


twitter.jpg Follow me on Twitter

-


Technorati Tags: , , , , ,

A friend of mine, Tom Bridge, recently found a Canon 5D Mark II and posted about it on his twitter page. I asked Tom if he wouldn't mind writing up his first impressions of finding the camera, and then actually shooting with it. He sent me the following report that I thought you might enjoy.


Tom's Canon 5D Mark II

Washington DC -- Yesterday afternoon, knowing that Penn Camera was sold out on the 5D Mark II for at least 3 months, I went to Dominion Camera in Falls Church. They'd told me late on Wednesday that they had one that hadn't been claimed yet, and that it was mine, were I to come over and pay for it. So I did. I picked up the 5D Mark II with the kit lens and all the assorted accoutrements.

I ran straight home, and busily set about clearing a workspace to open the box. My only disappointment after tearing through all the manuals and whatnot was that the battery came drained. I had to sit there and watch the LED blink on the wall charger for what felt like an eternity while I assembled the camera, filled out the documents, repacked the box and put it away.

This did give me the opportunity, though, to feel the camera out. For the last three years, I've used an old Canon 10D that I got second-hand. It's a work-horse, that I love to death, but it can't hold a candle to the 5D Mark II. I hardly knew quite what to expect in the upgrade.

The best way I can describe it is to go from a car that you dearly love to drive, but has clear and delineated issues you work around, to driving a brand new sport-tuned Porsche on the Autobahn. The 5D Mark II just seems to fit my hand better than the 40D or 50D that I tried out as part of this process, and the balance is exquisite with the 24-105mm f/4 IS kit lens. I was amazed at how agile it felt, despite the significant weight. Canon did a great job just with the hold-factor of the camera.

canon_5d_mark_2.png

I tend to shoot aperture-priority most of the time, with my thumb on the wheel. I'm always dialing back the exposure with the 10D, even at 800 or H, so I get something that I could hold still enough to capture. Boy is that gone from the 5D Mark II. The flexible ISO metering is something that I'll have to get used to, and learn how to capture to its best ability. It's pretty astonishing, though, to see something that's shot at ISO 3200 that looks better than anything I shot at ISO 400 on the 10D.

I'll know a lot more after this weekend's shooting, but for the time being, I'm a very, very happy camper. Here's hoping for some good weather tomorrow, I've got my 50mm prime, the 24-105, and there's a beautiful Christmas display in downtown Pittsburgh where we're visiting.


Thanks Tom for the field report. If you have first impressions of a new camera you just laid hands on, please send it my way. You can get all the details on our Submissions page.


twitter.jpg Follow me on Twitter

-


Technorati Tags: , , , ,

time_pics_of_year.jpg

Whether it's a shot of worn-out shoes from the campaign trail, or the micro-second victory by Phelps at the Summer Games, Time's Pictures of the Year for 2008 show us the highs and lows of a tumultuous 12 months.

If you have a few minutes, take a look at these 48 images. There's a lot of history here, and good photography too.

"Shoe Leather" is by Callie Shell/Aurora for Time


twitter.jpg Follow me on Twitter

-


bridge_rating.jpg

Virtual camera club member Jane R sends us a terrific tip to speed up the process of rating photos in Adobe Bridge (CS3 and CS4 versions). Jane writes:

"I've got a quick tip for you. I am reading your book, The Photoshop CS4 Companion for Photographers, and do not see this one mentioned."

"To make rating photos quicker when photo editing in Bridge, go to Preferences, find Labels, and uncheck the box to "require the Control Key (or CMD key on Mac) to Apply Labels and Ratings". This way you can just type a number (0-5) on the numeric keypad for the rating. (A '2' equals 2 stars, etc.) And you can change the rating easily by just typing another number 0-5."

"Thanks for all the good information you provide via the podcast, the website, and your books. I have copies of Digital Photography Hacks and The Digital Photography Companion. I suggested my public library buy a copy of The Photoshop CS4 Companion for Photographers, which I am now learning from."

Thank you for the great tip Jane! I've already changed my Preferences for both CS3 and CS4.Adobe Lightroom 2.2 Update Released

I got this note recently from Adobe PR about the latest version of Lightroom:

"Lightroom 2.2 adds raw support for seven new camera models including the Canon EOS 5D Mark II and Canon PowerShot G10. The update also includes several refinements such as enhanced performance of the local adjustment tools. In addition, Adobe's Camera Profiles are now available natively within Lightroom 2.2 and are provided automatically as part of this release. As the visual starting point for the raw processing workflow, camera profiles provide flexibility that allows photographers to quickly achieve their desired rendering."

This looks like a great update. I'll probably download it today and give it a spin.

Olympus E-30 Sample Shots on Imaging-Resouce

As you know, I've been testing the about-to-be-released Olympus E-30 DSLR. The good folks over at Imaging-Resource.com have released a terrific gallery of sample photos from the E-30 that include test targets, outdoor shots, and studio-lit settings, all at different ISO and other settings. It will help you get your head around how this camera performs. I'll continue to focus on the special features.


twitter.jpg Follow me on Twitter

-


Technorati Tags: , , , , , ,

five_things.jpg

If you haven't signed up yet, there's still time. I've put together a live presentation where I show you some of my favorite new features in Photoshop CS4. And it airs today at 10:30am PST/1:30pm EST. It is absolutely free. And all attendees receive 45-days complimentary access to The Photoshop CS4 Companion for Photographers via Safari Books Online. That means you could download the trial version of Photoshop CS4, access my book, and decide for yourself if this upgrade is for you -- and none of it will cost you a penny.

You can register right now at this site. After the presentation, I'll have a Q&A session too. It's going to be a lot of fun.

psc_cover_web.jpg

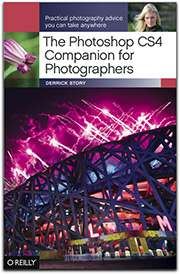
Learn what photographers need to know to organize and edit their images with Photoshop CS4. Take a look at The Photoshop CS4 Companion for Photographers. It fits in your laptop bag and is very easy on your wallet.

Imagine a high quality softening filter that's available for every lens you mount on your camera. And the best part is, you never have to clean it -- that is if you're shooting with the recently announced Olympus E-30 12.3 MP DSLR. One of its unique features is a selection of Art Filters built right in to the camera, with my favorite of the bunch being the Soft Focus effect.

The processing power for the Art Filters are made possible with the new TruePic III+ digital processing engine built-in to the E-30. According to an Olympus:

"When an Art Filter is enabled, not only does the camera process the conventional attributes such as brightness, contrast, white balance, hue, and sharpness, it also controls a whole subset of attributes such as shading, softening, composite and distortion. This is like taking a picture through an optical glass filter. Because the exposure and filter effects are calculated and applied during the image capture stage, the integrity of the final image is maintained."

Since the camera is actually processing the image when it's in Art Filter mode, the output is a Jpeg. But if you're shooting Raw+Jpeg, you also get the original unaltered image as a Raw file (so you get a softened Jpeg and an unaltered Raw). Let's take a look at how this works. Here's the original Raw file from an outdoor portrait:

original_image_dw.jpg
Original Raw File with no effects applied.

Standard portrait taken with fill-flash and a 105mm lens. Now here's the same frame, but this time you'll see the Jpeg that was produced in Art Filter mode using Soft Focus. I haven't done any image editing to either the original or the Art Filter version. This is what came out of the camera.

soft_focus_dw.jpg
Soft Focus Art Filter produced in-camera with the E-30

Even though the file you're looking at is unaltered, I did open a number of these images up in Photoshop to see what was going on. Olympus has applied a number of clever image adjustments to produce this effect, including moving the black point to the right of the histogram to downplay contrast.

When you capture via an Art Filter, you use the E-30's Live View function, so you can see the effect on the LCD while you compose. You can also see the final product on the LCD in playback mode.

One of the benefits of of the Soft Focus Art Filter is that it saves you Photoshop time in post production. What you see on the camera's LCD is what you get. No image editing required. But if you don't mind a little post production, you can work on the Raw file to produce a third version of the shot.

I have a technique that I include in the recipe chapter of my The Photoshop CS4 Companion for Photographers that uses the Gaussian Blur filter on a separate layer to soften the skin (p. 120). Here's that same shot using that post production approach.

ps_retouch_dw.jpg
Gaussian Blur applied in Photoshop

Each image has its own look. The Gaussian Blur technique is more subtle, but requires post production. The Soft Focus Art Filter is a bit more pronounced, but well executed. Plus, it's applied in-camera. No post production required!

Other Art Filters included with the E-30 are: Pop Art, Pale and Light Color, Light Tone, Grainy Film, and Pin Hole Camera. They are all fun, and they definitely get the creative juices flowing. I have more unique features of the Olympus E-30 12.3 MP DSLR that I'll cover in upcoming blog posts. Stay tuned.

Photos by Derrick Story. Captured with the Olympus E-30 DSLR with the 14mm-54mm f/2.8-3.5 Olympus Digital zoom lens.


twitter.jpg Follow me on Twitter

-


Technorati Tags: , , , ,