This is The Digital Story Podcast #812, Oct. 12, 2021. Today's theme is "If There Ever Was a Time to Stand Pat." I'm Derrick Story.
Opening Monologue
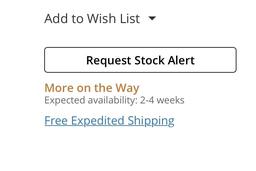
I have become very familiar with the term, Request Stock Alert. As I compare recent camera announcements with availability, I see there is a fairly wide gap. You can receive shipment on some items, but they may not be the exact thing that you're hoping for. And this got me thinking, maybe this is a good time to simply appreciate the equipment that I have, and leave it at that. I explore this topic on today's TDS Photography Podcast (and lots more!). I hope you enjoy the show.
Digital Photography Podcast 812
Tune-In Via Your Favorite Podcast App!

Apple Podcasts -- Spotify Podcasts -- Stitcher
Podbean Podcasts -- Podbay FM -- Tune In
If There Ever Was a Time to Stand Pat
Let's start with the story of my studio refrigerator.
When it comes to cameras, we're seeing a similar situation. Here's the latest Stock Requests on B&H:
Fujifilm XT-4, Fujifilm X100V, Fujifilm X-E4, Fujifilm X-T30II, Canon EOS R5, Canon EOS R3 (preorder), Canon EOS R6 (body only), Canon EOS M50 Mark II,Nikon Z7 II, Nikon Z fc (body only or with 28mm), Ricoh GR III X (not in US at all except through an Amazon channel), Sony Alpha a7S III (body only), Sony Alpha 1 (body only), and Sony ZV-E10 (body only).
Pentax, Panasonic, and Olympus had good stock numbers and could ship immediately.
With prices on the rise and availability spotty at best, it might be time to stand pat with your current gear. And maybe this is something we should be doing anyway.
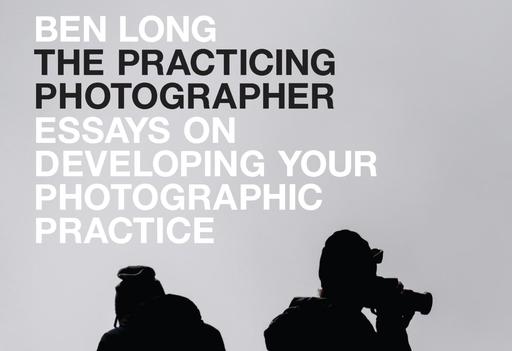
Our Inner Circle Winner of Ben Long's New Book
Congratulations to John Pemberton who wrote:
"There are a number of things I liked that resonated, such as it's ok to shoot cliches, or that not every shot has to be the best ever, some are simply meant to be supporting images for others or practice for the future.
"But the insight I am going to use first and foremost is taking the practice of looking at other photographer's work to my photo club and pitch the idea of a "photo book of the quarter" that many of us get, review and then share with others who do the same. Then for one of our meetings we discuss an image that we each liked the most and why."
John, please send me your mailing address!
Adobe Photoshop Elements and Premiere Elements 2022 announced with new Sensei-powered technology
You can read the entire article on DP Review.
Adobe has announced the 2022 versions of its Photoshop Elements and Premiere Elements software. The applications are designed to make creative photo and video editing accessible and fun.
To that end, Photoshop Elements and Premiere Elements include what Adobe calls 'Guided Edits.' These are step-by-step interactive tutorials you can use on your photos and videos to achieve specific editing tasks. The new applications add four new Guided Edits, bringing the total to 87.
The four new Guided Edits include a couple in Photoshop Elements, and the other two are in Premiere Elements. In Photoshop Elements, you can use a new Guided Edit to edit pet photos and extend photo backgrounds. For pet photos, you can adjust color and lighting, select and refine detailed edges like fur, remove collars and leashes and more. In the Guided Edit for extending photo backgrounds, you can use Content-Aware Fill technology to extend your image beyond its original crop, either to change an aspect ratio or just change up the framing.
Looking now at just Photoshop Elements 2022, the new software uses more Adobe Sensei AI technology than last year's release. You can use Adobe Sensei to transform your photographs into painting-inspired images. You can select from different artistic effects inspired by famous artwork and other popular styles.
Another Sensei-powered feature is the ability to warp photos to fit any shape. You can place one photo inside another by wrapping it around an object, like a mug, or fit the image into shapes, like the sunglasses example above.
Within Photoshop Elements 2022, you can combine still and motion photography with animated frames. You can place different moving overlays like snowflakes, hearts and sparkles to your still photos and then export the motion image as an .MP4 to share on social media.
Adobe Photoshop Elements 2022 also includes new slideshow styles, a revised Organizer that lets you view GIFs in motion, and automatic software updates.
Adobe Photoshop Elements 2022 and Premiere Elements 2022 are available now. The applications are available for macOS and Windows and can be purchased standalone or in a bundle. Standalone versions are $99.99 for new users and $79.99 to upgrade. The bundle is $149.99 or $119.99 for eligible upgrades. Education pricing is also available.
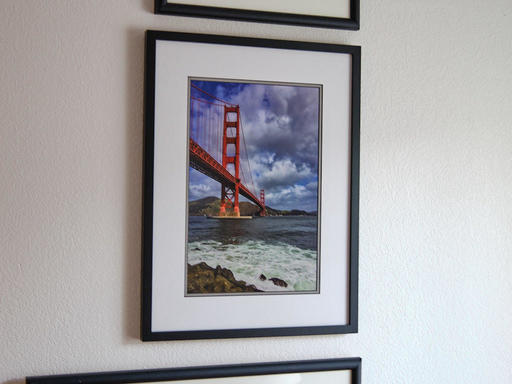
How I Made a Large Wall Print from an iPhone 6S
You can read the entire article on Medium.com.
Practically every photographer has Photoshop somewhere on their computer, even if it is generations old. One of the most useful tools in that application is Image Size, and you can use it to give your 12 MP smartphone pictures a resolution bump. This is particularly handy for making 13" x 19" prints.
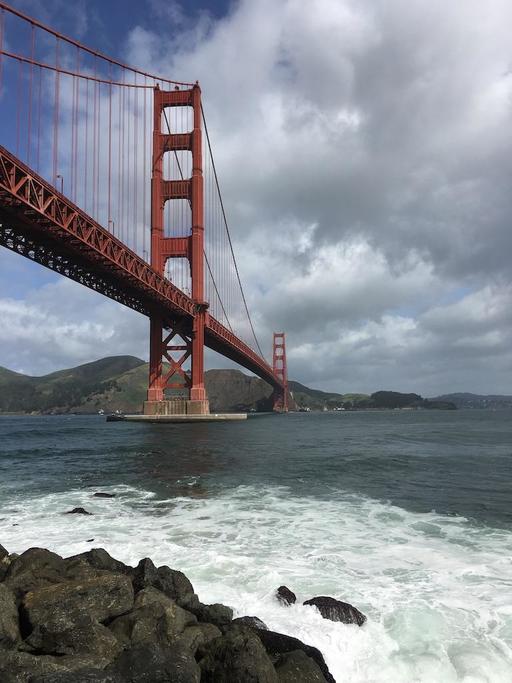
For example, a 2016 shot of the Golden Gate Bridge that was captured with an iPhone 6S.
The original file measured 3024 x 4032 pixels. If I printed it at 300 dpi, I could make a 10" x 13" print with no cropping at all. That's short of the 13" x 19" output we were hoping for. But using Image Size, I could get there.
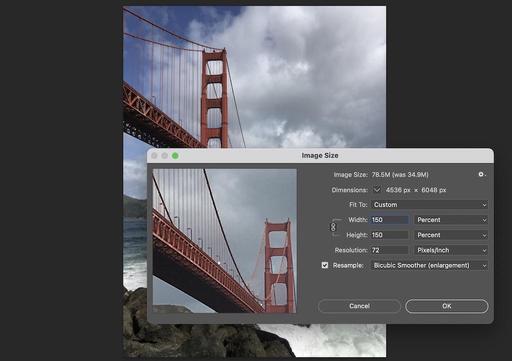
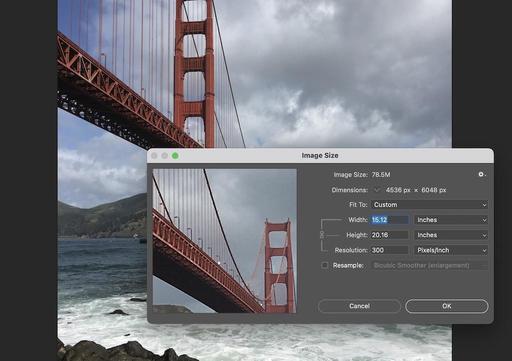
In Photoshop, I went to Image > Image Size, checked the box next to Resample with the Bicubic Smoother option, and increased the Fit parameters to 150 percent. The resolution remained at 72 ppi for this step. After clicking OK, Photoshop said that I could now make a 15" x 20" print at 300 ppi from the very same image. Yay.
Pergear Reveals a 10mm f/5.6 Pancake Fisheye Lens for Multiple Mounts
You can read the entire article on PetaPixel.
Pergear has announced the new 10mm f/5.6 fisheye lens for Fuji X-mount, Micro Four Thirds, and Sony E-mount. The ultra-wide manual lens provides a 172-degree angle of view, which the company says is perfect for exploring creativity through distorting and exaggerating normal perspectives.
The new fisheye lens is made of solid metal but weighs only 100 grams (0.2 pounds). The front lens has a multi-layer coating that suppresses flare and ghosting. It also adds greater contrast and color reproduction when shooting in strong lighting conditions, the company claims. The lens comes with a built-in petal-shaped lens hood to provide protection for the lens and also to prevent stray light from entering the lens and causing unwanted flare.
The new Pergear 10mm f/5.6 fisheye lens is available on Pergear's online store for $89.
Virtual Camera Club News
Inner Circle Members: A big thanks to those who support our podcast and our efforts! (And welcome to our new members.) And be sure to sign up for Inner Circle Annual Gathering of the Clans on Saturday, October 23.
My Writing on Medium.com: I now have 46 published articles on Medium.com. And if you haven't visited the site, and enjoy good writing on a variety of topics, I suggest that you may want to take a look. You can just go to the home page and enter "Derrick Story" in the search field. And if you like what you read, then follow me!
The New Donation Kit for Carefree Shipping of Found Film Cameras - If you've discovered a film camera that's no longer being used, our new Donation Kit makes it easy to pack and ship. Just visit the Contact Form on thenimblephotographer.com, click the box next to Donating a Film Camera, and let me know what you have. In your note, be sure to include your shipping address.
Affiliate Links - The links to some products in this podcast contain an affiliate code that credits The Digital Story for any purchases made from B&H Photo and Amazon via that click-through. Depending on the purchase, we may receive some financial compensation.
Red River Paper - And finally, be sure to visit our friends at Red River Paper for all of your inkjet supply needs.
See you next week!
Product Links and Comments
There are product links in this article that contain affiliate tags. In some cases, depending on the product, The Digital Story may receive compensation if you purchase a product via one of those links. There is no additional cost to you.
You can share your thoughts at the TDS Facebook page, where I'll post this story for discussion.
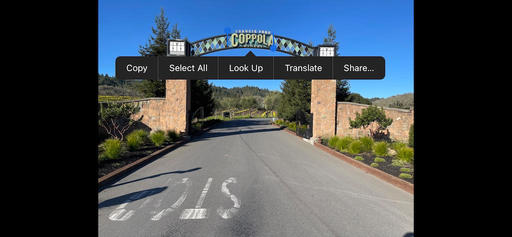 A visit to Coppola Vineyards, yes take a picture of the sign.
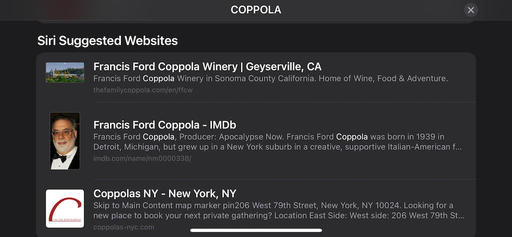 Want to know more about it? Live Text can help.
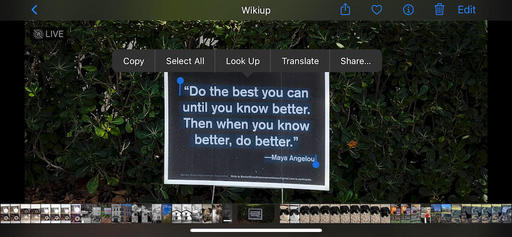 What a great saying! Too bad it's trapped in a ho-hum a picture.
 Now it's an entry in my Notes app as well thanks to Live Text