Music and audio add presence to our slideshows and movies. The combination of ambient sound, such as waves lapping up on a beach, and a soundtrack, such as a guitar solo, transforms our pictures into experiences.
Aperture provides two methods for managing these audio tracks, and I want to review them quickly so you can take full advantage of what this application offers for movie making.
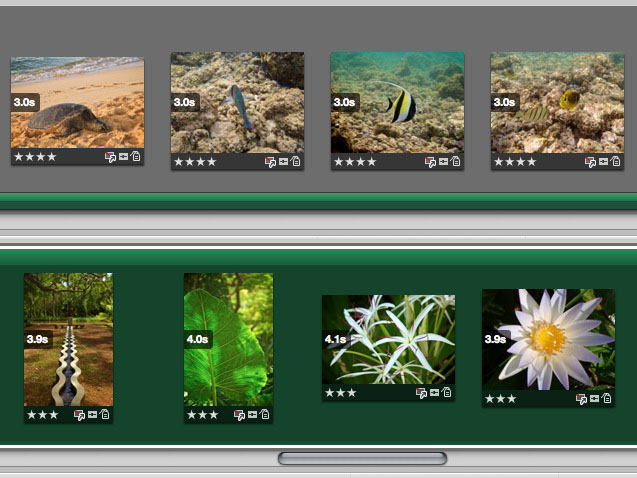
 Two types of soundtracks: Top -- "Secondary Audio Track," which is editable, and Bottom -- Main Audio Track, which has other advantages.
There are two types of audio tracks for Aperture multimedia presentations: Main Audio Track, and the Secondary Audio Track. Each has their advantages, and I often use them together in my presentations.
The Main Audio Track is the simplest to use. Click on the "Display Audio Browser" icon in the Aperture interface (music note image) and select a song from your iTunes library. Drag it to the background of your slideshow timeline, and it converts to green (as shown in the bottom image). You can't edit this soundtrack, per se, but you can do two very important things: "Fit Slides to Main Audio Track," and "Align Slides to Beats." Both options are found in the gear popup menu on the toolbar.
I particularly like "Align Slides to Beats." You can see that I used it in the illustration above. The slides range from 3.9 to 4.1 seconds as Aperture keeps your images and music in sync. Try it, I think you'll like the results.
If your show goes longer than the song you chose for it, you can add a Secondary Audio Track. This time, when you drag the audio from the browser, drag it to the bottom of the particular slide where you want the track to begin, as show in the top illustration. Unfortunately you can't use "Align Slides to Beats" with secondary tracks, but you can control their length by clicking on the end of the track and dragging.
You have other options too. Click on the track to highlight it, then choose "Adjust Audio" from the gear menu. You have some useful volume and fade controls available. These are particulary helpful when both soundtracks overlap, and you want to control their respective volumes. (Yes, Adjust Audio is available for the Main track too.)
With just a little fiddling around with these controls, you can raise the level of your presentation to professional heights.
More Aperture Tips and Techniques
To learn more about Aperture 3, check out my Aperture 3 Essential Training on Lynda.com. Also, take a look at our Aperture 3 Learning Center. Tons of free content about how to get the most out of Aperture.
 Follow me on Twitter