This is The Digital Story Podcast #652, Sept. 11, 2018. Today's theme is "The Fujifilm XF10: A Remarkable Compact." I'm Derrick Story.
Opening Monologue
It may seen crazy to create an ultra-compact camera to go up against premium smartphones. But no-one ever accused Fujifilm of being timid. And after the first dozen shots with this 9 ounce wonder, I realized that the engineers at Fujifilm had worked their magic once again. Join me today as I explain why the XF10 should be in every nimble photographer's pocket.
The Fujifilm XF10: A Remarkable Compact
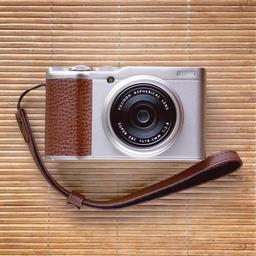
If my iPhone X were the dimensions of a box, the Fujifilm XF10 ($499) would fit inside of it. Yet, the XF10 houses a 24MP APS-C CMOS sensor that is 14 times larger than typical smartphone chips. It has a razor sharp f/2.8 FUJINON aspherical lens, low-energy Bluetooth 4.1, and WiFi. And even though its images are superior to my iPhone X, it was designed to humble it, rather complement it.
After pairing the two devices, they are like brothers. The iPhone provides realtime GPS data so that all of my images are geotagged. It's always listening for downloads from the XF10. If I need to share an image, I can go from camera to Internet in just moments. The iPhone can also serve as a remote release and command center for the XF10.
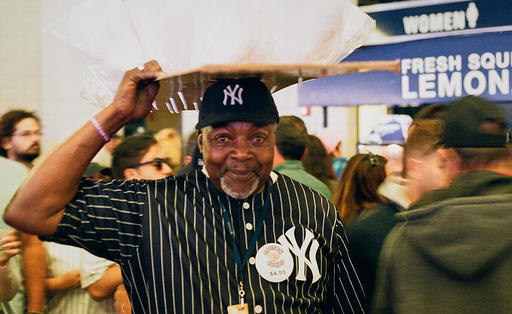
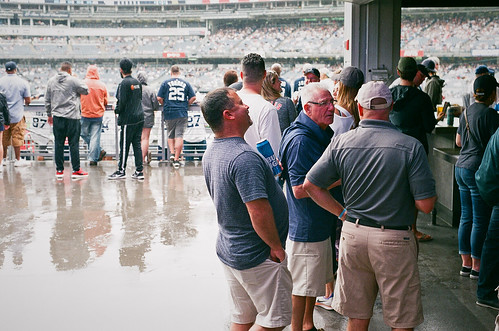
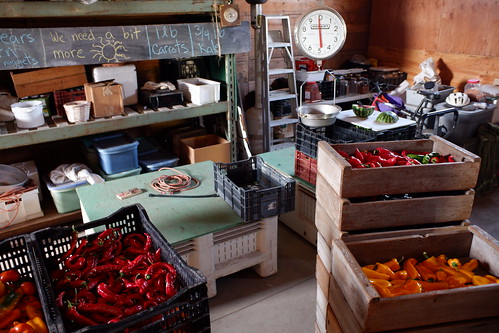 Tierra Vegetables in Santa Rosa, CA - www.tierravegetables.com. Captured with a Fujifilm XF10 in Jpeg Fine mode, unedited. Photo by Derrick Story
The Fujifilm imagery is gorgeous. Vibrant colors, superb detail, and 6000x4000 resolution. That's more than my E-M1 Mark II that weighs in at 5184x3888. And just like my mirrorless cameras, the XF10 has every trick in the book from time-lapse to HDR, plus features such as 4K burst and Fuji film simulations. Before we go any further, let's take a look at the specs.
- 24.2MP APS-C CMOS Sensor (Bayer type sensor with no low pass or AA filter - Not X-Trans)
- Fujinon 18.5mm f/2.8 Fixed Lens (28mm equivalent)
- 35mm and 50mm digital teleconverter (Jpeg only)
- 3" 1040k-Dot LCD Touchscreen
- Max ISO: 12800 (51200 Extended)
- 11 Film Simulations, 19 Advanced Filters
- Bluetooth 4.1 and WiFi
- 4K and Full HD Video Recording
- External mic jack (2.5mm) and HDMI out
- Sophisticated flash with rear curtain and slow sync
- New Snap Focus and Square Mode
- Mechanical and electronic shutter up to 1/16000th
- Two command dials, one command ring, mode dial, two function buttons, and four more function swipes on the touchscreen
- Excellent battery life, NP95 model
What the Camera Does Not Have
- Articulating screen
- Electronic viewfinder
- Accessory hot shoe
- Accessory filter ring
- No ACROS film profile (But it does have Classic Chrome)
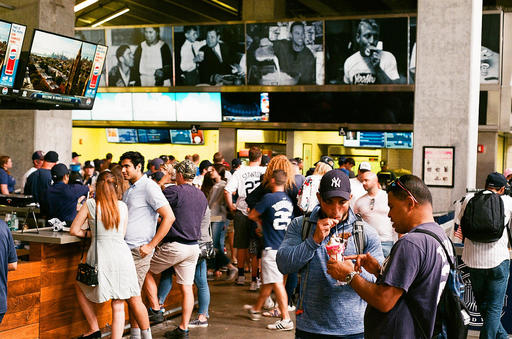
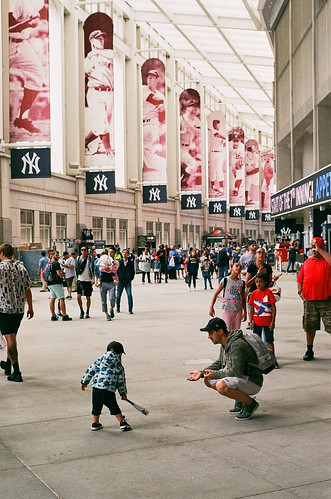
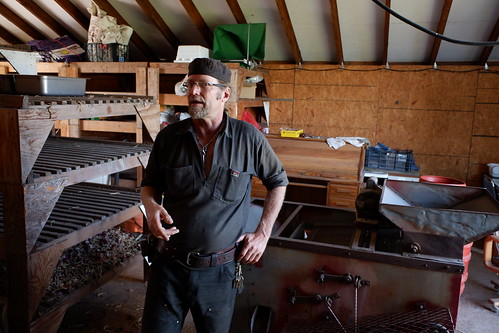 "Brian the Welder" - Tierra Vegetables in Santa Rosa, CA - www.tierravegetables.com. Captured with a Fujifilm XF10 in Jpeg Fine mode, unedited. Photo by Derrick Story
If you want a 9 ounce, finely-machined 24MP APS-C camera, there's really only one option: the Fujifilm XF10. The only other game in town is the Ricoh GR II that costs $100 more and doesn't have the modern connectivity. As for me, I'm really happy the XF10 came along.
The Portfoliobox Featured Image
Have you visited our TDS Facebook Page in the last few days? If you, what do you think of the infrared image by Dan Horton-Szar as the featured banner? Maybe yours will be next.
Each week for the month of September, I'm going to feature a PortfolioBox Pro image as the banner for our TDS Facebook Page. I will select the image from my list of TDS PortfolioBox Pro users, and include the photographer's name and link.
If you've signed up for a Portfoliobox Pro account, and have published at least one page, then send me the link to that site. Use the Contact Form on the Nimble Photographer and provide your name, the link, and the subject of the page or site you've published. I will add it to our PortfolioBox Pro Directory.
I love using Portfoliobox for these reasons:
- My images look great, both on my computer and on my mobile devices.
- It's easy to use. Without any instruction, I'm adding a high quality page in just minutes.
- It's affordable. There's a free plan and a Pro version. The Pro version is only $82.80 per year or $8.90 per month USD, and that's before the 20 percent TDS discount.
In addition to unlimited pages, you get a personalized domain name, web hosting, and up to 1,000 images.
Get Started Today
Just go to the TDS Landing Page to get started with your free account, or to receive the 20 percent discount on the Pro version. And if you want to see the page that I've begun, visit www.derrickstoryphotography.com.
Flickr Rolls Out a Fresh Look to its Galleries
As reported by The Phoblographer:
"Heads up, Flickr users! The platform has recently revamped its galleries, so you might want to take a look what has changed if you haven't been around making galleries of your favorite works by your favorite creatives.
According to the Flickr blog post announcing the long overdue revamp, the all new galleries now showcase photos and videos in a much larger layout to take advantage of today's new screen sizes and resolutions. The limit on photos that users can add to galleries have also been increased from 50 to 500. They also added a new modal batch for adding photos straight from our Faves.
The galleries list page has also been given a nice refresh, where we can now see a triptych of photos with the cover photo being slightly larger than the next two most recently added ones. The gallery metadeta at-a-glance also comes in a new card style that Flickr uses in the gallery itself."
And if you really want to see a treat, visit the TDS Member Photo Galleries on Flickr. Here's where I curate our outstanding Member Photo of the Day images. This new gallery interface really shows them off. It's a visual treat!
Inner Circle Members: New York Fine Art Greeting Cards
My latest printing project is creating a set of 6 fine art greeting cards from my trip to New York. Inner Circle members, not only can you help me choose the final images, but by doing so, you become eligible to win a free set of the cards.
Starting last week, I published two images on our Inner Circle site. Post a comment as to which one you prefer best, and you are automatically entered in the drawing. We'll do this once a week throughout September. At the end of each week, I'll randomly choose a name from the comments and send them a completed set of fine art cards once they are finished. This week's winner is: Edward J Shields.
If you want to participate, you can become a member of our Inner Circle by clicking on this link or by clicking on the Patreon tile that's on every page of The Digital Story.
Updates and Such
B&H and Amazon tiles on www.thedigitalstory. If you click on them first, you're helping to support this podcast. And speaking of supporting this show, and big thanks to our Patreon Inner Circle members:
And finally, be sure to visit our friends at Red River Paper for all of your inkjet supply needs.
See you next week!
More Ways to Participate
Want to share photos and talk with other members in our virtual camera club? Check out our Flickr Public Group. And from those images, I choose the TDS Member Photo of the Day.
Podcast Sponsors
Red River Paper - Keep up with the world of inkjet printing, and win free paper, by liking Red River Paper on Facebook.
Portfoliobox - Create the site that your best images deserve by visiting Portfoliobox. And get a 20 percent discount by using our landing page!
The Nimbleosity Report
Do you want to keep up with the best content from The Digital Story and The Nimble Photographer? Sign up for The Nimbleosity Report, and receive highlights twice-a-month in a single page newsletter. Be a part of our community!
Want to Comment on this Post?
You can share your thoughts at the TDS Facebook page, where I'll post this story for discussion.
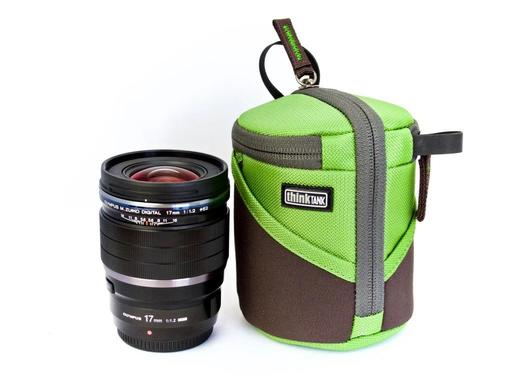 The Think Tank Lens Case Duo 5 with Olympus 17mm f/1.2 PRO lens.
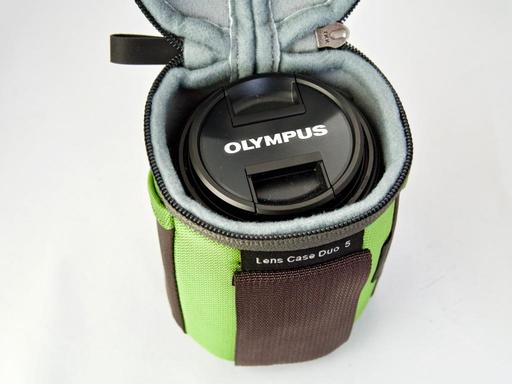 Olympus 17mm f/1.2 with lens cap and hood inside the Lens Duo 5 case.
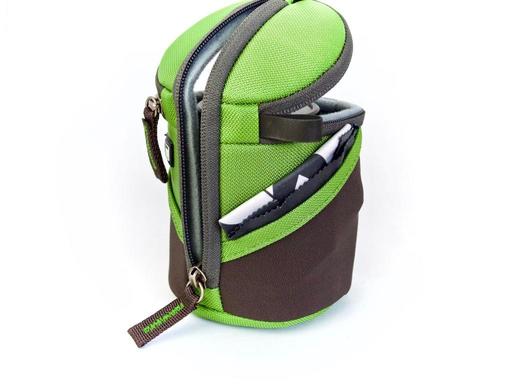 The Think Tank lens case Duo 5 with microfiber cloth.