Recently in Photography

  Page 289 of 381 in Photography  
Panasonic G2 Micro Four Thirds Camera

The world of Micro Four Thirds is a busy one. On the heels of Olympus announcing its Olympus PEN E-PL1, Panasonic unveils two new cameras: the high end Panasonic LUMIX G2, with its 3" 460,000-dot high-resolution LCD touch screen, and the more affordable Panasonic LUMIX G10 that features a 202,000-dot Live View Finder.

Both cameras stick with the standard 12 MP resolution, but the G2 gets a processor upgrade, using the new Venus Engine HD II. We don't have pricing or release dates yet, however, Panasonic will give us a 30-day heads up for both cost and availability. My guess is that it won't be too far down the road.

You might also want to note that this week's TDS podcast is on the Micro Four Thirds system. That show will be released Tuesday morning, March 9, 2010.


The Digital Story Podcast App is the best way to stream or download weekly TDS podcast episodes. No more syncing your iPhone or iPod Touch just to get a podcast. And there's more! Tap the Extras button for free passes and discounts, the latest blog posts from The Digital Story (audio versions), and the current Grab Shot by our virtual camera club members. Each podcast episode has its own Extras button, too, that contains more goodies such as pro photo tips. And the best part is, The Digital Story Podcast App is your way to help support this show.Download it today!

twitter.jpg Follow me on Twitter

-


"This was literally a shot where I grabbed the camera with whatever settings it was on, and snapped away," writes Anthony Zahra.

Anthony Zahra Grab Shot

"I had been taking random shots of my son playing cricket (weird English/Australian sport you guys never understand :) They wear all white, which was tending to blow out in the full sun, so I had a -EV setting when I saw this crow fly overhead. I grabbed the camera, which was sporting the Canon 70-200 f/2.8, and fired off a shot. I liked the silhouette of the bird and softened tree branches against the rich blue sky."

Anthony captured this image with his Canon 40D and a 70-200mm f.2.8L zoom. He was in Shutter Priority mode (from the cricket match) at 1/6400. At ISO 200, the corresponding aperture was f/2.8.

Photo by Anthony Zahra. Click on image to zoom to larger size.

If you have a candid you'd like to share, take a look at our Submissions page, then send us your Grab Shot. We'll try to get it published for you on The Digital Story.

And you can view more images from our virtual camera club in the Member Photo Gallery.


The Digital Story Podcast App is the best way to stream or download weekly TDS podcast episodes. No more syncing your iPhone or iPod Touch just to get a podcast. And there's more! Tap the Extras button for free passes and discounts, the latest blog posts from The Digital Story (audio versions), and the current Grab Shot by our virtual camera club members. Each podcast episode has its own Extras button, too, that contains more goodies such as pro photo tips. And the best part is, The Digital Story Podcast App is your way to help support this show.Download it today!


twitter.jpg Follow me on Twitter

-


Technorati Tags: , , ,

Now that the Olympus PEN E-PL1 is available, I want to highlight some of its most interesting features. Today, I'm taking the iAuto challenge.

Most seasoned photographers wouldn't consider an "auto everything" mode on their camera. Normally, I wouldn't either. But iAuto on the Olympus E-PL1 is not your standard "the photographer is lazy" mode. In fact, it's just the opposite. I say that because in iAuto you have access to Live Guide. This feature allows you to intuitively adjust the image to your particular tastes before you press the shutter button. And the best part is, you make these adjustments using sliders that give real time results.

To enable Live Guide, first set the top mode dial to iAuto. Then press the Start/OK button on the back of the E-PL1. You see a menu that looks like this:

Slider Menu in iAuto

You have five slide adjustments: Change Color Saturation, Change Color Image (temperature), Change Brightness (exposure), Blur Background (aperture control), Express Motions (shutter control). My favorite is Change Color Image, which via a slider, lets me adjust color temperature in real time.

change_color_image.jpg

If I want to warm up tones, I use the up-arrow key until the image looks the way I want, and to cool, press the down-arrow key. I put this system to work in the ghastly lighting at the PMA 2010 trade show in Anaheim, CA. I wanted the carpet to be the color it was supposed to be, so I pointed the E-PL1 down and moved the Change Color Image slider until I liked what I saw. I shot Raw+Jpeg so we can see the difference between what the camera set automatically (the Raw version on the right), and the change I made using the slider (the Jpeg version on the left).

jpeg_vs_raw.jpg

As you probably figured out, Live Guide only affects the Jpeg. It's designed for Jpeg shooting, which isn't a problem with Olympus because their Jpegs are so good. But if you want a Raw version to tinker with in post production, Raw+Jpeg is available, as illustrated here.

You have access to lots of other controls in iAuto too: drive mode, self timer, flash on/off, autofocus point selection, and live histogram. Plus, you have one-touch video recording using the red button on the back of the E-PL1.

So in many ways, iAuto is really a creative mode. You can play with Live Guide via a simulator on Olympus site. Give it a go. I think it's one of the terrific new features on this $599 micro four thirds compact DSLR from Olympus.


tds_podcast_app.jpg

Did you know that you can listen to audio versions of daily TDS posts on The Digital Story Podcast App? Just tap the Extras button, and the current post will be there for the listening.

twitter.jpg Follow me on Twitter

-


Our digital cameras capture video, YouTube is a great way to share it -- how do we get from point A to point B as quickly as possible? With QuickTime X.

QuickTime X is the slightly controversial player that shipped with Snow Leopard. Some people like this new streamlined viewer, others prefer (and keep using) QuickTime 7 because of its handy toolset. For this workflow, all you'll need is QuickTime X. It handles trimming just fine, and it does a great job of optimizing your large movie files for YouTube. Then, it actually manages the entire publishing process. If you share your work on YouTube, these features alone make QuickTime X worth hanging on to.

Share Movie to YouTube

The Fast Workflow

This process is almost as simple as 1-2-3. First, capture your movie. For this movie, I used a Canon 5D Mark II at the PMA trade show that featured brutal lighting and lots of ambient noise in the expo hall. By using a custom white balance setting and an external lapel mic, I was able to record usable 1920x1080 video. Great to have a high definition master, but way too much resolution for YouTube. We'll get to that in a moment.

Next, open your movie in QuickTime X and trim off the yucky ends. Just go to Edit > Trim, and you get the now familiar yellow trim guides.

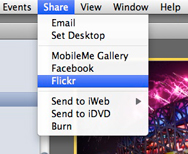
Finally, publish your movie. Go to Share > YouTube. Log in to YouTube, fill out the description and other basic metadata, then upload your work without ever leaving the player application. QuickTime X will take that gigantic movie, sample it down to the standard 360p/480p resolution, and place it right there in your account next to your other great works of art.

When you need to turn video around quickly, QuickTime X does a great job.


tds_podcast_app.jpg

Did you know that you can listen to audio versions of daily TDS posts on The Digital Story Podcast App? Just tap the Extras button, and the current post will be there for the listening.

twitter.jpg Follow me on Twitter

-


Canon PowerShot S90 Review

Canon S90 on Deck of Cards

In my recent Macworld Magazine review of the Canon S90, I say that it: "might be one of the most powerful point-and-shoot cameras that you can slip into your shirt pocket." After using this compact for months now, I feel stronger than ever about that statement. This is a great camera.

What really impresses me about the S90 is how much image quality it pulls out of its 10 Megapixel, 1/1.7-inch CCD sensor, which has only a fraction of the surface area compared to a four-thirds or APS-C sensor. Yet, in most lighting conditions, the Raw files, as well as the Jpegs, look terrific. When I'm traveling, I always keep the S90 on the front seat next to me so I can grab it in a hurry if something interesting appears. And thanks to its compact size, I have captured many shots that I would have missed in the past.

Things got even better when Aperture 3 was released, which can process S90 Raw files. Including Adobe Lightroom, Adobe Camera Raw, and Canon's own DPP software, we now have many options for working with these Raw files.

For more information about the S90, please read my Macworld review where I gave the Canon S90 4.5 mice, highlighting these pros and cons:

PROS

Extremely compact and lightweight; outstanding image quality; Raw format support; excellent user interface.

CONS

Lackluster battery performance; control dial on back can accidentally change settings; no HD movie mode.

More Articles About the Canon S90

Canon S90 Raw Processing - Aperture 3 vs Digital Photo Professional

Five Lesser Known (but very cool) Features on the Canon S90

Canon S90 Raw Processing Comparison: DPP vs ACR 5.6 RC

DigiScoping Pro Basketball with the Canon S90

Did Canon Really Improve Image Noise with the PowerShot S90?

"Compacts for Serious Shooters" - Digital Photography Podcast 201

Is the Canon S90 the New G11?


tds_podcast_app.jpg

Did you know that you can listen to audio versions of daily TDS posts on The Digital Story Podcast App? Just tap the Extras button, and the current post will be there for the listening.


twitter.jpg Follow me on Twitter

iPhone and iPod Touch users can now download the TDS iPhone App from the Apple App Store. This is the perfect way for you to support our virtual camera club and get lots of useful tools in the bargain.

When you get The TDS Podcast App, you will automatically receive each week's podcast. No more syncing headaches or missed episodes. We'll always be there waiting for you on your mobile device. Plus, you'll receive bonus content on a regular basis. It's just fun stuff, but there will be things you like.

For example, on the Show Extras, how about a Free 24-Hour Pass to Lynda.com. That's right, for 24 hours you can watch any training you want from a library that features thousands of videos. To receive your free pass on the new iPhone App, just click on the Extras button in the upper right corner of the Episodes listing on the iPhone App. You'll then see the link marked Free Pass! Click on that and all the information you need will be right there.

extras_menus.png

The Extras menu contains special offers. And remember, each individual episode has its own Extras button.


And if you like the TDS iPhone App, please give it a rating... or even write a short review. This will help attract new members to our virtual camera club.

Questions About How to Operate the TDS Podcast App

We've tried to make the menus and interface as intuitive as possible, but there's probably more to the application than initially meets the eye. I recommend taking a quick look at our Support Page for a comprehensive overview of the podcast application. Pay particular attention to the section that explains the "Star" feature. It's very powerful!


twitter.jpg Follow me on Twitter

-


Advantages of Tethered Photography

There are times when it's more convenient to connect your DSLR directly to a laptop for capture. You have a much larger screen for viewing images than with the 3" display on the back of your camera. This is particularly helpful during portrait sessions when clients or art directors want to monitor the shoot.

EOS Utility Software

Canon's EOS Utility comes bundled with their DSLR cameras, and provides excellent tools for tethered shooting. Click image to enlarge.

Product photography is another area where tethering makes sense. You can save a days worth of shooting directly to your computer's hard drive and not have to worry about changing memory cards. If you need to review fine details in the set up, that's much easier on a 17" monitor than on the back of a camera.

I also like tethered shooting for shy subjects, such as birds. If you set up a feeder outside the back window, you can position the camera for a "bird's eye view" and monitor the activity safely behind the curtains without disturbing your feathered visitors.

In my Macworld article, Shoot tethered to control your camera from your Mac, I cover a number of options for shooting tethered. I also mention in the article onOne Software's DSLR Camera Remote application for the iPhone. I have a separate article dedicated specifically to that workflow that you might like too: iPhone Remote Control with DSLR Camera Remote.

Regardless of your particular situation, shooting tethered is just plain fun. There's something cool about controlling your camera from a laptop. I guess any kind of remote control brings out the geek in all of us.


twitter.jpg Follow me on Twitter

-


In my previous post, Aperture 3.0.1 Fixes a Lot, but Not All, I raised the issue that the IPTC metadata I was entering in Aperture 3 was not appearing in the Photoshop CS4 "File Info" box after export from Aperture. Initially, I thought this was a bug in Aperture.

But after a little digging, I discovered that Bridge CS4 was displaying my metadata properly. What gives? Why would Bridge show it and Photoshop not?

It appears that we're in the middle of a standards transition. Looks like Aperture 3 is embracing the current specification, as is Bridge CS4. Photoshop CS4 seems to be following an older approach to displaying metadata.

Now if you're feeling the urge to get riled up and start pointing fingers, please stay calm. The point of this post is to show Aperture 3 users an easy way to have their metadata appear correctly in Photoshop CS4. Let's start with how I entered the IPTC metadata in Aperture 3 using a custom template (click on image to enlarge view):

Data in Aperture 3

If you haven't created a custom metadata template in Aperture 3, it's easy. Just choose "Edit" from the popup metadata menu in the Metadata view.

I then exported a Jpeg as I normally would. But instead of opening it directly in Photoshop, I opened it in Bridge CS4 first. Nearly all of my IPTC data is there. Great! If I want this same data to appear in Photoshop, all I have to do is edit any of the fields. A one character edit will work, but I filled in the missing "Copyright Info URL" field. Then click on any other thumbnail, and Bridge will ask you if you want the metadata updated for the picture you were perviously viewing. Yes you do! So, click "Apply."

bridge_metadata.jpg

You're done! The metadata for the image has been updated with your Aperture IPTC fields. If you want to check your work, open the image in Photoshop, then go to File > File Info (click on image to enlarge):

Metadata Appears in Photoshop CS4

Yes, this is a workaround that involves an extra step. But it's easier than having to reenter all of your metadata in Photoshop. And it keeps your information consistent.

The bottom line is that Aperture 3 is exporting your metadata. And as other applications update to the current standards, this workaround should soon go away.

More Aperture Tips and Techniques

To learn more about Aperture 3, check out my Aperture 3 Essential Training on Lynda.com. Also, take a look at our Aperture 3 Focus Section. Tons of free content about how to get the most out of Aperture.


twitter.jpg Follow me on Twitter


Aperture 3.0.1 Fixes a Lot, but Not All

Aperture 3 users can download the 3.0.1 update that improves 15 called-out features including: upgrading older libraries, importing photos, memory management, face recognition processing, roundtripping, accessing libraries on a network volume, Places, and more. A lot of stuff! But it still doesn't address a couple of things on my list. One complaint I have is that exporting is slower on my MBP 2.5 GHz than it was before. But the problem that drives me crazy is that my IPTC metadata doesn't display properly in Photoshop after an export from Aperture.

Here's the metadata that I entered in Aperture 3.0.1 (click on picture to enlarge):

Metadata Entered into Aperture 3.1

And here's what is displayed in Photoshop CS4 after I've exported from Aperture with the metadata box checked: (click to enlarge):

No Metadata in Photoshop CS4

Notice all of the blank fields...

So I'm happy to see an Aperture 3 update so quickly after its release. And I'm looking forward to future updates that will smooth things out even more... especially the metadata export.

More Aperture Tips and Techniques

To learn more about Aperture 3, check out my Aperture 3 Essential Training on Lynda.com. Also, take a look at our Aperture 3 Focus Section. Tons of free content about how to get the most out of Aperture.


twitter.jpg Follow me on Twitter

-


lowepro_demo2.png

I've been recording quite a bit of video on location (link goes to YouTube movie sample) for Lowepro as part of my photo evangelist work. For the most part, things have gone well. That's only because I've been lucky. Today my luck ran out.

I'm plugging a lav mic directly into a Canon 5D Mark II and recording both audio and video at the same time. (Yes, I know I can record with separate devices, but I need to turn these projects around really fast.) The problem with 5D audio is that it employs Automatic Gain Control (AGC) that pumps up hiss, plus you have no visual or audio indication of what you're recording. This lack of feedback nailed me today when I didn't push the mic connector firmly and all the way into the audio jack on the 5D. Result: I recorded audio with the onboard mic instead of my external lav. It sounded like this:

Canon 5D Mark II Native Audio with Onboard Mic

When I got back to the room to process and upload the video, I was horrified. Kevin, one of my Lowepro comrades, had just told me about the Magic Lantern Firmware enhancement for the Canon 5D Mark II. It temporarily disables that nasty AGC, allows you to choose between internal or external mics, lets you set the audio levels manually, then provides visual meters so you can monitor your recording in real time. For added protection, enable the camera's A/V jack for audio monitoring with headphones. Needless to say, I was suddenly very interested.

I downloaded the firmware, copied it to a CF card with my card reader, and enabled it on the 5D Mk2 by going to Firmware on the menu and hitting OK. The enhancement is only temporary. Once you turn off the camera, it returns to its normal firmware. Very cool.

After installing, Kevin did an audio test for me with my lav mic and the Magic Lantern Firmware enabled. In the very same environment as the first recording, here's how the audio recorded:

Canon 5D Mark II Audio with Lav Mic and Magic Lantern Firmware

The Magic Lantern site does a great job of explaining all the ins and outs of this wonderful software. I encourage you to read everything, then watch the movie they have embedded on the site. It really explains what's going on. You can download for free, but you'll probably be inspired to hit the donation button after a few uses.

I'm going to reshoot the videos tomorrow that I botched today. With the Magic Lantern Firmware, I'm sure things will go much smoother.


twitter.jpg Follow me on Twitter

-