Recently in Photography

  Page 131 of 386 in Photography  

DxO ONE vs iPhone 5S Sunset Shoot

I stepped out the front door the other evening to witness a beautiful sunset. Like most other folks, I pulled a smartphone out of my pocket to record the event. Unlike most others, however, I then pulled a DxO ONE from my other pocket to capture a few more pictures. I thought you might be interested in how they compare.

Note: The DxO ONE images were captured with pre-release hardware and processed with beta software. Specs and performance may change with the final release in September.

The Jpegs from both the iPhone 5S and DxO ONE are right out of the camera with no further processing. The DNG from the ONE was processed with automatic settings (no individual slider tweaking) in DxO OpticsPro 10 and saved out as a Jpeg.

iPhone 5S Jpeg

iphone-5s-sunset-web.jpg The iPhone does a good job of capturing the vibrancy of the sunset. Gradation with the brightest tones isn't quite as smooth as with the DxO, and the resolution is less at 3263 x 2448. But overall, a nice rendering of the scene.

DxO ONE Jpeg

dxo-one-jpeg-sunset-web.jpg The Jpeg from the DxO One is very good. Smoother gradation in the bright areas and more resolution at 5540 x 3688. Noise is very well controlled.

DxO ONE DNG

dxo-one-dng-sunset-web.jpg Where things get real interesting is the the DNG version of the twilight scene captured with the ONE and processed with automatic settings in DxO OpticsPro 10. The rendering is more dramatic with excellent tonality.

Even though the iPhone 5S is an excellent camera (with the 6 being even better), it's hard to compete against RAW files produced by a 1" sensor and matching software. I also like the wider proportions of the DxO One (3x5) compared to the iPhone (3x4).

Either way, how cool to have such excellent cameras comfortably stashed in the front pocket of my pants.


Nimble Photographer Logo

The DxO ONE has a high Nimbleosity Rating. What does that mean? You can learn about Nimbleosity and more by visiting TheNimblePhotographer.com.

Want to Comment on this Post?

You can share your thoughts at the TDS Facebook page, where I'll post this story for discussion.
The Visual Shot List

I have a commercial client who's very particular about the images we capture for their branding. They've spend a lot of time and money figuring out who they are and how to convey that to their customers.

One of the tools that we use to ensure that we work efficiently during our photo sessions is what I call the visual shot list. I think it's a great idea, and you might want to consider it too.

visual-shot-list-1024.jpg My assistant, Leah, reviewing the visual shot list before an important assignment at a salon in San Francisco. Image captured with a Canon 5D Mark II and a Yongnuo 35mm F/2.0 lens.

Here's how it works. The client figures out what type of images they want for a particular shoot. Then they research stock photography (they have an account) to find samples that come as close as possible to their ideas. They build the shot list with pictures and text.

Then, before the shoot, we have a phone conference to discuss the shot list. As a team, we look at the stock photos and talk about how "this comes close, but what we'd like is a little brighter background," and details like that.

If the client doesn't want to build the visual shot list, you can draft one, then review it with them. You'll be surprised at the things you learn during the discussion.

By the time that Leah and I arrive on location, we have an excellent idea about what we have to do and how we're going to do it. The success rate has been very high since using this approach.

I'm a big fan of creating shot lists for all assignments, but the visual shot list takes this concept to new heights.

Want to Comment on this Post?

You can share your thoughts at the TDS Facebook page, where I'll post this story for discussion.
iCloud and Photos for OS X

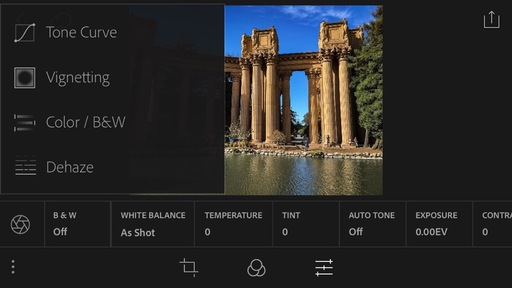
A big advantage to Photos for OS X is its iCloud integration. This allows photographers to tie together their mobile devices with their computers. Regardless of where an image is captured or uploaded, it's immediately available on all the other devices, plus it's backed-up in the cloud too.

If you have a Mac and have not set this up yet, it's easy and only takes a minute. Here's a quick walk through to get you up to speed.

After you enable Photos integration on your Mac, check all of your iOS devices too. Just go to Settings > iCloud > Photos and turn on all the switches (except for Upload Burst Photos, which I leave off).

That's all there is to it. From that point forward, every picture you capture with an iPhone, or upload to Photos, will be shared across all of your devices.

icloud-settings.jpg It's easy to turn on iCloud for Photos on your Mac.

For more free movies, check out the links at the end of this post.


Get Up and Running with Photos for OS X

Want to learn the ins and outs of Apple's latest photo management application? Then take a look at my latest online video training, Up and Running with Photos for OS X. Soon, both you, and your pictures, will be comfortable in their new home.

Previous Articles on Photos for OS X

Basic Editing in Photos for OS X.

What Do Those Icons Mean in Photos for OS X?

How to Switch to RAW Files in Photos for OS X.

Converting an Aperture or iPhoto Library to Photos for OS X.

How to Open an Aperture or iPhoto Library in Photos for OS X.

How to Migrate from iPhoto or Aperture to Photos for OS X.

This week on The Digital Story Photography Podcast: DxO ONE: The Pocket Powerhouse Camera; Plug Your Aperture Plugins into Emulsion: a New Photo App for the Mac; Say Ello to iOS - all of this and more on today's show with Derrick Story.

Weekly Update - "Ello for iOS Has Arrived". Ello is now available for iPhone and iPad: "Featuring dozens of new features, including real-time notifications, new ways to find your friends, full screen images, and a hell of a lot more. And no ads, forever."

In other news... "Samsung Testing Prototype Truck With Live View Camera" Fstoppers reports: "Samsung is currently testing a prototype truck in Argentina fitted with a camera on the cabin and a live view display in the rear. The purpose of this is to help drivers safely pass trucks; a task which often proves difficult and has resulted in many accidents."

dxo-one-on-iphone.jpg

Story #1 - "DxO ONE: The Pocket Powerhouse Camera" -

Artists no longer have to choose between mobility and quality. The DxO ONE packs a 1″ sensor into a palm-size camera with a 6-element f/1.8 aspherical lens. When combined with bundled DxO software, the image quality can be stunning.

The system is simple. The 3.8 ounce device that measures 67.5 x 48.85 x 26.25 mm plugs into an iOS device, such as an iPhone 5S or 6, via its built-in Lightning connector. You can control the camera and compose the shot using the mobile device. Jpegs are saved to the iPhone (optional) and DNG RAW files are recorded to the microSD card in the camera. You can use the Jpegs immediately for social media and fine tune the RAW files later on your computer.

emulsion-app.jpg

Story #2 - "Emulsion Could be the New Home for Your Aperture Plugins"

I've been playing with a new image workflow app called Emulsion. It runs on Mac OS X Yosemite, and it provides some handy non-destructive image editing tools plus star ratings, keyboarding, and more. Two of its more interesting features are that it accepts Aperture editing plugins and can import an iPhoto library. Emulsion handled all of the RAW files on my Mac, plus Jpegs and Tiffs. But what was really interesting was using it with Color Efex Pro. More on this in today's second story.

Story #3 - From the Screening Room - Up and Running with Pixelmator with Richard Harrington.

You can watch Richard in action by visiting the TDS Screening Room at lynda.com. While you're there, you can start your 7 day free trial to watch all of Richard's movies, plus every other title in the library (including over 20 by yours truly).

Virtual Camera Club News

Moving from Aperture to Photos or Lightroom - August 7-8 - Now that Aperture will no longer be developed, many photographers are contemplating their next move. In this software workshop, we'll explore the two leading contenders: Photos (part of the Yosemite Update) and Adobe Lightroom. By the time we conclude, you'll have a much clearer idea about your photo management future. Two full days plus breakfast and lunch - all included for just $495. Use the Send Me Info form to receive a reservation form.

Show Off with SizzlPix

Do you want to blow away friends and family with your photography? Then hang a 5k Ultra High Definition SizzlPix on the wall at home. You won't believe the comments.

Give it a try. They'll send Digital Story listeners and readers a free mini-proof before production; just put "proof first, TDS" in the comment space on the SizzlPix order page.

Did you know that Red River Paper has a Discounts and Clearance page? Ink, paper, greeting card stock, all at big savings.

Thanks to everyone who recently reviewed the TDS Podcast in iTunes!

BTW: If you're ordering through B&H or Amazon, please click on the respective ad tile under the Products header in the box half way down the 2nd column on thedigitalstory.com. That helps support the site.

Download the Show - MP3 Version

In addition to subscribing in iTunes, you can also download the podcast file here (33 minutes - MP3 version). You can support this podcast by purchasing the TDS iPhone App for only $2.99 from the Apple App Store.

More Ways to Participate

Want to share photos and talk with other members in our virtual camera club? Check out our Flickr Public Group. And from those images, I choose the TDS Member Photo of the Day.

Podcast Sponsors

lynda.com - Learn lighting, portraiture, Photoshop skills, and more from expert-taught videos at lynda.com/thedigitalstory.

Red River Paper -- Keep up with the world of inkjet printing, and win free paper, by liking Red River Paper on Facebook.

SizzlPix! - New 5k Ultra High Definition SizzlPix output for your photography. You've never seen your imagery look so good. SizzlPix.com.

Want to Comment on this Post?

You can share your thoughts at the TDS Facebook page, where I'll post this story for discussion.
40-150mm-zoom.jpg

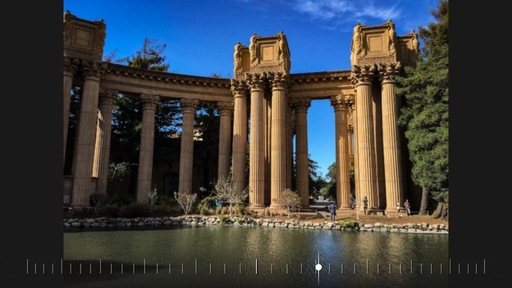
Wide aperture zooms are typically bulky and expensive. But when I mount the Olympus 40-150mm f/2.8 PRO lens on my Olympus OM-D E-M5 Mark II, I feel like I can work all day.

Though not cheap at $1,499, this optic does provide an equivalent of 80-300mm focal length with a constant maximum aperture of f/2.8. And when mounted on the E-M5 Mark II with its excellent 5-axix image stabilization system, I can shoot handheld in nearly any lighting condition.

mono-lake-bird.jpg Captured at Mono Lake after 7pm handheld. Photo by Derrick Story.

The PRO 40-150mm balances nicely on the Micro Four Thirds body, focuses quickly, and renders outstanding image quality. I also like the included retractable lens hood that allows me to pack the camera in a small bag without having to remove the accessory.

I wouldn't say that the Olympus 40-150mm f/2.8 PRO is as light as a bird, but when I need a fast telephoto zoom that I can carry all day, it's certainly a feather in my cap.


Nimble Photographer Logo

The Olympus 40-150mm f/2.8 PRO lens has a high Nimbleosity Rating. What does that mean? You can learn about Nimbleosity and more by visiting TheNimblePhotographer.com.

Want to Comment on this Post?

You can share your thoughts at the TDS Facebook page, where I'll post this story for discussion.

The DxO ONE is a palm-size camera that features a 6-element f/1.8 aspherical lens and a 20 MP 1" CMOS sensor that produces stunning images. Via a rotating Lightning connector, it connects to an iOS device such as an iPhone, to compose the image and control the camera. It can also capture photos as a standalone device, albeit without a viewable LCD.

dxo-one-with-iphone.jpg

I carried the DxO ONE in my pocket last week as I explored the Eastern Sierra. Because of its excellent image quality, I was able to rely on it for my wide angle shots (thanks to its 32mm fixed focal length lens). That allowed me to work with a long telephoto on the OM-D, and not have to worry about switching lenses in a breezy environment. The images I came home with were absolutely beautiful.

Tufa and Water at Twilight "Tufa and Water at Twilight" captured with the DxO ONE. Photo by Derrick Story. Click on image to see high resolution version.

Thanks to the maximum aperture f/1.8 optic and ISO range of 100 to 51,200, I was able to work in just about any type of lighting condition. When the ONE is connected to the iPhone (a 5s in my case), I had plenty to hang on to while making the exposure. When not in use, it detaches from the mobile device and takes up just a small amount of space in my pocket (measuring 67.5 x 48.85 x 26.25 mm and weighing a mere 3.8 ounces).

Mono Lake Tufa at Twilight "Mono Lake Tufa at Twilight" captured with the DxO ONE. Photo by Derrick Story. Click on image to see high resolution version.

The DxO ONE captures both Jpegs and DNG RAW files. Using the free iOS app, I was able to automatically save the Jpegs to the iPhone's Camera Roll for immediate sharing, then work with the DNGs (saved to a microSD card) later on my MacBook PRO using DxO Optics Pro software. Here's where the images really take on a new life.

Because the hardware and software are made by the same folks, you can squeeze every drop of quality out of the photographs using Optics Pro or Film Pack (both come bundled with the camera). Lightroom users can have the photographs exported straight from Optics Pro to their LR library, ensuring a smooth workflow.

Padlock "Padlock" captured with the DxO ONE. Photo by Derrick Story. Click on image to see high resolution version.

I've included a bit more technical information in the article, DxO ONE Unlocks Mobile Photography for Artists. What has really impressed me is how such a palm-sized device can capture so much quality, and work so well with the iPhone I'm already carrying. When used with a larger screened device, such as an iPad mini, it's almost like having a view camera in the field... at a fraction of the weight and inconvenience.

You can preorder the DxO ONE for $599 with a shipping date set for September. Bundled software includes DxO FilmPack, and (for a limited time) the Elite Edition of DxO OpticsPro, their professional editing software (a $300 combined value).

Bottom line is this: The DxO ONE is an impressive camera that works well with the mobile device that many of us already have in our pockets. It's conceivable that you could traverse the globe with only your iPhone and the ONE, and return home with an amazing collection of artistic imagery.

More to report in the coming weeks and months...


Nimble Photographer Logo

The DxO ONE has a high Nimbleosity Rating. What does that mean? You can learn about Nimbleosity and more by visiting TheNimblePhotographer.com.

Want to Comment on this Post?

You can share your thoughts at the TDS Facebook page, where I'll post this story for discussion.

Basic Editing in Photos for OS X

Image editing in Photos for OS X is quite intelligent. You can go as simple as one-click enhance, or drill down through the set of smart adjustment sliders. In this video, I show you the first two levels.

Most images can be spruced up in just a few seconds using this approach. In the following movies for this title, I drill down to more advanced adjustments, allowing you to get just the right look for your picture.

basic-editing-photos.jpg

For more free movies, check out the links at the end of this post.


Get Up and Running with Photos for OS X

Want to learn the ins and outs of Apple's latest photo management application? Then take a look at my latest online video training, Up and Running with Photos for OS X. Soon, both you, and your pictures, will be comfortable in their new home.

Previous Articles on Photos for OS X

How to Switch to RAW Files in Photos for OS X.

Converting an Aperture or iPhoto Library to Photos for OS X.

How to Open an Aperture or iPhoto Library in Photos for OS X.

How to Migrate from iPhoto or Aperture to Photos for OS X.

This week on The Digital Story Photography Podcast: 5 Photo Tips from the Eastern Sierra, A Handy Portrait Technique, A Tempting Leica - all of this and more on today's show with Derrick Story.

Weekly Update - "Leica Q (Typ 116) is a 24MP full frame compact camera with fixed 28mm f/1.7 lens". Imaging-Resource reports: "Leica announced the Leica Q (Typ 116), a fixed lens compact camera that packs a 24-megapixel full-frame sensor and 28mm f/1.7 lens into a compact frame.
Despite its small size and much more wallet-friendly price, the Leica Q (Typ 116) still dons the German manufacturer's signature red dot and rigorous build quality, brought over from Leica's M-series digital rangefinders.
To coincide with the release of the Q (Typ 116) camera, Leica has developed a camera-specific iOSapp that will let you remotely control camera settings.The Leica Q is available starting today for $4,250. As with all Leica cameras, the Q (Typ 116) comes with a free copy of Adobe Lightroom 6."

In other news... "LensProToGo Suffers Theft of Estimated $500K in Gear" Stoppers reports: "An early estimated $500,000 worth of mostly Nikon, Canon and Sony equipment was taken out through a hole made in the drywall and smashed windows. The thieves gained access through a storage closet and then cut through an interior wall into the shipping department. LensProToGo's Facebook page commented this was likely to avoid motion detectors. Thankfully nobody was hurt."

bodie-house-sky-1024-tds.jpg

Story #1 - "5 Photo Tips from the Eastern Sierra" -

  • Talk to Strangers
    Unlike urban life where we generally avoid contact with strangers, just the opposite is helpful in rural areas. Just over the last week, I learned of a handful of new spots to visit that are off the beaten track. Each one of them the result to talking to someone I didn't previously know.
  • Know your physical limits
    Traveling puts a strain on the body, and visiting high altitude locations even more so. Be honest with yourself about how far you should push your body while on the road. Yes, great shots are important. But good health should top the list.
  • Work in Pairs
    Many remote locations don't have cell phone coverage. We forget that because we're so used to having it everywhere. So it's important to travel with a photo buddy to assist you if something goes awry. Plus it's fun.
  • Tripods are still relevant
    Street shooters don't need them often, but working in the great outdoors demands a tripod now and again. Long exposures, HDRs, high quality panos, and twilight shooting all need a good set of sticks. At least put them in the trunk of the car so they're accessible on the road.
  • Practice first with Neutral Density Filters
    Since we don't use ND filters that often in our daily shooting, we might not be aware of the color shift surprises they might present during a shoot. Don't trust that spectacular waterfall shot to an untested ND filter.
  • Review your images each night
    Bring a laptop or tablet to review your pictures each night. We can't trust those tiny 3" LCDs for an accurate rendering of a day's work. If you or your camera is doing something wrong, you need to know while you're still on the road so you can correct the problem.

leah-by-gary.jpg Leah Gerber photographed by Gary Angelo at the TDS Eastern Sierra Photo Workshop.

Story #2 - "Portrait Tip - Have the Model Hold the Reflector"

We don't always have an extra set of hands to hold a reflector for us, but don't rule out the model helping out. You can capture great head and shoulder portraits with the model holding your reflector at waist level and bouncing light up into his/her face. Continue to have them pose, twist, and shift weight from one foot to another. You'll be surprised at how good these images look.

Story #3 - From the Screening Room - iMovie 10.0.2 Essential Training with Garrick Chow. iMovie is a highly capable video editor, and you can't beat the price. Learn how to tap its full potential with Garrick.

You can watch Garrick in action by visiting the TDS Screening Room at lynda.com. While you're there, you can start your 7 day free trial to watch all of Garrick's movies, plus every other title in the library (including over 20 by yours truly).

Virtual Camera Club News

Moving from Aperture to Photos or Lightroom - August 7-8 - Now that Aperture will no longer be developed, many photographers are contemplating their next move. In this software workshop, we'll explore the two leading contenders: Photos (part of the Yosemite Update) and Adobe Lightroom. By the time we conclude, you'll have a much clearer idea about your photo management future. Two full days plus breakfast and lunch - all included for just $495.

Show Off with SizzlPix

Do you want to blow away friends and family with your photography? Then hang a 5k Ultra High Definition SizzlPix on the wall at home. You won't believe the comments.

Give it a try. They'll send Digital Story listeners and readers a free mini-proof before production; just put "proof first, TDS" in the comment space on the SizzlPix order page.

Red River Paper Discounts

Did you know that Red River Paper has a Discounts and Clearance page? Ink, paper, greeting card stock, all at big savings.

Thanks to everyone who recently reviewed the TDS Podcast in iTunes!

BTW: If you're ordering through B&H or Amazon, please click on the respective ad tile under the Products header in the box half way down the 2nd column on thedigitalstory.com. That helps support the site.

Download the Show - MP3 Version

In addition to subscribing in iTunes, you can also download the podcast file here (30 minutes - MP3 version). You can support this podcast by purchasing the TDS iPhone App for only $2.99 from the Apple App Store.

More Ways to Participate

Want to share photos and talk with other members in our virtual camera club? Check out our Flickr Public Group. And from those images, I choose the TDS Member Photo of the Day.

Podcast Sponsors

lynda.com - Learn lighting, portraiture, Photoshop skills, and more from expert-taught videos at lynda.com/thedigitalstory.

Red River Paper -- Keep up with the world of inkjet printing, and win free paper, by liking Red River Paper on Facebook.

SizzlPix! - New 5k Ultra High Definition SizzlPix output for your photography. You've never seen your imagery look so good. SizzlPix.com.

Want to Comment on this Post?

You can share your thoughts at the TDS Facebook page, where I'll post this story for discussion.

Many of the places we visited during the Eastern Sierra Workshop were perfect subjects for Black & White photography. And we discovered that the inspiration can increase dramatically when we captured our images in monotone.

BW-at-mono-lake.jpg Mono Lake at twilight. Image captured by Derrick Story with an OM-D E-M5 II, 40-150mm f/2.8 Olympus zoom in Monotone Picture Mode.

I was shooting with an Olympus OM-D E-M5 II with a Olympus ED 40-150mm f/2.8 PRO lens. When it was time for B&W capture, I set the camera to RAW+Jpeg, then went to Camera Menu 1 > Picture Mode > Monotone. But wait, there's more.

There's another sub-menu for Monotone that provides options for Contrast, Sharpness, Tone, Gradation, and yes, B&W filters. I went with Red for this image at Mono Lake. To get the most out of this scenario, the Jpegs are set to Super Fine quality; they are the B&W images. The corresponding RAWs are in color. So if I want to do something else with them later, all of my options are open.

We had shooters using this technique (with different options) on Fujifilm and Canon cameras too. Check yours to see what you can do with B&W in RAW+Jpeg mode. It's very inspiring to see this images on your LCD in the field.


Nimble Photographer Logo

The Olympus OM-D E-M5 II has a high Nimbleosity Rating. What does that mean? You can learn about Nimbleosity and more by visiting TheNimblePhotographer.com.

Want to Comment on this Post?

You can share your thoughts at the TDS Facebook page, where I'll post this story for discussion.
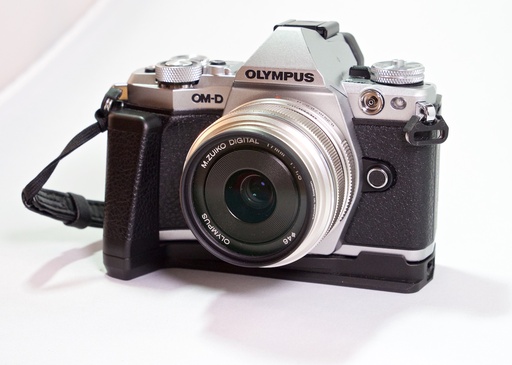
If you have an Aperture or iPhoto library that you would like to bring in to the Photos for OS X environment, then migration makes a lot of sense.

I recommend that your start with a smaller library to get a feel for the migration process. And there are a few gotchas you should be aware of.

  • Unless you make the migrated library your "System Library," it won't be connected to iCloud and available across all devices. You can only have one System Library.
  • It isn't easy to merge libraries. There isn't really a process for this. So if you wanted to combine an existing System Library, with a newly converted library, you'll most likely be disappointed.
  • You can switch among libraries in Photos for OS X. So you can go back and forth between a System Library and one that has been migrated.

choose-library.jpg

Of course all of this could change in future updates. But if you want to know the best procedure for migration now, and what you can and cannot do once go through the process, watch my lynda movie on the subject. I'll walk you through the migration steps.


Get Up and Running with Photos for OS X

Want to learn the ins and outs of Apple's latest photo management application? Then take a look at my latest online video training, Up and Running with Photos for OS X. Soon, both you, and your pictures, will be comfortable in their new home.

Previous Articles on Photos for OS X

How to Switch to RAW Files in Photos for OS X.

Converting an Aperture or iPhoto Library to Photos for OS X.

How to Open an Aperture or iPhoto Library in Photos for OS X.